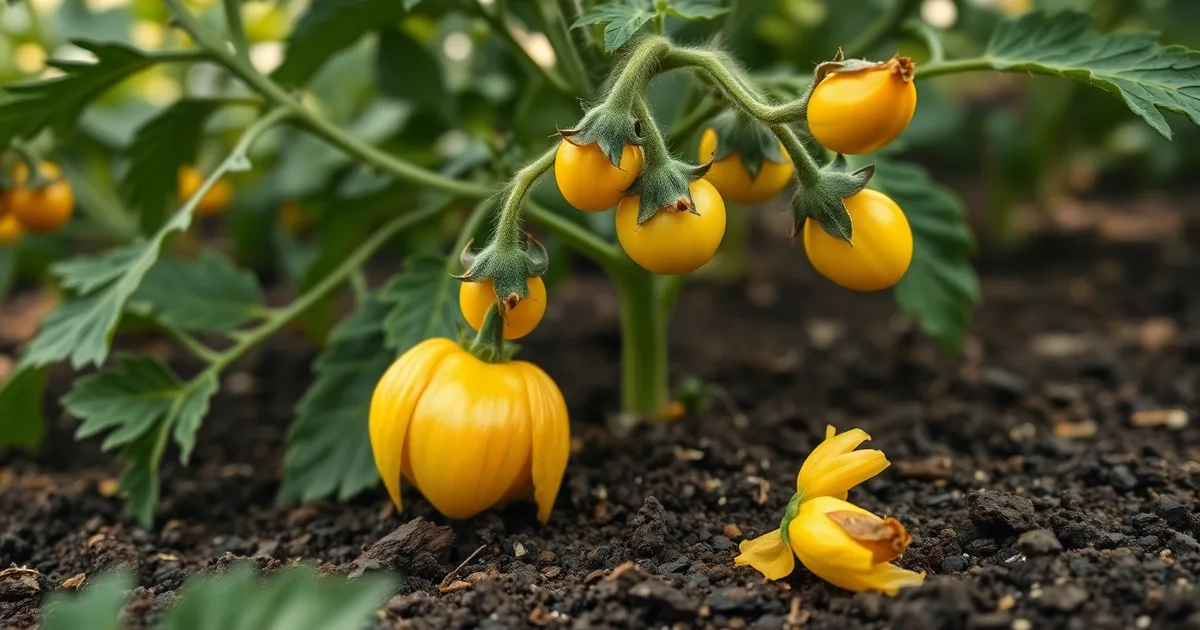
Tomato flowers abort rather than set fruit when the plant hits an environmental threshold: nights above 24°C (75°F) for three nights running, nights below 10°C (50°F), humidity outside 40–70%, or nitrogen above 200 ppm. Pollination is rarely the culprit. Shield the flowers through the bad window instead of feeding the plant more.
Most gardeners who hit this problem start by shaking the trusses harder or reaching for a bloom-booster feed. Both usually make it worse. A tomato flower has roughly a two-day receptive window, and if the air around it is at 35°C at noon and 27°C at 2 a.m., the pollen tube never grows down to the ovule. Nothing visible happens. The flower opens yellow, looks fine for a day, then drops cleanly at the pedicel — no browning, no shrivelling, no pest damage. That clean drop is the diagnostic. Blossom end rot leaves the fruit on the plant; early blight and thrips leave marks; a heat-aborted flower just lets go.
The number that catches people out is three. One hot night is survivable. Three consecutive nights above 24°C is where most open-pollinated and hybrid beefsteak varieties start shedding, and the damage is already locked in by the time you notice the missing fruit a week later. The same applies at the cold end: a single 8°C night in late May can strip a first truss without any visible frost.
Humidity matters as much as temperature and gets far less attention. Below 40% relative humidity the pollen grains desiccate before they adhere to the stigma. Above 70% they clump and the anther cone will not release them at all. The sweet spot is narrow: 40–70% RH with daytime air between 21°C and 29°C (70–85°F). In a polytunnel or on a balcony against a west wall, you can be outside that band for six hours a day and never feel uncomfortable yourself.
- Three-night rule: Blossom drop in most tomato varieties is triggered by night temperatures above 24°C (75°F) sustained for more than three consecutive nights.
- Humidity band: Pollen fails below 40% relative humidity (it dries) and above 70% (it clumps); release is best between 40% and 70% RH at 21–29°C.
- Nitrogen ceiling: Soil nitrogen above 200 ppm pushes leaf growth over flower set; phosphorus needs to be at least 50 ppm for reliable fruit set.
- Buzz pollination: Tomatoes need vibration, not wind — bumblebees or an electric toothbrush applied to the truss at mid-morning does the job where pollinators are scarce.
- Heat-tolerant genetics: A 2020 University of California study found parthenocarpic varieties such as 'Oregon Spring' set fruit at 32°C day / 26°C night, where standard varieties abort.
What temperature range causes tomato flowers to drop without setting fruit?
The short answer is that Solanum lycopersicum has a narrow thermal window for fruit set, and it closes well before the plant itself looks stressed. Night temperature is the first limit: once the overnight low stays above 24°C (75°F), pollen viability drops by roughly 50% after two hours of exposure, according to a 2021 study in Frontiers in Plant Science. The same collapse happens below 10°C (50°F), which is why early-planted tomatoes in cool coastal gardens flower enthusiastically in May and set nothing until July.
Daytime heat is the second, faster trigger. Ideal fruit set runs from 21–29°C (70–85°F), and at 32°C (90°F) or above fruit set falls to nearly zero, per a 2017 University of California Agriculture and Natural Resources publication. The practical detail buried in that number is the duration: two hours above 32°C is enough, so an afternoon that peaks at 36°C for ninety minutes in partial shade may cost you less than a sustained 33°C from 11am to 5pm in full sun. Pollen grains are the mechanism here. They are shed from the anther cone, and at high temperature the grains lose membrane integrity and burst before the tube can reach the ovule. Nothing the plant does afterward can rescue that flower.
The optimal split, if you want a single figure to work against, is 21–29°C by day and 15–20°C overnight. Tomato flowers are self-pollinating within the anther cone, so insects are largely irrelevant to whether this flower sets fruit — the exception being buzz pollination, where bumblebees (Bombus spp.) vibrate the cone and lift set by up to 45% over unaided self-pollination. That gain never appears above the thresholds, though. In a heat-stressed plant, bumblebees simply visit flowers that are already sterile.
How does humidity stop tomatoes from pollinating?
Tomato pollen is not wind-blown dust or sticky insect cargo. Solanum lycopersicum packages its pollen in a porous anther cone that must be vibrated — usually by buzz pollination from Bombus species, though a strong gust or a bee's wingbeat can substitute — before the grains shake loose and land on the stigma directly beneath. Whether that release actually happens depends on the water content of the pollen itself, and that is a humidity problem, not a pollinator problem.
Below roughly 40% relative humidity, the grains dehydrate before they can adhere. The stigma surface loses its tackiness at the same time, so pollen that does land slides off or germinates too slowly to reach the ovules. Above 70% RH the failure mode reverses: pollen absorbs moisture, swells, and clumps into a paste inside the anther cone. No amount of shaking dislodges a clumped mass. The cone simply stays shut, and every flower on the truss opens, yellows, and aborts on schedule. UC Davis set the working window at 40–70% RH in 2019, and that number holds whether you are growing in a greenhouse, a polytunnel, or a balcony that gets its own microclimate from nearby concrete.
Why this matters more than pollinator presence
If you have flowers and no fruit, the insects are almost never the limiting factor. Bumblebee visitation lifts fruit set by up to 45% over mechanical self-pollination in open-field trials (2018, Journal of Pollination Ecology), but that gain only materialises when the pollen is physically releasable. Add a hive to a greenhouse sitting at 85% overnight humidity and you have bought bees that cannot do their job. Fix the humidity first and the existing insect population, or your own hand-vibration, will finish the work.
So the productive move is diagnostic, not remedial: measure. A £12 digital hygrometer placed at canopy height — not on the wall, not at waist level — will tell you within an hour whether you are under 40% or over 70%. Low readings call for misting paths, mulch, or shading with 30–40% shade cloth during midday. High readings call for venting, defoliation of the lower third, and stopping evening irrigation. What none of those fixes require is another feed. Excess nitrogen pushes the plant into vegetative growth (anything above 250 ppm N in soil is a red flag against a 100–200 ppm sufficiency range), and a plant that is busy making leaves will drop blossoms regardless of what the hygrometer says.
Is your tomato plant getting too much nitrogen?
Before you blame heat or humidity, look at the leaf colour and the soil test. A tomato plant sitting in soil above 250 ppm nitrate will grow like a hedge and set almost nothing, because the plant is allocating carbon to stems and leaves rather than to reproductive tissue. The University of Massachusetts soil test guidelines put the sufficiency range for tomatoes at 100–200 ppm nitrogen; the 2022 revision flags anything north of 250 ppm as the point where vegetative growth visibly outcompetes flowering. That is the ceiling most home growers cross without noticing, usually by topping up a granular 10-10-10 every fortnight "just in case".
- Nitrogen at or above 200 ppm is a fruit-set brake, not a boost. You get dark green leaves, thick stems, delayed trusses and flowers that open and then abort before the pedicel separates cleanly. The plant has plenty of resources and no signal to spend them on seed production.
- Phosphorus below 50 ppm (Olsen P) raises blossom drop by roughly 30%. That figure comes from a 2020 Wageningen University trial on container-grown Solanum lycopersicum. Phosphorus drives root development and the energy transfer that makes a pollen tube actually reach the ovule. Chronically low P looks almost identical to high N from above the soil line.
- Stop all nitrogen feeding the moment you see the first open flower. That includes fish emulsion, blood meal, worm castings and any "bloom booster" that still carries meaningful N. Compost tea is not exempt. If you have been feeding weekly, cutting it off is the single fastest intervention available to you and it costs nothing.
- Switch to a high-phosphorus, low-nitrogen blend such as 5-10-10. The 2023 extension guidance is that nitrogen should not exceed phosphorus by more than 2:1 in a flowering-stage feed. A 5-10-10 satisfies that; a 20-20-20 does not, and neither does the tomato-specific 18-18-21 sold in most garden centres.
- Check electrical conductivity before you add anything. If your EC is above roughly 2.5 mS/cm in a container, you already have a salt load and further feeding will push the plant into osmotic stress on top of the nutrient imbalance. Flush the pot with plain water until run-off EC drops under 2.0 mS/cm, then resume with the 5-10-10 at half strength.
- Do not reach for magnesium sulfate (Epsom salt) here. It is the standard advice for yellowing leaves on tomatoes, but magnesium deficiency produces interveinal chlorosis on older leaves, not the deep uniform green you see with excess nitrogen. Adding Epsom salt to an already salt-loaded container makes the EC problem worse.
- Give it 10–14 days to show a response. Once nitrogen feeding stops, new trusses initiated after the cut-off should set fruit. Trusses already open when you stopped are a write-off. This is why the timing matters more than the dose: a plant that flushes into high nitrogen in late June will spend July making leaves, and by the time it settles down the daytime highs are past the fruit-set window.
The thing people get wrong most often is treating the fix as a feeding problem rather than a stopping problem. They read "phosphorus for flowering" and add a phosphorus boost on top of a nitrogen programme that is already over the threshold, which changes the ratio on paper and nothing in the plant. The order is: test or estimate your nitrogen, cut it to zero, flush if EC is high, then supply phosphorus only. If you genuinely have low phosphorus and low nitrogen together, a balanced correction is reasonable. If you have high nitrogen and adequate phosphorus, which is the common case in raised beds that received manure in spring, the only correct action is subtraction. Sidedressing more of anything is how a 1.8 m indeterminate plant ends up with four fruit in September.
The role of pollination: buzz pollinators and wind
Tomato flowers (Solanum lycopersicum) shed pollen through pores at the tip of the anther cone, not from open slits. The grains have to be shaken out. Wind moves leaves and stems but rarely generates enough force at the flower itself, and this is why a greenhouse crop with good ventilation and no insects can still set almost nothing. Bumblebees (Bombus spp.) solve this by grabbing the cone and vibrating their flight muscles at roughly 400 Hz, a behaviour called buzz pollination. A 2018 study in the Journal of Pollination Ecology found bumblebee visits raised fruit set by up to 45% over self-pollination alone. Honeybees cannot do it. They visit tomato flowers for nectar and leave without releasing meaningful pollen.
Outdoors, wind plus the odd bumblebee is often enough. In a polytunnel, on a balcony, or under horticultural fleece, it is not, and you become the pollinator. Use an electric toothbrush with a bare bristle head, or a tuning fork struck against something solid, and touch it to the pedicel just behind the flower truss. Work at mid-morning, once the dew has dried but before the day heats up, because pollen release is best between 40 and 70% relative humidity (UC Davis, 2019) and viability falls fast once temperatures climb. Two or three seconds per truss. You should see a puff of yellow pollen on the brush head or in the air. No puff means the pollen is either not mature or already cooked, and the problem is upstream of your technique.
A tuning fork is the better tool in a small greenhouse because you can hold it against the truss and watch the pollen fall while your other hand stays free. The toothbrush is faster over a whole row. Either way, do it every second day while the plant is flowering heavily, since individual flowers are only receptive for a short window and each truss opens over roughly a week.
Which tomato varieties set fruit in heat?
Most garden tomato seed sold in North America and Europe was selected for fruit quality, not for pollen that survives a 30°C afternoon. That is a breeding gap, not a gardening failure, and it is the reason two growers on the same street can get different results from the same compost and the same watering can. If your nights ran above 24°C (75°F) for a week in July, standard beefsteak pollen lost roughly half its viability within about two hours of dehiscence, and no amount of Epsom salt reverses that.
Breeders have closed part of the gap, mostly through two routes. The first is parthenocarpy, where the ovary swells without fertilisation at all, so pollen viability stops mattering. The second is selection for pollen that stays viable and for anther cones that still dehiscence in dry, hot air, which keeps seed set intact. A few cultivars carry both traits.
| Variety | Fruit set mechanism | Days to maturity | Heat notes | Seed price (approx.) |
|---|---|---|---|---|
| Oregon Spring | Parthenocarpic; sets fruit with no pollination | 58-68 from transplant | Bred at Oregon State for cool springs; the parthenocarpy pays off in heat too, since it bypasses pollen entirely | USD 4-5 per 25 seeds |
| Solar Fire | Heat-tolerant pollen; normal self-pollination | 70-75 from transplant | UF/IFAS release for Florida fall planting; holds set through 32°C (90°F) days better than most determinates | USD 5-6 per 25 seeds |
| Heatmaster | Heat-tolerant pollen; normal self-pollination | 70-80 from transplant | Firm, shipping-grade fruit; the set advantage shows mainly when night temps stay under 26°C (79°F) | USD 5-7 per 25 seeds |
| Florida 91 | Heat-tolerant pollen; normal self-pollination | 72-80 from transplant | Selected for Florida's 32°C-plus summers; fruit runs 170-220 g and holds on the vine | USD 6-8 per 25 seeds |
| Cherokee Purple (control) | None; standard pollen | 75-85 from transplant | Set collapses to near 0% once daytime highs reach 32°C (90°F); the cultivar most likely to flower and drop everything | USD 4-5 per 25 seeds |
For a hot-summer grower who wants fruit and does not care about heirloom flavour, Solar Fire is the safest single pick: it keeps normal pollination, so fruit is well-filled and seeded, and it delivers in 70-75 days. Florida 91 beats it on the hottest sites, roughly 1-3°C of extra tolerance in published trial data, but the trade is a later first harvest and less flavour. Oregon Spring flips the logic entirely. It wins where nights stay above 24°C for weeks on end and nothing else sets, because parthenocarpy does not need pollen at all, but its fruit is small (100-140 g), often seedless, and its flavour is the price you pay. If nights sit in the 20-23°C band and only your days are brutal, buy Solar Fire or Heatmaster instead, and spend the savings on 30% shade cloth from mid-July through August.
Fixing blossom drop: a 7-day action plan
This procedure applies when your plants look healthy—dark green, thick stems, no wilting—yet flowers open, shrivel at the stem, and drop without leaving a visible fruit. It assumes daytime highs have been hitting 32°C (90°F) or above, or nights have stayed above 24°C (75°F), or both. Run it once, over a single week. Do not repeat it if the weather changes in your favour, because most of what follows is a correction of a specific stress, not a routine.
What you need before Day 1: a shade cloth in the 30–40% range (a 3 × 5 m panel costs roughly $25–40 / £20–35), a pump sprayer or hose with a mist setting, one electric toothbrush, a soil test kit or a lab submission bag, and a bag of tomato fertiliser with a high phosphorus number. If you cannot get a lab test back inside a week, a $15 home kit measuring nitrate and phosphorus is enough to catch the obvious faults.
- Day 1–2: put up the shade cloth and start misting. Erect 30–40% shade cloth over the plants, held at least 30 cm above the canopy so hot air can escape rather than pooling. At midday in a heatwave this typically drops leaf-surface temperature by 3–5°C. Mist the foliage and the surrounding air at 11 a.m. and again at 2 p.m. for 60 seconds each time, which lifts relative humidity into the 40–70% band where pollen release works properly. Stop misting by late afternoon so leaves go into the night dry. Wet foliage overnight is how you trade blossom drop for early blight.
- Day 3–4: pollinate by hand, but only in the morning window. Tomato pollen is released from the anther cone by vibration, not by insects brushing past—it needs a buzz at roughly 30–35 kHz. An electric toothbrush pressed against the flower stalk, or against the main stem just below a truss, does the job. Work between 9:30 and 11 a.m., when humidity is still high enough for pollen to be sticky but the flower has fully opened. Two seconds per truss. The whole row takes about ten minutes.
- Day 3–4, the part most people get wrong: do not shake the plant by hand and do not do this at noon. Hand-shaking a stake or cane knocks flowers off without releasing viable pollen, and by midday the pollen is already dead if it has been sitting above 32°C (90°F) since morning. The toothbrush works because it vibrates the anther cone; the cane does not, because it moves the whole plant. If you have bumblebees (Bombus spp.) working the crop, skip this step entirely—buzz pollination from bumblebees lifts fruit set by up to 45% over self-pollination alone, and your toothbrush is a poor substitute. Bumblebee hives for a small greenhouse run £60–90 and last 6–8 weeks.
- Day 5: test the soil. Pull a sample from 15 cm down, from four spots around the root zone, mix them, and send or run it. You are looking for three numbers. Nitrate-nitrogen should sit in the 100–200 ppm sufficiency range; anything above 250 ppm is pushing leaf and stem at the expense of flowers. Phosphorus as Olsen P should be at or above 50 ppm—below that, blossom drop runs about 30% higher in controlled trials. Electrical conductivity (EC) above roughly 2.5 dS/m in a container mix means salt has built up and roots are taking up water poorly; leach the pot with two volumes of plain water before you feed anything.
- Day 6–7: feed according to what the test said, not according to what the bottle says. If nitrogen is high and phosphorus is low, switch to an NPK ratio around 5-10-10 and apply at half the label rate, then repeat weekly. Keep nitrogen from exceeding phosphorus by more than 2:1. If your test comes back with adequate phosphorus already, do not add more—extra phosphorus locks up iron and zinc and you will see interveinal yellowing on the new growth within a fortnight.
- Day 6–7: check calcium before you blame it. Blossom-end rot is the calcium problem, and it shows as a sunken brown-black patch on the bottom of a fruit that did set. Blossom drop is not a calcium deficiency, and adding calcium sprays will not bring flowers back. If you have both at once, the cause is usually irregular watering rather than low soil calcium—mulch to 5 cm and water deeply every two to three days instead of lightly every day.
Treat all seven days as one intervention. If you shade the plants but keep feeding a 20-20-20, you have fixed the temperature and preserved the nitrogen excess, and the flowers will keep aborting. If you switch to a high-phosphorus feed but leave the plants in full sun through a 38°C afternoon, same result. The one adjustment worth making mid-week: if night temperatures fall below 18°C, take the shade cloth off, because at that point you are stealing light from the plant without any heat benefit.
The failure mode to watch for is a plant that responds to the shade-and-mist correction by setting fruit that then ripens unevenly and cracks. That is not blossom drop returning—it is the plant swinging from heat stress into a wet, humid microclimate faster than the fruit can handle it, and the fix is to hold the misting schedule steady rather than increase it. Count fruit set on the first truss from Day 3 onward. If you see no new set by Day 10 and your daytime highs are still over 32°C (90°F), the season may be the problem rather than your management, and a heat-set variety is the answer for next year rather than more intervention now.
Can you save flowers that are already dropping?
No. A flower that has abscised is finished. Once the pedicel forms a clean separation layer, the tissue is sealed off and the bud or bloom falls within 24-48 hours; there is no spray, no tonic and no amount of Epsom salt that reverses it. Stop counting the flowers on the ground and start counting the ones still attached. Those are the only ones you can influence.
The encouraging part is how fast the picture changes. A tomato flower that opens under acceptable conditions — daytime 21-29°C (70-85°F), night below 24°C (75°F), relative humidity between 40% and 70% — typically sets fruit within three to five days of anthesis, often with visible swelling at the calyx by day four. So a plant that has shed everything for two weeks can be holding marble-sized fruit ten days after a weather break. Don't pull it. This is the same reason a heat-stressed Solanum lycopersicum looks barren in early August and loaded in early September, when nights finally drop into the teens.
What to do with the flowers still on the plant
Leave open flowers alone entirely. Removing them is counterproductive — you're deleting your only path to fruit. What you should remove is the spent, browned bloom still clinging to the truss after petal fall, and any dropped ones sitting on the soil or tangled in the foliage. Wet, senescent petals against a stem are an easy entry point for Botrytis cinerea, and a truss with grey mould on it will abort the flowers either side of it. Snap them off dry, in the morning, after dew has lifted. Don't compost them; bin them.
Meanwhile, hold the line on the two things most often overdone in this exact situation. Don't feed. If your soil test already reads 100-200 ppm nitrogen, additional N — especially anything with a wide ratio — pushes the plant further into leaf and further away from fruit set; above 250 ppm you're actively working against yourself. And don't shake the trusses harder. Tomatoes are self-pollinating, but they need vibration at roughly the frequency Bombus species generate through buzz pollination, not a human rattling a cane. If you want a mechanical assist, an electric toothbrush held against the truss pedicel for one second per flower does more than any amount of manual jiggling. Get the microclimate right and the flowers will do the rest themselves.
Blossom drop vs. blossom-end rot: what's the difference?
These two problems look unrelated once you have seen both, but they get confused constantly because they share a name fragment and appear on the same plant in the same six-week window. The distinction matters because the fixes point in opposite directions: one is about heat and humidity at the moment of pollination, the other is about water movement through the soil over weeks. Get the diagnosis wrong and you will either water a plant that needed shade, or feed a plant that was already getting too much.
- Blossom drop: the flower is the casualty. The blossom opens, may even look fully formed and yellow, then abscises at the pedicel and lands on the soil or the mulch below. No fruit ever forms. On a plant in the 24°C-plus night range, the pollen tube fails to reach the ovule within the viable window, the plant reads the flower as unfertilised, and it seals off the pedicel with a layer of cells. You find flowers on the ground and bare trusses on the vine.
- Blossom-end rot: the fruit is the casualty, but the flower was fine. The flower sets fruit normally. Two to three weeks later a pale, water-soaked patch appears at the blossom end, opposite the stem, and darkens to leathery brown-black. The fruit stays on the plant and ripens, but the bottom third is unusable. It appears on the first trusses of the season far more often than the later ones.
- The mechanism in blossom-end rot is calcium transport, not calcium supply. Almost every soil test from a garden with blossom-end rot comes back adequate for calcium. The problem is that calcium moves through the plant in the transpiration stream, dissolved in water, and it cannot be redistributed from old tissue to new. When the plant's water uptake stalls, the rapidly expanding cells at the distal end of the fruit are the last in line for what little calcium is moving.
- Irregular watering is the actual cause. A week of heavy rain followed by five days of dry surface soil, or a drip line that runs 40 minutes every third day on sandy ground, produces the same result: the fruit's growth rate outpaces calcium delivery. Mulch 5–8 cm deep, water to field capacity rather than to a schedule, and check moisture at 15 cm depth with a trowel instead of at the surface, which is where the error almost always starts.
- Soil pH above 7.5 locks calcium out even when it is present. In alkaline soils and in container mixes that have been limed repeatedly, calcium precipitates as insoluble compounds and the root cannot take it up regardless of how much is in the ground. A pH of 6.0–6.8 in the root zone is the working range for Solanum lycopersicum; above 7.5, adding gypsum will not help until the pH is corrected.
- Excess magnesium and potassium compete with calcium at the root. Dolomitic lime raises magnesium alongside calcium, and heavy applications of Epsom salt (magnesium sulfate) or a high-potassium bloom booster can suppress calcium uptake directly. If you have been adding either on a hunch, stop for three weeks and watch the new trusses.
- The two conditions can appear together. A plant sitting at 35°C daytime and 25°C night for two weeks will drop most of its flowers and set the few fruit it manages with weak calcium delivery, so you get stripped trusses and black-bottomed fruit on the same vine. In that case the environmental fix for blossom drop comes first; the watering regime settles once temperatures moderate.
The item people most often get wrong is the third one: they see a black bottom, read "calcium deficiency," and buy a calcium foliar spray or a bag of gypsum. Foliar calcium does not move from the leaf to the fruit in meaningful quantities because it travels in the transpiration stream, and the fruit transpires very little compared to a leaf. Gypsum works on sodic soils and does almost nothing on a garden that already has adequate calcium. The one thing that reliably reduces blossom-end rot across trials is even moisture, and that is a plumbing and mulching problem, not a nutrient problem. If you want a single diagnostic test, cut a fruit in half: blossom-end rot shows the blackened tissue confined to the distal end with clean flesh above it, while a fruit lost to sunscald or anthracnose will show damage on the shoulder or in irregular patches. Look at where the damage is, not how it looks.
When to call it a season and start over
The calculation is simpler than most gardeners expect. Count back over the last two weeks of local overnight and afternoon readings. If your site has spent more than 14 consecutive days above 32°C during the day, the plant has already forfeited the flowers it is holding and will forfeit the next flush too. UC ANR's 2017 figure is blunt on this: at 32°C and above, fruit set falls to nearly 0%. That is not a slowdown you can fertilise your way out of — it is the pollen grain's own failure, and it resets only when the weather does.
What fools people is that the plant looks magnificent. Nitrogen keeps pushing new growth, leaves stay deep green, and every truss opens on schedule. Meanwhile soil nitrogen above 250 ppm is doing nothing but feeding foliage that will never be asked to fill fruit. If you are in that position on 13 September and you are somewhere in USDA zone 9 or 10, the honest answer is to stop. Pull the plant, cut your losses, and put in Solanum lycopersicum varieties bred for the shoulder season instead. Oregon Spring sets reliably at lower night temperatures and is a determinate, so it finishes fast. Solar Fire and Heatmaster both hold fruit set into the low 30s, which matters less for an autumn crop than their short days-to-maturity.
The one case where waiting pays
If you are in zone 6 or 7 and your hot spell broke in the last four or five days, wait. A mature, unstressed plant that has been sitting at 33°C for ten days will often set a heavy top truss once nights fall back under 24°C, and that fruit will ripen before the first frost if you have eight weeks left. Zone 9 and 10 growers do not get that grace period. Their autumn is the productive window — cooler nights, lower humidity stress, and far fewer days above the 24°C threshold that halves pollen viability within two hours — which is why a September-planted fall crop routinely outyields a June-planted summer one in those zones. Rip out the exhausted plant, amend with a low-nitrogen blend such as 5-10-10, and get transplants in the ground this week rather than next.
One caveat before you act: check whether the top metre of soil is actually hot rather than just the air. Black plastic mulch and bare, sun-baked ground will hold root-zone temperatures several degrees above ambient well into the evening, and replanting into that same bed gets you the same result. Shade cloth at 30–40% over the new transplants for their first ten days, then remove it — the autumn sun angle is weak enough that you will not need it after that.
Frequently Asked Questions
Why are my tomato plants flowering but not producing fruit in hot weather?
Heat sterilises tomato pollen. Night temperatures above 24°C (75°F) make pollen grains non-viable before the flower even opens, and two or more hours above 32°C (90°F) during the day kills what is left. This is why a July or August heatwave produces flowers that open, fade and drop with nothing behind them. Shade cloth rated 30-40% and a morning misting bring the canopy back into range; fruit set usually resumes on new trusses within 7-10 days. Established flowers will not recover.
Does high humidity cause tomato flowers to drop?
Yes. Above roughly 70% relative humidity, tomato pollen becomes sticky and clumps inside the anther cone, so it never releases onto the stigma and the flower aborts. The window tomato pollen actually needs is 40-70% RH. In a sealed greenhouse or a wet coastal August, that upper bound is easy to blow past. Ventilation and a dehumidifier fix it; outdoor growers mostly have to wait for the weather to shift. Low humidity below 40% causes its own problems, drying the stigma before pollen lands.
How do I pollinate tomatoes manually?
Touch a running electric toothbrush to the flower truss, or press a vibrating tuning fork against the stem just below it, for 1-2 seconds per truss. Tomatoes are self-pollinating but the anthers need vibration at roughly the frequency of a bumblebee's flight muscles to shake pollen loose. Do it mid-morning, around 10am, when humidity sits near the middle of the 40-70% range and the flowers are dry. Repeat every two to three days on each new truss as it opens.
Can too much nitrogen cause tomato plants to flower but not fruit?
Yes, and it is one of the most common causes. Nitrogen above 200 ppm drives vegetative growth at the expense of fruit set, so you get a dark, lush, six-foot plant with sparse flowers that drop. Phosphorus below 50 ppm blocks fruit development even when pollination succeeds. The fix is a switch to a high-phosphorus feed, roughly a 2-6-4 or similar tomato-specific blend, and stopping the nitrogen-heavy general fertilizer. Container growers overfeeding with a general-purpose 20-20-20 hit this fastest.
What tomato varieties produce fruit in extreme heat?
Oregon Spring, Solar Fire, Heatmaster and Florida 91 all set fruit when standard varieties fail. Oregon Spring is parthenocarpic, meaning it can produce fruit without fertilisation at all, which sidesteps the pollen problem entirely. Solar Fire and Heatmaster were bred for pollen that stays viable into the mid-30s Celsius, and Florida 91 was developed at the University of Florida for exactly this. Flavour is respectable but rarely matches a Brandywine. For a heatwave-prone region, plant one of these as insurance alongside your main crop.
How long does it take for tomato flowers to turn into fruit?
Fruit set is decided within 48 hours of successful pollination, though nothing is visible at that point. A tiny green tomato becomes visible at the base of the spent flower in 5-7 days. From there, most slicing varieties need 45-55 days to reach ripe colour, and cherry types around 30-40 days. If a flower has dropped cleanly off its stem with no swelling at the base after a week, pollination failed. A flower still attached with a small green nub behind it is on its way.