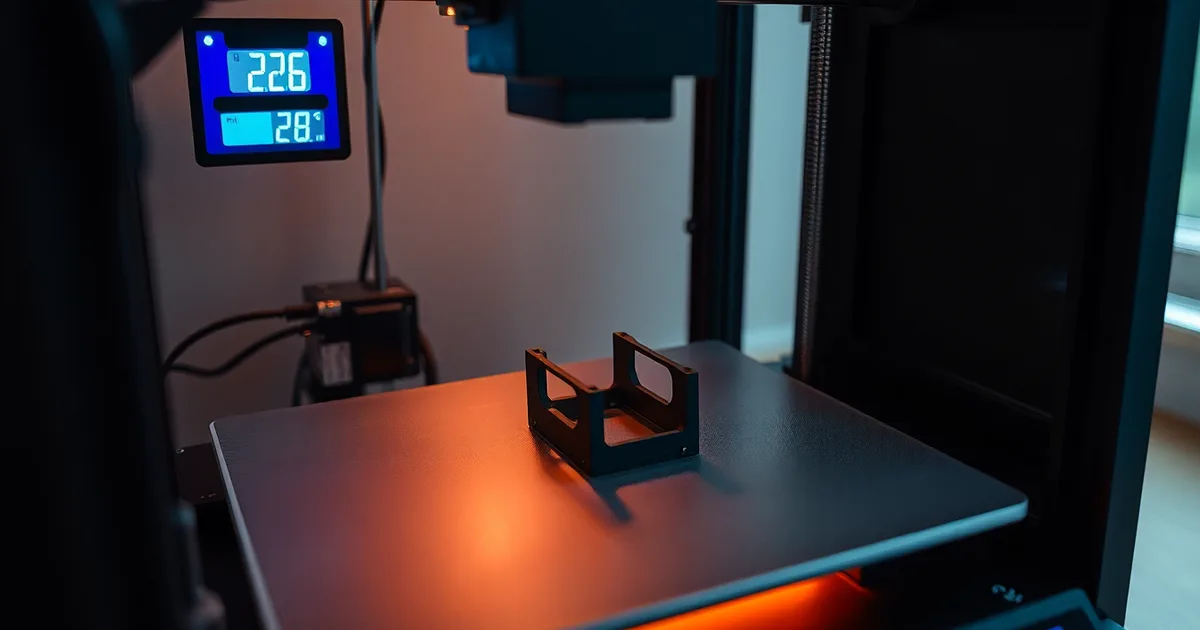
Warping is a thermal gradient problem, not a broken printer: the bottom layer cools and contracts faster than the layers above it, lifting corners off the bed. Fix it in this order — chamber temperature first (45–60°C for ABS and ASA), then bed temperature, then adhesion, then part cooling.
Most people reach for glue stick because adhesion is the symptom they can see. It rarely is the cause. ABS softens near a glass transition temperature of 105°C, and a draught of roughly 5°C across the build surface is enough to curl a 200 mm corner before the print is half finished. A garage in September, a window left ajar, an air-conditioning vent three metres away — all of them produce that gradient.
Bed temperature matters more than most calibration guides admit. PLA wants 55–60°C and PETG wants 70–80°C, and on either material a 10°C shortfall is enough to lose first-layer grip entirely. If you have been printing PLA at 50°C because the spool label said "40–60", that is your problem.
The caveat is that these targets assume an ambient room around 20–22°C. A cold workshop shifts every number upward, and a heated garage in summer shifts them down.
- Chamber thresholds: Warping drops sharply above 45°C chamber temperature for ABS, 35°C for PETG and 30°C for PLA.
- Cooling fan timing: Keep the part cooling fan off for the first 3 layers on every material — early cooling contracts the base while it is still bonded to the plate.
- First-layer height: With a 0.4 mm nozzle, set the first layer to 0.2 mm rather than 0.3 mm for the best balance of squish and release.
- Brim sizing: On a 200 × 200 mm bed, an 8–10 mm brim adds enough surface area to counteract most ABS corner lift on its own.
- Fix order: Chamber temperature, then bed temperature, then adhesion, then cooling — reversing that order wastes filament on problems the first step already solves.
What actually causes a 3D print to warp off the build plate?
Every FDM print is laid down hot and wants to shrink as it cools. ABS extrudes around 240°C and lands on a bed held at 100–110°C, so the first few millimetres are already being pulled inward by the time layer twenty goes down. The material can't move much while it's still above its glass transition temperature, roughly 105°C for ABS and 80°C for PLA — it's soft enough to relax. Below Tg it's rigid, and any further cooling becomes real contraction with nowhere to go. That stored strain is the whole mechanism. The printer is doing exactly what you told it to.
Corners fail first because they have material pulling from one direction and nothing balancing it from the other. A straight edge contracts against a neighbouring wall; a 90° corner lets both walls tug toward the centre of the part while the bed holds the bottom layer in place. The force is small per degree — a 2026 thermal expansion model puts it at roughly 0.02 mm of contraction per 10 mm of length per 1°C of differential between the top and bottom of a part. Run that across a 150 mm ABS bracket with a 60°C gap between the nozzle-end and chamber air and you get a few tenths of a millimetre of pull concentrated on maybe 4 mm of corner contact area. That's plenty. It's also why thin, long parts bow in the middle and tall parts peel from the ends.
Warping and curling get blamed on each other constantly, but they're different failures with opposite causes. Warping is adhesion loss: the part lifts cleanly off a PEI sheet or BuildTak, usually at a corner, often within the first 15 minutes on an ABS print in a 30°C garage. Curling is overheating: the edges of PLA or PETG lift and roll upward because the part cooling fan is running too hard on the first layers, or because the nozzle is dragging across already-set material. The tell is the shape of the lift. A warp leaves a flat bottom and a gap underneath. A curl leaves a raised, rounded lip with the bottom layer still stuck. If you're looking at a curled edge, raising the bed temperature makes it worse.
Why the chamber matters more than the bed
The bed only heats the bottom two or three millimetres of most prints. Everything above that cools against ambient air, and if ambient is 25°C while the bed is 110°C, you've built a part with a permanent thermal gradient running through it. Enclosed printers hold 45–60°C for ABS and ASA in 2026, which cuts that gradient to something the material can absorb. A Bambu Lab X1 Carbon or a Prusa i3 MK3S+ in an enclosure will print the same ABS that peels off an open-frame Creality Ender 3 in a cold room — same filament, same slicer profile, different air. Drop an Ender 3 in a garage at 12°C in January and no amount of glue stick will save a 200 mm ABS part.
Which filament warps the most: ABS vs PETG vs PLA?
Rank them by glass transition temperature and the order falls out immediately: ABS and ASA first, PETG a distant second, PLA last. The mechanism is the same in all three cases — the top of the part cools and contracts while the bottom stays pinned to a hot bed — but the numbers that keep the part flat are wildly different. A 1°C differential between top and bottom layers produces roughly 0.02 mm of contraction per 10 mm of part length in a 2026 thermal expansion model, which means a 200 mm ABS bracket with a 30°C gradient across its height is arguing with several millimetres of accumulated shrink.
Self-diagnosis is mostly a matter of asking what your chamber is doing, not what your build surface is doing.
| Filament | Warp risk | Chamber target | Bed target | Cooling profile | Time to visible lift |
|---|---|---|---|---|---|
| ABS / ASA | Highest — corners lift on parts over ~80 mm | 45–60°C, actively heated enclosure | 100–110°C | 0% fan for the first 3 layers, then 20–30% max | Under 15 min if chamber sits below 35°C |
| PETG | Moderate — thin walls and large flats at risk | Passive enclosure or draught shield; 25–35°C ambient | 70–80°C | ~50% part cooling after layer 3 | 30–60 min on parts over 150 mm |
| PLA | Low — warps mainly from cold air, not heat loss | None; open frame is fine | 55–60°C | 0% for the first 3 layers, then 100% | Rare on an Ender 3 with a stable bed; 20–40 min if bed sags under 55°C |
| ABS, brim added, cold chamber | Still high — brim delays rather than prevents | None (25°C room) | 100°C | 0% throughout | 10–25 min; brim tears at the 8–10 mm boundary |
The ABS/ASA row is the one that decides your hardware budget. If you print ABS on a Bambu Lab X1 Carbon with the chamber held at 50°C, you get flat parts with a PEI sheet and no glue at all; if you print the same spool on an open Creality Ender 3 in a 20°C garage, no brim, raft or BuildTak sheet will save a 200 mm part, and you will spend twenty minutes chiselling it off. PETG is the middle ground most small-batch makers actually live in — a $40 cardboard or acrylic enclosure around a Prusa i3 MK3S+ holds ambient near 30°C and gets you 95% of the way there. PLA flips the logic entirely: it is the one material where an open frame genuinely helps, because the failure mode is a draughty garage dumping cold air onto layer one, not a missing chamber heater. Set the first-layer fan to 0% in PrusaSlicer or OrcaSlicer, keep the bed at 60°C, and PLA warping usually disappears without touching the build surface.
The honest caveat: glue stick and hairspray do have a job, and it is not preventing warp — it is acting as a release agent so a large PETG or ASA part comes off a PEI sheet without pulling chunks of coating with it. Add it for removal, not for adhesion, and you will stop blaming the printer.
Is your printer in a cold room? The chamber temperature test
Run this before you touch a single slicer setting. It applies to any FDM machine sitting in a garage, a basement, a shed or next to a window in winter, and it costs about €10–15 for a digital thermometer with a remote probe (search "fridge/BBQ probe thermometer"; a ThermoPro TP49 at roughly £12 or a generic 2-probe unit on AliExpress at €8 both work). You need the thermometer, something to block moving air, and 20 minutes. If your printer lives in a centrally heated room that never drops below 22°C, you can skip straight to bed temperature.
- Put the probe where the part actually sits — bed level, 5–10 mm above the build surface, near the front-left corner. Not taped to the frame, not on top of the enclosure, not hanging at the top of the chamber. Heat stratifies: a Bambu Lab X1 Carbon showing 40°C at the top of the chamber can read 28°C at bed level with the door cracked. Leave the probe hanging for 3 minutes before reading.
- Run the printer as normal for 15 minutes with the bed at your usual temperature (55–60°C for PLA, 70–80°C for PETG, 100–110°C for ABS) and no filament extruding. This lets the bed and motors heat the air. The number you want is the temperature with the machine running, not the cold-room number.
- Read the thermometer and compare against the threshold: 30°C minimum for PLA, 35°C for PETG, 45°C for ABS and ASA. Below those figures, ambient cooling is stripping heat out of the top of the part faster than the bed can replace it through the bottom.
- Repeat the reading with the room's normal airflow running — garage door open, extractor fan on, window ajar, air conditioning on. A draft that drops the reading by 4°C or more is your culprit, and it will hit one side of the part harder than the other, which is why the lift is often asymmetric.
- If you are under the threshold, enclose. A cardboard box over the whole printer is the standard 2026 stopgap and it works. Cut a flap for the display and one low hole for the PSU and stepper cooling, or you will cook the electronics. A 60 × 60 × 60 cm double-wall box costs nothing if you have a delivery box, or around €25 new. Drop a blanket over the top for ABS. Leave at least 10 cm clearance around the power supply.
- Re-measure after 20 minutes with the box on. Expect +6 to +12°C over ambient with the bed at 100°C. If you land at 40°C for ABS rather than 45°C, add a second layer of cardboard or move the printer somewhere smaller.
- Print a 20 mm × 20 mm × 5 mm single-wall test square with an 8–10 mm brim and watch the corners for the first 15 minutes. That is the window in which ABS warps when the chamber is under 35°C. If the corners stay flat through minute 20, the chamber is no longer your problem and you can move down the fix order.
The failure mode here is subtler than a flat-out cold room: it is a fluctuating one. A garage that sits at 34°C in the afternoon and 24°C at 2 a.m. will print the first 40 layers fine and lift at layer 200, which is exactly the symptom that sends people hunting for a bent bed or a bad Z-axis. Log the chamber temperature at the start and end of a long print. If it moves more than 5°C, enclosure first, everything else second.
First-layer settings that stop corner lift
Squish is the term that matters here, and it is a mechanical problem before it is a chemistry problem. A first layer that sits on top of the bed instead of being pressed into it leaves microscopic gaps, and gaps are where a lifting corner starts. The five settings below are the ones worth changing before you buy a different build surface.
- First-layer height: 0.2 mm with a 0.4 mm nozzle. That is 50% of nozzle diameter, and it is the number that produces both squish and tolerance for an imperfect bed. Dropping to 0.3 mm gives you a rounder bead with less contact area and less forgiveness for a bed that is 0.05 mm low in one corner. In PrusaSlicer this is First layer height under Print Settings → Layers and perimeters; set it explicitly rather than leaving it at the default percentage.
- First-layer speed: 20–25 mm/s for ABS, 25–30 mm/s for PETG and PLA. ABS gets the slower figure because it needs time to bond before the second layer pulls on it. Speeds above roughly 35 mm/s on the first layer routinely produce a bead that has not fully wet the PEI sheet, even when the nozzle height is correct.
- First-layer extrusion width: 0.44–0.48 mm on a 0.4 mm nozzle. A slightly wider extrusion forces filament sideways into the previous line and closes the gaps between perimeters. Most slicers set this to 100% of nozzle diameter by default; nudge it to 110–120% for ABS and ASA and leave it alone for PLA.
- Bed temperature, verified with an IR thermometer, not the display. A 10°C gap between setpoint and actual surface temperature is common on a stock Creality Ender 3 with a magnetic sheet, and larger with a glass plate. Print a 100 mm single-layer patch, wait 60 seconds for the reading to stabilise, and check the four corners. If you set 100°C for ABS and the surface reads 88°C, you have been chasing adhesion on a bed that never reached temperature.
- Cooling fan off for the first three layers. A 2026 slicer default of 0% for the first three layers exists for a reason: any airflow across the first layer pulls heat out of the bead faster than the bed can replace it. On an enclosed printer this is already handled, but garage printers running PLA at a 55–60°C bed can lose the first layer to a draft from an open door.
- Brim width 8–10 mm for ABS and ASA. A brim does not add heat, it adds lever length, and it spreads the peel force over a longer perimeter. It will not save a part printed in a 25°C room, so treat it as the last line of defence rather than the fix. For PETG, 5–6 mm is enough and easier to remove.
- Z-offset adjusted live, not guessed at. Print a single-layer square, watch the bead during the first pass, and raise or lower the nozzle in 0.01 mm steps until the lines meet without ridges. Bambu Lab X1 Carbon owners can use the built-in calibration; Prusa i3 MK3S+ users should run the first-layer calibration from the LCD and keep the resulting Z value written down per sheet.
The setting people get wrong most often is the one they never think of as a setting: bed temperature as measured, not as commanded. A printer reporting 100°C while the plate surface sits at 88°C will make every other number in this list look wrong. Buy a €20 IR thermometer before you buy another PEI sheet.
Bed adhesion: PEI, glue stick, hairspray — what works and when?
If you have already tried glue stick and tape, you have probably concluded the bed is the problem. Usually it is not. A textured or smooth PEI sheet at the correct temperature will hold PLA and PETG without any additive at all, and if yours will not, the temperature underneath it is wrong or the surface is contaminated. Wipe the sheet with warm water and dish soap, dry it, and re-level. On a Prusa i3 MK3S+ or a Bambu Lab X1 Carbon this is the whole fix more often than any of the consumables people keep in a drawer. Run PLA at 55–60°C and PETG at 70–80°C, and check the sheet with an infrared thermometer rather than trusting the display — a 10°C error between what the thermistor reads and what the surface actually is shows up as a warped print every time.
Glue stick on PEI is not primarily an adhesive. For PETG it is a release agent, and you need it because PETG bonds to bare PEI strongly enough to tear chunks out of the sheet when you pry the part off. It helps ABS a little, but ABS on PEI needs the bed at 100–110°C, and even then a 8–10 mm brim is doing more work than the glue is. Many people jump to hairspray because it is cheap and sprays evenly. It works, particularly for ABS and ASA, but it builds up in layers, it is hard to remove cleanly, and the film thickness varies across the plate so your first-layer squish does too.
When adhesion aids make things worse
A thick layer of glue or hairspray can hold a part down that should have lifted, which sounds like success until you look at the bottom face. The part lifts in the middle where the film is thin, the base comes out with a pitted, uneven texture, and the whole thing is now bonded so hard you risk bending the sheet to remove it. More importantly, a generous coating masks a chamber that is 20°C too cold. ABS can warp within 15 minutes if the chamber is below 35°C, and no amount of slurry will stop a 100 × 100 mm part from curling once the top layers cool faster than the bottom. If you find yourself reapplying adhesive every print, that is the signal to fix the chamber — 45–60°C for ABS in an enclosed machine — not to buy a stronger glue.
Cooling fan settings: when to turn it off
Part cooling is the one setting where the correct value differs so much between materials that a single profile will guarantee warping on at least one of them. The rule that survives every material change is simpler than any profile: fan off for the first 3 layers, always. This is a slicer default in PrusaSlicer and Bambu Studio for good reason. Those layers are the anchor. Cool them at 100% and you harden the base while the layers above are still shrinking, which pulls the corners up against a base that can no longer flex to follow. On a 100 mm ABS test cube the corner can lift within 15 minutes if the chamber is sitting below 35°C, and a fan blasting layer one is the fastest way to get there.
After layer 3, the material decides. PLA wants everything you can give it, 100% is fine and usually necessary for bridging and overhangs because PLA's glass transition temperature sits around 60°C and it does not carry the internal stress that styrenics do. PETG is the opposite trap: people run it at PLA fan speeds, get a glossy stringy mess, then crank the fan higher still. Cap PETG at 50% after layer 3 and leave it there. It bonds too well to itself and to PEI when it stays hot, but it also warps if you chill it fast, so half speed is the compromise that holds on both a Prusa i3 MK3S+ and an Ender 3. ABS and ASA get 0–20%, and on an unenclosed printer, zero. ABS at full fan is a guaranteed split or lift on any part longer than about 60 mm.
Duct design is not separate from chamber temperature
A 5015 blower with a wide duct at 30% can move less air across the nozzle than a stock 4010 at 60% with a tight shroud, so copying someone else's fan percentage from a forum post is close to meaningless without copying their duct. This matters most in an enclosed machine, where the fan is fighting the chamber. In a Bambu Lab X1 Carbon or a garage enclosure held at the 45–60°C that ABS wants, a fan at 20% is dumping 25°C air onto a part sitting in 50°C air, and that local gradient does exactly what the numbers predict: roughly 1°C of differential between top and bottom layers produces about 0.02 mm of contraction per 10 mm of length, so a 120 mm ABS bracket is looking at more than a quarter millimetre of differential shrink at the corners. Turn the fan down before you turn the chamber up, and if you run an open printer, accept that ASA and ABS need a cardboard box or a tent more than they need a better fan curve.
One thing the fan cannot fix: if you are also running a brim, the airflow hits the brim edge and cools it early, which defeats the 8–10 mm of extra grip you just added. Reduce fan by another 10% whenever a brim is in play, or move the brim inside the enclosure where the chamber air is doing the work instead. It depends on the part, but for anything with a footprint over 80 mm in ABS, the honest answer is fan off past layer 3 and let the chamber hold the shape.
When to use a brim, raft, or mouse ears
Geometry add-ons do not fix a cold chamber, and it is worth saying that plainly before listing them. They buy you margin on a print that is already running in decent conditions — a 120 mm ABS bracket in a 50°C enclosure, say — and they do almost nothing for a 200 mm ASA panel sitting in a 19°C garage. Use them as the last 20% of a solution, not the whole thing.
- Brim, 8–10 mm for ABS and ASA. PrusaSlicer and Bambu Studio both expose this as a single number; 8 mm is the floor for anything over roughly 100 mm in X or Y, and 10 mm is worth it past 150 mm. The brim’s job is to slow the cooling of the bottom perimeter, not to clamp the part down. Set the brim gap to 0.1–0.15 mm so it snaps off without tearing the first layer.
- Brim, 5–8 mm for PETG and PLA on large flat parts. PLA at a 55–60°C bed rarely needs more than 5 mm unless the part is a thin, wide plate. PETG is stringier against the nozzle, so keep the 0.2 mm gap and expect a little cleanup with a deburring tool. Both are cheap insurance compared to a failed 8-hour print.
- Raft, only when the bed is genuinely out of level or the surface is marginal. A raft works because it decouples the part from the bed’s flatness — it is the right call on a warped Ender 3 build plate that you cannot be bothered to shim, or on a textured BuildTak sheet that has seen two years of use. The cost is real: 0.8–1.2 mm of extra material, 15–30 minutes added per print, and a rough bottom face that needs sanding on functional parts.
- Mouse ears, 10–15 mm discs at each corner. These are the right tool for a small footprint tall part — a 20 mm × 20 mm bracket 90 mm tall, for instance — where a full brim would just add peel force at the wrong end. Place one at every sharp corner, 0.2 mm thick, 0.1 mm gap. In PrusaSlicer you add them as a negative volume cylinder; in Bambu Studio the “add primitive” corner disc does the same job. They cost about 40 seconds of print time each.
- Brim plus mouse ears together, for the awkward middle case. A long thin ABS rail — 180 mm × 25 mm — will lift at the two ends before the middle moves. A 10 mm brim handles the perimeter, and two mouse ears at the extreme corners handle the peel. This combination is common in the Prusa forums for RC car chassis parts and it works.
- Adhesion promoter on top of the brim, not instead of it. A light glue stick layer under a brim is standard practice on glass beds and does not hurt on PEI. Hairspray is messier and builds up; if you are using it, reapply every 5–10 prints, not every print.
The thing people get wrong most often is the brim gap. Set it to zero and the brim fuses into the part — you will spend ten minutes with a knife on a print that would have been fine with 0.15 mm of clearance. The second most common error is using a raft to compensate for a chamber that is 15°C too cold. A raft will hold an ABS part down for maybe 40 minutes; if your enclosure is below 35°C, that part has already started contracting by then and the raft just delays the inevitable by one layer. Fix the chamber first, then decide whether you even need the brim.
Diagnostic order: what to check first, second, third
This order applies to any FDM printer that has already produced at least one good print and has started lifting corners since — a Prusa i3 MK3S+ in a garage, a Bambu Lab X1 Carbon with the door propped open, an Ender 3 dragged next to a window. It assumes the machine is mechanically sound: belts tensioned, no obvious Z wobble, nozzle not clogged. Before you start, you need a way to read two temperatures: an infrared thermometer is fine for the chamber, but tape a thermocouple or a spare bed sensor to the bed surface if you can, because an IR gun reading a PEI sheet is off by 10–15°C. Budget 30–40 minutes for the whole sequence. Do it in order. Skipping to step 5 and buying an enclosure is how people spend €300 solving a problem that a 20-minute fan-schedule change would have fixed.
- Measure the chamber and the bed surface, not the bed setting. Your slicer says 100°C; the thermocouple taped to the PEI sheet says 92°C. That gap is real and it matters. On ABS, a chamber below 35°C lets the part warp within 15 minutes of printing. You want 45–60°C for ABS and ASA, 70–80°C reported on the bed for PETG, 55–60°C for PLA. Write both numbers down. Five minutes with the printer idle and the bed soaking for 10 minutes first — the bed surface lags the thermistor by several minutes and people measure too early.
- Verify first-layer squish and bed level before touching anything else. A first layer that is 0.05 mm too high gives the plastic nowhere to grip, and no amount of glue stick fixes geometry. Run a single-layer patch test at 0.2 mm layer height. You want lines that touch with no gaps between them, a slightly flat top, and extrusion that does not lift when you drag a fingernail across it. If the gaps are there, adjust Z-offset in 0.02 mm steps. This is the step people botch most often: they compensate for a bad Z-offset with adhesion aids, get three good prints, then wonder why the fourth fails. Ten minutes.
- Adjust the cooling fan schedule, starting with the first layers off entirely. Set 0% cooling for the first 3 layers — that is the 2026 slicer default in PrusaSlicer and Bambu Studio, and a lot of profiles still ship with it at 30% or higher. Then ramp, not jump: 30% by layer 5, full only above layer 10 for PLA. For ABS and ASA, cap the part-cooling fan at 10–20% and let the chamber do the work.
- Re-test without adhesion aids. Print a 60 mm x 60 mm x 5 mm flat test square in the material you are actually fighting. If corners stay down, you have found it and you can stop. If they still lift after step 3, you have a genuine adhesion problem and step 5 is now justified.
- Add adhesion aids — but pick the one that matches the sheet. Glue stick on a smooth PEI sheet is a release agent, not an adhesive; it helps PETG come off without tearing the sheet, and it barely affects ABS grip. Hairspray on a glass bed genuinely does add tack. For ABS and ASA, an 8–10 mm brim is usually the single highest-value change, more than any coating. Rafts work but cost you a 0.3–0.5 mm cosmetic scar on the bottom face.
- Only now consider an enclosure or a material change. A cardboard box over an Ender 3 with a 60W bulb on a thermostat holds 40°C for about €15 and tells you within one print whether a chamber is the answer. If a heated chamber fixes it, buy or build properly. If it does not, the part geometry or the material is the issue.
- Change material last, and change it deliberately. ABS holds roughly 0.02 mm of contraction per 10 mm of length for every 1°C of differential between the top and bottom of the part, which is why tall ABS parts fail regardless of chamber. ASA behaves similarly but tolerates UV and slightly lower chamber temperatures. PLA at 55–60°C bed essentially never warps on a flat part unless it is sitting in a draft — if PLA is lifting, go back to step 2, because it is not a thermal problem.
The failure mode to watch for in this sequence: each step produces a print that mostly works, so people declare victory at step 3 and stop. Then they run a tall part or a cold morning and it lifts again. The other common miss is treating step 1 as a one-time measurement. A garage printer swings 12–15°C between a July afternoon and an October morning, and the same profile that held corners in summer will warp in autumn. Re-measure the chamber whenever the season changes, not when the print fails.
Frequently Asked Questions
Why does my ABS print warp even with a heated bed at 100°C?
A 100°C bed only heats the first few millimetres of the part. The layers above sit in cooler air, contract as they set, and drag the corners upward. ABS needs the surrounding air at 45–60°C, which is why an actively heated chamber (or a passively warmed enclosure that has soaked for 20–30 minutes) matters more than bed temperature alone.
Can I print ABS without an enclosure?
Yes, but only for small parts. Keep the footprint under roughly 40 mm, add a 6–8 mm brim, and block every draft in the room. Anything larger will almost always warp unless ambient air stays above 30°C, and a cold garage in January is not going to cooperate. Watch the first 10 layers; that is where the corners commit.
Why does my PLA print warp when it's supposed to be easy?
PLA still contracts as it cools, and it is less forgiving of sudden temperature drops than the "easy filament" label suggests. Check three things: bed at 55–60°C, part cooling fan off for layer one, and no open window or air-conditioning vent within a metre of the printer. A 2°C draft across a 200 mm print is enough to lift a corner.
Does glue stick actually stop warping?
No. Glue stick (PVA-based, like the standard UHU or Elmer's purple stick) raises adhesion between the first layer and the bed, but it does nothing about the thermal contraction pulling the corners up. It often masks the real cause for the first 30 layers, then the part lifts anyway, and you are left scraping a gummy residue off the bottom surface.
What is the best bed temperature for PETG to prevent warping?
70–80°C on a PEI or textured sheet. Below 70°C, first-layer adhesion drops sharply and corners curl within the first 15 layers. Above 80°C you trade warping for elephant foot and increased stringing, because the filament stays soft too far up the part. Start at 75°C and adjust from there.
How do I stop corners lifting on a large flat print?
Use an 8–10 mm brim, drop first-layer speed to 20 mm/s, and turn the part cooling fan off for the first three layers. If the room is under 30°C, enclose the printer or run a space heater nearby. These four changes together fix most large-format corner lift; doing only one of them rarely does.