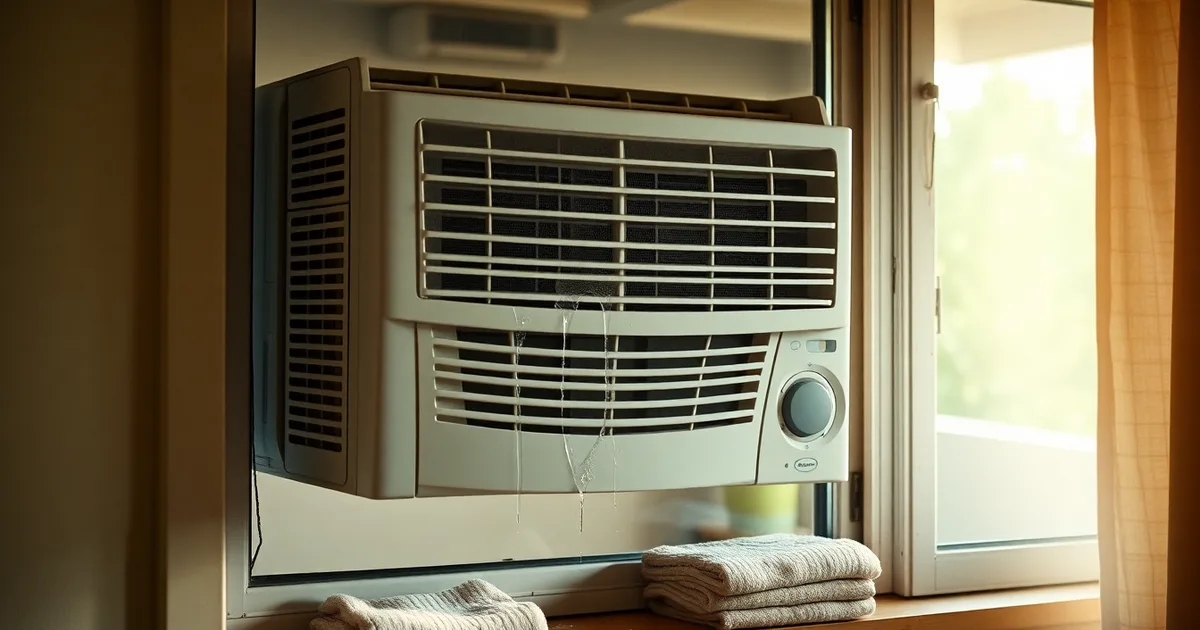
A window air conditioner drips indoors when its back is not tilted 2–5 degrees down, when the drain pan or drain hole is clogged, when a dirty filter ices the evaporator, or when humidity overwhelms the drain. Fix the tilt before anything else.
That 2–5 degree figure is not a suggestion. It works out to roughly a quarter-inch of drop for every foot of cabinet depth, and it is measured front-to-back, not side-to-side. A 5,000 BTU Frigidaire or Midea unit has a shallow case, so the whole correction is often less than a quarter-inch of shim under the front rail. Owners frequently install these units dead level, sometimes adding a shim under the back because water was pooling on the sill. That reverses the slope and sends every drop of condensate onto the floor.
Here is what most people do not expect: a functioning window unit pulls somewhere between one and two quarts of water out of the air every hour when relative humidity sits above 80%. In a Gulf Coast or mid-Atlantic summer, that is a steady stream, not a trickle. Pull the unit on a hot afternoon and you will find the pan holding more water than a standard ice cube tray.
Condensate overflow accounts for the overwhelming majority of indoor drips. Not refrigerant. Not a cracked coil. Algae and biofilm in the drain channel are the second most common cause, and they build up quietly across a single humid season.
- Backward tilt, not level: the cabinet should slope 2–5 degrees toward the outside, about a 1/4-inch drop per foot of depth, or condensate flows back into the room.
- Drain path, twice a season: clean the drain hole and pan at least twice per season, more often in humid months, because algae block a channel that is only a few millimetres wide.
- Filter every 2–4 weeks: a clogged filter drops airflow across the evaporator, which ices over and then melts into the room when the unit cycles off.
- Expect 1–2 quarts hourly: in 80%+ relative humidity a typical 8,000 BTU unit removes 1–2 quarts of water per hour, which is why a partially blocked drain overflows fast.
- Thaw before diagnosing: if the coil has frozen, switch the unit off and let it thaw 3–4 hours before checking tilt or drain, or you will misread a freeze-up as a leak.
Is your window AC supposed to drip water?
Yes, and if it drips outside the window, that is the machine working correctly. A window air conditioner pulls heat and moisture out of the room air, passes that air over a cold evaporator coil, and the water vapour in it condenses on the fins the same way a glass of iced tea sweats on a July afternoon. In 80°F air at 80% relative humidity, a 10,000 BTU unit from Frigidaire or LG produces roughly 1.5 to 2 quarts of condensate every hour it runs. All of that water has to leave the unit somewhere, and the design answer is a sloped drain pan that tips it out the back, where it drips onto the ground or the roof below.
Water appearing inside is a different event entirely. The unit has no indoor drain path by design. If condensate is reaching your windowsill, your floor, or the wall under the unit, something has broken the drainage route: the chassis is tilted the wrong way, the drain pan has clogged, or the pan itself has cracked and is overflowing before it can carry water to the rear. None of those is normal, and none of them is a defect in how the air conditioner is built. It is a plumbing failure, and it will keep happening until you fix the tilt or the path.
Stand behind the unit and look at where the water shows up. Drips at the back, on the outdoor sill or the ground, mean the condensate is exiting where it should. Water at the front grille, running down the interior faceplate, pooling on the interior sill, or staining the wall below the window means condensate is being held inside the chassis long enough to spill forward. That distinction is worth checking before you touch anything, because the fix for one looks like the fix for the other and is not.
One warning before you reach for a shim. Many people see water inside, assume the unit is tilted the wrong way, and add tilt in whatever direction seems to help. Getting the direction wrong accelerates the problem: the condensate pools deeper, the pan overflows faster, and in humid weather you can be mopping the floor within an hour. The correct direction is down and toward the outdoors, by roughly 2 to 5 degrees, which works out to about 0.25 inches of drop per foot of unit depth. If your unit is level or tipped toward the room, that alone explains the leak in most cases.
The 5 reasons your AC leaks inside, ranked by how likely they are
Water on the sill almost never means the unit is broken. It means condensate is being produced faster than the drain path can carry it away, or the drain path is pointing the wrong direction. Roughly nine out of ten service calls on window units end at one of the five causes below. Work down the list in order; the first two account for the large majority of cases.
- Backward tilt. The unit must sit 2–5 degrees down toward the outside, roughly 0.25 inches of drop per foot of depth. A 12-inch-deep chassis needs about 3 inches of fall from the interior edge to the exterior edge. If your sill is level, or worse, the unit was shimmed so it leans inward, the pan fills and water runs over the front lip onto your floor. Check it with a torpedo level on the top rail, not by eye. Sills settle, and a unit that drained fine in June can lean the wrong way by August.
- Clogged drain hole or pan. Every window unit has a small drain opening at the rear of the base pan, often hidden under the condenser fan shroud. Dust, pollen, and cottonwood pack into it. In warm, humid conditions algae and mold can seal a drain line in as little as 2–3 weeks. Look for a slimy grey film. Clear it with a pipe cleaner or a length of 14-gauge wire, then flush with a cup of water and watch where it goes.
- Dirty filter causing ice buildup. A clogged filter cuts airflow across the evaporator coil, and a 5–15% drop in cooling efficiency is the mild version of the damage. The coil surface drops below freezing, frost forms, and then it melts all at once when the compressor cycles off. That meltwater hits the pan faster than the drain can handle it and spills forward. Ice typically appears within 1–2 hours of running with a restricted filter. Pull the filter, hold it up to a light, and if you cannot see through it, that is your answer.
- Low refrigerant or a frozen coil. Same symptom as above but the filter is clean. A slow leak in the sealed system drops suction pressure until the evaporator runs below 32°F, and the coil ices over from the inside out. On a unit using R-410A or the newer R-32, this is a sealed-system repair, not a homeowner fix. A 5,000 BTU unit under warranty is usually worth the claim; a $150 unit out of warranty at $200–$600 for a replacement is not worth a $300 recharge that may leak out again by spring.
- Humidity overwhelming the drain path. At 80% relative humidity and 85°F, a 10,000 BTU window AC pulls roughly 1.5–2 quarts of condensate per hour. That is a lot of water, and on older or poorly designed chassis the pan and drain simply cannot keep up during the first hour of operation on a Gulf Coast afternoon. This is a design edge case, not a defect, and it usually shows up only on the hottest, wettest days. If the leak is intermittent and matches the weather, you have found it.
The thing people get wrong is the fix for number one. Most guides say to tilt the unit more, and that instinct is backwards past a point. Over-tilting past about 5 degrees pushes the condensate pool away from the drain hole at the rear of the pan, so the water sits forward of the drain and spills over the front lip instead. It also raises the evaporator relative to the blower, which can starve the intake and cost you cooling capacity on an already undersized unit. The correct answer is a precise 2–5 degrees toward the outside, measured with a level, not "as much as I can get." Loosen the mounting screws, add a shim of the right thickness at the front, and re-check before you tighten anything down. Getting this right takes ten minutes and costs nothing; a warped sill or a stripped screw hole is what turns it into an afternoon.
How to check and fix the tilt (start here)
This procedure applies if water is running down the inside face of the unit, pooling on the sill, or dripping off the front grille onto the floor. It takes 20 minutes and needs a torpedo level or a smartphone level app, a stack of 1/8-inch or 1/4-inch shims (a scrap of cedar siding, a few plastic shim packs from The Home Depot at about $4, or cut-down pieces of composite decking all work), and a screwdriver for the leveling bolts on units that have them. Do this before you touch the drain pan or the coil, because a wrong tilt mimics a clog almost exactly.
- Turn the unit off and unplug it. Not just off at the remote. Pull the plug. You will be reaching behind the chassis and, on a 10,000 BTU Frigidaire or LG, the condenser fan is still spooling down for 10-15 seconds after shutdown. Give it a minute.
- Pull the unit out far enough to see the outdoor half, then push it back into the window frame as it normally sits. Measure the tilt from the top of the cabinet, not the front grille or the trim. Those two surfaces are not parallel on most Midea and Haier models, and measuring off the grille is the single most common way people convince themselves the unit is already pitched correctly.
- Set your level on top of the cabinet running front to back and read the bubble. You want the back lower than the front by 2-5 degrees, which works out to roughly 1/4 inch of drop per foot of cabinet depth. On a typical 21-inch-deep 8,000 BTU unit, that is about 1/2 inch total. If the bubble says the unit is level or pitched toward the room, you have found your leak.
- If the sill itself is out of level — common in older wood-frame windows and almost universal in RVs — measure the sill separately. You may need to correct both. A unit forced flat by a sagging sill will still drain backward.
- Do not tilt it further than 5 degrees. This is the step people botch. Chasing the water with a steeper angle feels productive and makes the leak worse in three ways: the compressor oil migrates toward the evaporator, the condensate can run off the sides of the drain pan instead of into it, and on a slide-out chassis the outdoor half can start striking the frame. If you have already propped the front up on a 2x4, take the 2x4 out.
- Lift the front of the unit and slide shims between the bottom rail and the sill, one at each front corner. Start with a single 1/8-inch shim per side and re-check with the level. Adding 1/8 inch at the front of a 21-inch cabinet changes the pitch by roughly 0.3 degrees, so going from level to 3 degrees takes two or three shims per side — about five minutes of fiddling.
- If your unit has leveling screws or slotted feet (LG and Frigidaire models in the 5,000-8,000 BTU range usually do), adjust those instead of stacking shims. Turn them a half-turn at a time and re-measure. Plastic shims compress under load over a summer or two, which is why the manufacturer put the screws there.
- Re-level side to side while you are in there. A unit pitched hard to the left can overflow the low corner of the pan even when the front-to-back angle is correct. Then push the unit fully closed, check that the window sash or the included bracket is locked down, and plug it back in.
Run the unit for 30 minutes. At 80% relative humidity and 85°F, a 10,000 BTU window AC makes roughly 1.5-2 quarts of condensate per hour, so you should see a steady trickle out of the rear drain holes or the drain cup within 10 minutes if the tilt is now correct. If water still appears inside, the tilt was not your only problem — stop and check the drain path, because algae and mold can plug a drain channel in as little as 2-3 weeks in warm, humid weather.
The failure mode to watch for: correcting the tilt and assuming you are done. A unit that was draining backward for a month has been dumping water into the chassis, and the drain pan now holds a layer of biofilm and grit that will clog within days. If the tilt fix stops the leak, good. If it slows the leak but does not stop it, you are looking at a blocked channel, and a replacement pan runs $15-$40 against $200-$600 for a new unit.
Cleaning the drain hole and pan: a 15-minute job
If your unit is already tilted correctly at 2–5 degrees (roughly 0.25 inches per foot) and water still pools on the sill, the drain path is the suspect. This fix applies to Frigidaire, LG, Midea, and Haier window units with a gravity drain — the overwhelming majority of 5,000–12,000 BTU models sold at Home Depot, Lowe's, or Amazon. You need a pipe cleaner or stiff wire, a small cup of water, household bleach, and a Phillips screwdriver. Budget 15 minutes.
The reason this clogs so fast: in warm, humid air, algae and mold can block a drain line in as little as 2–3 weeks. A 10,000 BTU unit running in 85°F air at 80% relative humidity sheds roughly 1.5–2 quarts of condensate per hour, and all of it has to leave through a hole narrower than your pinky.
- Unplug the AC at the wall. Not the remote, not the power button. Pull the cord. If the unit weighs under 60 lbs and you have a second person, lift it out of the window and set it on a towel-covered table. Otherwise leave it mounted and work from outside or from below.
- Remove the front grille and the filter. Most Midea and LG models release the grille with two tabs at the bottom edge; Frigidaire usually needs the filter slid out first, then a single screw. This takes about 60 seconds.
- Locate the drain hole. On window units it sits at the back-bottom of the chassis, often behind a small rubber plug or a molded plastic lip. On some LG models there are two — one at the rear, one offset to the side for a drain kit. Shine a flashlight along the lowest point of the base pan; the water tells you where it wants to go.
- Clear the hole with a pipe cleaner or 14-gauge wire. Push through gently and twist. You are feeling for a soft plug of black-green slime, not fighting metal. If the wire stops hard against something solid, stop — you may be hitting the condenser fins, and bending those costs you cooling capacity.
- Scrape the visible debris out of the base pan with a gloved finger or a plastic spoon. A pan holding a half-inch of standing water will re-seed the clog within days.
- Mix one part household bleach to ten parts water — about 2 tablespoons per cup. Pour it slowly into the drain hole and let it sit for 5 minutes. This kills the algae root, not just the visible mat.
- Flush with a cup of plain water and watch underneath the unit. You want a steady trickle, not a drip-by-drip seep. If the flow is slow, repeat steps 4 and 6 once. Bleach is corrosive to aluminum over time, so do not leave it in the pan overnight.
- Reassemble, plug in, and run the unit on its highest fan setting for 20 minutes with the room door open. Watch the drain point. The average window AC draws 500–1,500 watts, so this test run costs you a few cents.
If you have flushed twice and water still stands in the pan, the pan itself has cracked or the drain spout has separated from the chassis. Replacement pans run $15–$40 at Grainger or Amazon. A full unit replacement is $200–$600 in 2026 dollars, and 2026 ENERGY STAR models are up to 15% more efficient than standard ones — so if the unit is more than 8 years old and running R-410A, replacing it beats repairing it. Older R-22 units are not worth the refrigerant cost at all.
One warning that saves people a service call: do not pour drain cleaner, vinegar, or compressed air into the hole. Drain cleaner eats the plastic pan. Compressed air drives the slime deeper into the channel and can blow it into the blower housing, where it becomes a mold source you cannot reach. Wire, bleach, water. That order, every time.
Filter and coil maintenance: preventing ice-related drips
A filter clogged with dust and pet hair chokes the airflow across the evaporator coil. Less air means less heat to absorb, and coil surface temperature falls below 32°F. Once that happens, the moisture condensing on the fins freezes instead of draining. A dirty filter can cut cooling efficiency by 5–15%, and with a badly matted one the coil can ice over within 1–2 hours of runtime, especially when the outdoor air is above 85°F and the unit never gets a break.
The drip arrives later, which is why people miss the connection. Ice insulates the coil, so the compressor keeps running while the thermostat never satisfies. When the unit finally cycles off or the coil ices shut, that accumulated frost melts — and the meltwater has to go somewhere. If the drain path is clear it exits out the back. If the pan is full, tilted wrong, or the drain hole is partly blocked, the water spills over the front lip and onto your floor or windowsill instead.
Cleaning takes five minutes and costs nothing. Pull the filter, vacuum or rinse it, and let it dry fully before it goes back — a damp filter grows mold fast in humid air. During peak season with daily use, do this every 2–4 weeks; monthly is fine if you run the unit only at night. Replacements are cheap enough that most people keep two and swap them, and they are stocked at The Home Depot, Lowe's and Amazon for around $10–$20 for a two-pack depending on the model. Frigidaire, LG and Midea ship washable filters on most 5,000–12,000 BTU units, so check before buying disposables.
If the coil is already iced
Switch the unit off and let it thaw with the fan running on fan-only, or just leave it off for a few hours. Do not chip at the ice — the aluminum fins bend with almost no force and a bent fin blocks airflow permanently. Once thawed, run the unit again and watch the coil: if it re-freezes with a clean filter and warm outdoor temperatures, the likely cause is a low refrigerant charge, not dirt. That is a sealed-system repair on R-410A and R-32 units and needs a technician, not a can of sealant from Amazon. On a 2026 ENERGY STAR model, which runs up to 15% more efficient than a standard unit, the same airflow problem shows up as longer run times and a higher electric bill before it ever drips.
When to call a professional (and what it will cost)
Most indoor leaks trace back to tilt or drainage, both of which you can handle with a level and a length of stiff wire. The exceptions are sealed-system failures, and there are three symptoms that point to one: a hissing or bubbling sound from the unit while it runs, white frost building on the evaporator coil behind the filter (visible once you slide the filter out and shine a light in), and a room that never gets cold even though the compressor is clearly running. Frost typically appears within 1–2 hours of startup when the charge is low or airflow is choked, so if you see it after a fresh filter change, refrigerant is the likely culprit.
Recharging a window unit is not a DIY job. It requires recovering the existing charge, pulling a vacuum, and weighing in new refrigerant — R-410A on most units sold before 2025, increasingly R-32 on newer Frigidaire, LG, and Midea models. A shop with the right recovery equipment will charge roughly $100–$300 for the work in 2026, and many will not take the job at all because a 5,000–12,000 BTU window unit costs $200–$600 to replace outright. Do the arithmetic before you call. If the technician quotes $250 on a four-year-old 8,000 BTU unit, put that money toward a new one and skip the appointment.
Warranty changes the calculation, but only on a narrow band of units. Most manufacturers cover the sealed system — compressor, condenser, evaporator, and factory refrigerant lines — for five years, with labor often excluded after the first year. That means a three-year-old LG or Haier with a confirmed leak may cost you only the diagnostic fee, typically $75–$150. Read the warranty card before you authorize anything, and check whether the serial number is registered; unregistered units get denied claims more often than people expect. Units past the five-year mark are almost always replace-and-recycle territory.
When replacement beats repair
Replace rather than recharge if the unit is older than five years, if it uses R-410A and you cannot find a local shop that still stocks it cheaply, or if the same leak has returned after a prior recharge. A new ENERGY STAR unit draws up to 15% less power than a standard model, which matters on a 500–1,500 watt load running eight hours a day through a humid summer. Buy the replacement from a retailer that accepts the old unit for recycling — The Home Depot, Lowe's, and many local utilities run haul-away or rebate programs, and dumping a charged window AC in household trash is illegal under federal refrigerant rules.
Quick-reference: symptoms vs. fixes
Match what you're seeing to one row below, then commit to that fix before trying anything else. A 10,000 BTU unit pulling 1.5–2 quarts of condensate per hour in 80% relative humidity at 85°F has no tolerance for improvisation. Water that appears in the first minutes of operation points to a physical drainage problem. Water that appears after a few hours of running points to something the unit is doing to itself.
| Symptom | Most likely cause | First check | Typical fix cost (2026) |
|---|---|---|---|
| Water drips from the front grille or runs down the interior wall within minutes of startup | Unit tilted inward, or sloped flat instead of 2–5 degrees toward the exterior (roughly 0.25 in per ft) | Spirit level on the cabinet top, front to back | $0 (re-shim with a 0.25–0.5 in strip) |
| Water pools on the sill while the unit is level, but only on humid days | Clogged drain hole or pan, often algae growth in 2–3 weeks of warm, humid weather | Drain hole at the rear of the base pan, visible from outside | $0 (pipe cleaner or stiff wire) |
| Dripping starts 1–2 hours into a run, cooling weakens just before it | Frozen evaporator coil from a dirty filter (5–15% efficiency loss) or low refrigerant | Filter held to a light; frost on the coil behind it | $5–$25 filter, or $15–$40 for a replacement pan if cracked |
| Unit runs continuously, no cooling, and drips steadily | Refrigerant leak from a sealed system (R-410A or R-32 charge) | Coil temperature and compressor amp draw | $200–$600 to replace the unit; recharge is rarely economical |
| Intermittent drip, worse after the unit has been off overnight | Condensate trapped in a partially blocked pan drain, released in a surge on restart | Pan depth and standing water after 30 minutes off | $0–$40 depending on whether the pan is cracked |
For most people the first row is the answer, and the fix costs nothing but ten minutes and a shim. A clogged drain is the close second and shows up more often in coastal Gulf states and the Southeast, where algae can close a drain line in as little as 2–3 weeks. The one case that flips this: if you've already tilted the unit correctly and cleared the drain, and the drip returns within 48 hours, stop treating it as a drainage problem. That pattern means the unit is producing more condensate than the pan can move, and low refrigerant or a failing compressor is the likely culprit. On a 5,000 BTU unit bought for under $200, replacement beats diagnosis at 2026 prices. Plug the new unit into a properly rated outlet, and if you're unsure what the circuit can carry, the National Electric Code (NEC) sizing on the nameplate is the number that matters — not the one on the old unit you're replacing.
Frequently Asked Questions
Why is my window air conditioner leaking water inside all of a sudden?
Sudden indoor leaking almost always traces to a blocked drain or a changed tilt angle, not to the refrigerant circuit. The drain hole at the rear of the base pan is roughly 1/8 to 3/16 inch wide, and one season of dust, pollen and slime mould is enough to seal it. If the unit was reinstalled, or the window frame settled after summer heat, the rear may now sit level or tipped forward.
Check the slope with a spirit level first, then clear the drain hole with a pipe cleaner or a short blast of compressed air. Both fixes take under 20 minutes on most 5,000–12,000 BTU units.
Can a window AC leak water inside if it's not tilted enough?
Yes. A window air conditioner needs the outdoor edge of the cabinet roughly 1/4 to 1/2 inch lower than the indoor edge, about 3 to 5 degrees of downward slope. Without that pitch, condensate collects in the base pan instead of running out the rear drain, and once the pan fills past the chassis lip the water spills onto your floor or windowsill.
As a quick test, place a level on the top of the cabinet and check which way the bubble sits. If the front is level with or higher than the back, adjust the mounting bracket or add a shim under the indoor side.
How do I stop my window AC from dripping water inside?
Work through four checks in order: tilt, drain path, filter, then ice. Confirm the rear sits 1/4 to 1/2 inch lower, flush the drain hole and rinse the base pan with a cup of water to prove flow, clean or replace the filter every 2 to 4 weeks in peak season, and look for frost on the evaporator coil behind the filter.
On a 2019 Frigidaire or LG 8,000 BTU window unit, the whole routine takes about 30 minutes and needs nothing beyond a screwdriver, a level and a pipe cleaner. If water still pools after all four, suspect a cracked base pan or a lost drain plug.
Is it normal for a window air conditioner to drip water inside?
No. Indoor dripping is never normal operation. Water on the room side means the condensate that should exit through the rear drain is escaping into your living space, and it will keep damaging the sill, drywall and floor until the drainage path is corrected. The only acceptable drip is outside the window, where the unit sheds water onto the exterior.
Roughly 1 to 2 gallons of condensate per day is typical for a 10,000 BTU unit running in humid weather, and all of it should leave through the back.
What causes a window AC to freeze up and leak water inside?
A frozen evaporator coil thaws and drips indoors because the meltwater overwhelms or bypasses the drain. Three causes dominate: a clogged filter restricting airflow, low refrigerant from a slow leak, and outdoor temperatures below about 60°F (15°C) that drop the coil below freezing.
Airflow is the usual suspect. A filter loaded with more than a few weeks of dust can cut airflow enough to ice the coil within hours. Switch the unit off, let it thaw for 3 to 4 hours, then clean the filter and inspect the coil fins before restarting.
How much does it cost to fix a window AC leaking water?
DIY repairs run under $20: a new filter costs $8–$15, a drain pan cleaner or compressed air can about $5, and a replacement drain plug or shim a few dollars. A technician call-out for a window unit typically runs $100–$300 in the US in 2026, covering a drain clearing, coil cleaning or refrigerant top-up.
Since a new 8,000–10,000 BTU window air conditioner sells for $200–$400, any repair quote above roughly $200 usually makes replacement the better call, especially on a unit older than 8 years.