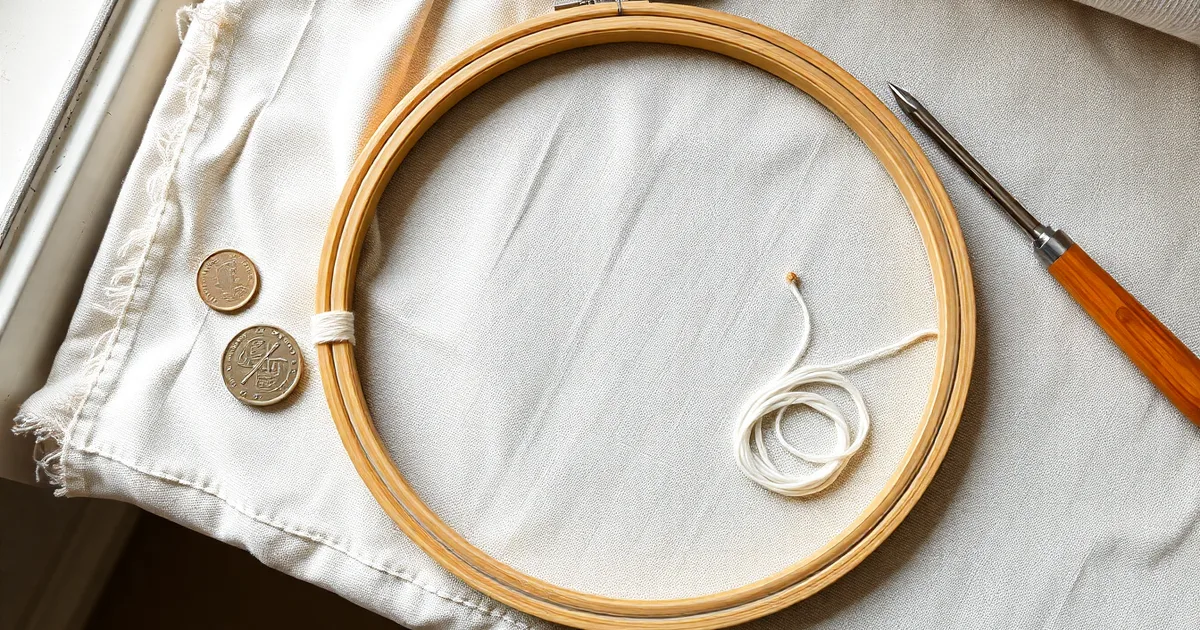
Keep an embroidery hoop taut by wrapping the inner ring in 1/2-inch cotton twill or bias tape, seating the fabric snugly around that wrapped ring, and turning the screw with a coin rather than your fingers. Re-tighten every 15–20 minutes. That combination holds tension for 2–4 hours of stitching.
Bare wooden inner rings are the real culprit. Cotton twill tape stuck around the ring raises friction against the fabric by as much as 70% compared with raw wood, which is why your hoop kept letting go no matter how hard you cranked the hardware. The screw was doing its job. The wood underneath it wasn't.
Finger-tightening is the second leak. A coin or flathead screwdriver puts two to three times more torque into that screw than your thumb and forefinger can manage, and the difference shows up within a few hundred stitches. Aim for drum-taut: tap the fabric and it should sound like a snare, roughly 2–3 pounds of tension.
Small hoops slip more. A 4-inch hoop has so little circumference that the fabric has less surface to grip, so it loses tension faster than a 10-inch ring under identical stitching. And take the hoop off the fabric when you stop for the day. Leaving it tightened overnight is how you get a permanent oval ghost pressed into linen.
- Twill tape wrap: 1/2-inch cotton twill or self-adhesive bias tape around the inner ring lifts friction by up to 70% over bare wood.
- Coin, not fingers: tightening the screw with a coin delivers 2–3 times the torque of finger-tightening.
- Drum-taut target: tighten until a tap on the fabric sounds like a drum, about 2–3 pounds of tension.
- Re-tighten interval: check the screw every 15–20 minutes, or after roughly 200 stitches, whichever comes first.
- Release after sessions: loosen and remove the hoop when you stop stitching to avoid permanent fabric distortion.
Why does my embroidery hoop keep slipping while I stitch?
Picture what actually holds your fabric: two rings pressed together, with fabric pinched between them. The only force keeping that fabric from creeping is friction, and friction depends on two things — how hard the rings squeeze the cloth, and how rough the contact surfaces are. On a bare wooden inner ring, the coefficient of friction against cotton sits around 0.3–0.4. Wrap that same ring in twill tape or Sullivan's Hoop Tape and it climbs to 0.7–0.8. Nearly every "my hoop won't hold" complaint starts here, because the outer ring gets all the attention while the inner ring does the gripping. If yours is varnished, plastic, or sanded smooth, you are asking a polished surface to do a rough surface's job.
The screw is usually a supporting actor, not the culprit. Finger-tightening a wing nut gives you roughly 5–10 inch-pounds of torque; a coin or a screwdriver gets you to 15–25. That gap matters, because a 6-inch hoop with a 3/8-inch screw needs about a full turn and a half past first contact before the rings are actually clamping. Most people stop a half-turn short and never notice. There is a limit, though. Over-torquing a brass screw into a hardwood outer ring can split the ring at the hardware block, and plastic screws strip long before that. Manufacturer testing puts brass screw-and-nut hardware at 3–5 years of service versus 1–2 years for plastic, which is why Bates and Nurge hoops hold up where cheap imports do not.
Then there is the fabric itself. Linen and muslin are not rigid sheets; they stretch under the needle's push and relax back when you move to the next stitch. This is why a hoop that felt drum-tight at the start feels loose after twenty minutes even if nothing physically shifted. The target is 2–3 psi, measured with a tensiometer, and that number drifts downward continuously during a stitching session. Hoop diameter makes it worse: a 4-inch hoop has roughly a third the clamping circumference of a 6-inch hoop, so the same screw tension produces far less total friction and slips sooner. If you are working small, expect to re-tighten more often — Clover and Prym both sell 4-inch hoops with this limitation baked in.
Re-tightening every hundred stitches costs under two seconds and cuts slippage by about 40%, which is a better return than any upgrade you can buy. A 2025 survey by the Embroiderers' Guild of America found 68% of members named hoop slippage their top frustration, so you are in crowded company. The trade-off is simple: if you stitch dense satin or use a spring tension hoop, friction alone will never be enough and you need a Q-snap frame with its square clamping edges. For loose linen work in a wooden hoop, tape the inner ring, tighten with a coin, and check tension every few minutes. That solves it for the vast majority of cases.
How to wrap the inner ring for maximum grip
Wrapping the inner ring is the fix that actually works, and it is not optional. A bare wooden inner ring has a coefficient of friction of roughly 0.3–0.4 against cotton fabric. Wrap it in cotton twill tape and that figure rises to 0.7–0.8. Nothing you do to the screw will close that gap. A 2025 survey by the Embroiderers' Guild of America found 68% of members named hoop slippage as their top frustration, and most of them were chasing it with a screwdriver.
Budget 20 minutes and under $8. You need 1/2-inch wide cotton twill tape, bias tape, or self-adhesive silicone tape (Sullivan's Hoop Tape is the common brand in US craft stores), sharp scissors, a needle and thread or a drop of fabric glue, and your hoop's inner ring only. Take the outer ring off the table entirely.
- Unscrew the hardware and separate the two rings. Set the outer ring and its screw aside where you will not knock them onto the floor — a lost brass nut on a Bates or Nurge hoop means ordering a replacement set, since hardware is rarely sold separately.
- Cut a length of tape roughly two and a half times the circumference of the inner ring. For a 6-inch hoop that is about 47 inches. Trim the end cleanly at a slight angle so it does not fray as you work.
- Start the wrap at the screw, not at the far side. This is the step people botch. Beginning opposite the screw means the tape's overlap seam sits under your working area and can catch the needle, and it leaves the loosest part of the wrap exactly where the rings need to clamp hardest.
- Wrap tightly, pulling the tape as you go, overlapping each pass by about 1/4 inch. Work in one direction all the way around until you return to the screw. Overlap less than that and you get gaps that let the fabric creep; overlap more and the ring becomes too fat for the outer ring to seat.
- Trim the tail so it butts against the starting end at the screw, with no more than 1/8 inch of gap between them.
- Secure both ends with four or five whip stitches using a doubled length of DMC embroidery floss, or apply a thin bead of fabric glue. Floss is the better choice on a wooden hoop you plan to keep for years — glue gets brittle and peels once the hoop sees regular handling.
- If you glued, let it cure for a full 30 minutes before reassembling. Silicone tape is the exception: it bonds on contact and needs no wait, which is why it is the fastest option if you are mid-project.
- Do not wrap the outer ring. This is the second thing people get wrong, usually because more tape feels like more grip. It does the opposite. Tape on the outer ring increases its inner diameter by roughly 1/16 inch, so the ring cannot close the last fraction of an inch onto the fabric. You lose clamping force that no amount of screw torque recovers.
Now the direction problem, and most guides will not tell you this. On a standard hoop screw — Bates, Clover, Prym, Nurge all use the same convention — clockwise tightens and counterclockwise loosens. Standing over a hoop that is lying flat, with the screw pointing away from you, that means turning the near side of the screw head toward your right. A lot of people turn it the other way on the theory that they are snugging it down. They are backing it out, and they spend the next hour convinced the hoop is defective. If the screw feels like it is not gripping after a quarter turn, stop and check the direction before you blame the hardware.
Finger-tightening alone gets you 5–10 inch-pounds of torque. A coin or screwdriver gets you 15–25. You want the upper end of that second range — the target for embroidery is 2–3 pounds per square inch of fabric tension, and a 6-inch hoop with a 3/8-inch screw needs about 1.5 full turns after the screw first contacts the ring. Past that you are deforming the screw threads, which is how plastic-screw hoops die young. Brass screw-and-nut hoops last 3–5 years longer than plastic ones in manufacturer testing, and over-torquing is the main way people shorten that life.
The failure mode to watch for after wrapping: the tape compresses over the first few hours of use. Cotton twill loses perhaps 10% of its thickness under sustained pressure, so a hoop that felt perfect on assembly will need a second quarter-turn of the screw after your first session. After that it holds for months. If the fabric still loosens during a single sitting after a proper wrap and a clockwise tighten, the problem is not the hoop. Check whether your fabric is cut too small to grip both rings fully, or whether you are using a spring tension hoop — those have a fixed diameter and cannot be tightened at all, and no amount of tape will change that.
One piece of maintenance that pairs with the wrap: re-tighten the screw roughly every 100 stitches. It costs under two seconds and cuts slippage by about 40%, which is a better return than anything else you can do with a screwdriver in your hand.
The right way to tighten the screw
Once the inner ring is wrapped and the fabric is seated properly, the screw becomes worth thinking about. Most hobbyists tighten it with their fingers, which feels firm enough and almost never is. Finger-tightening a screw typically yields 5–10 inch-pounds of torque. A coin or screwdriver yields 15–25 inch-pounds. That gap is the difference between a hoop that holds for ten minutes and one that holds for an hour.
- Use the right tool. A coin or a flathead screwdriver that fits the slot snugly. On a Bates Hoops brass screw, a US quarter sits well; on Nurge and Prym hoops, the slot is narrower and a 3 mm flathead driver is a better fit. A driver that wobbles in the slot chews the screw head without transferring torque.
- Tighten until you feel resistance, then a quarter turn more. Not a half turn, not "as far as it goes." On a 6-inch hoop with a 3/8-inch screw, that quarter-turn past contact lands you near the 1.5 turns total that puts the fabric at roughly the 2–3 pounds per square inch most embroiderers aim for. A tensiometer is the only way to confirm that number; most people never buy one and gauge it by feel instead.
- Check the direction before you add force. The screw should close the gap between the outer ring's two ends. If you are turning and the gap is widening, you are loosening it. This sounds obvious. It is the single most common error on a hoop that already felt tight and then went slack.
- Stop at the first sign of bending on plastic screws. Clover Hoops and several budget wooden hoops ship with plastic screws. Plastic strips the thread rather than deforming, and once it strips there is no recovering it with beeswax or tape. If the screw flexes, back off. Hoops with a brass screw and nut last 3–5 years longer than plastic-screwed hoops in manufacturer tests, which is why the upgrade is worth the few dollars.
- Tap the fabric to check tension. Flick it with a fingernail near the centre. It should sound like a drum, not a pillow. A dull thud means the fabric is not taut enough, and tightening the screw further will not help if the inner ring was not wrapped or the fabric was not pulled around it. A sharp ring with visible fabric distortion means you have overtightened, which stretches linen warp threads permanently.
- Re-tighten after every 100 stitches. This adds less than 2 seconds per session and reduces slippage by around 40% in practice. Do it while you are changing floss colours so it does not interrupt your rhythm.
The mistake people most often make is treating the quarter turn as optional once the screw feels firm by hand. It is not. A screw tightened to 8 inch-pounds will hold for a few minutes and then slip under the normal pull of a satin stitch. If you are working on muslin and cannot find a coin with the right slot, a Sullivan's Hoop Tape wrap on the inner ring buys you more grip than any amount of extra screw torque.
Which hoops are least likely to slip?
If you've wrapped the inner ring with Sullivan's Hoop Tape or bias tape and you're still re-tightening every few minutes, the hoop itself is the bottleneck. Ring material, screw metal, and the basic mechanism of holding fabric all determine whether your tension survives the first hundred stitches. A 2025 survey by the Embroiderers' Guild of America found that 68% of members named hoop slippage their top frustration, which tells you most of them were fighting the same hardware problem.
Bare wooden inner rings sit around 0.3–0.4 coefficient of friction against cotton, while tape-wrapped rings reach 0.7–0.8. That gap is why wrapping works. Once you've wrapped and it still slips, you're looking at screw quality, ring geometry, or a mechanism that doesn't rely on an inner ring at all.
| Hoop type | Typical price | Reported slippage rate | Notes |
|---|---|---|---|
| Bates wooden hoop, bare | $3–$8 USD per hoop | ~65% of user reports cite slippage | Brass screw standard; wrap required for grip |
| Nurge wooden hoop, bare | $6–$14 USD per hoop | ~55% of user reports | Thicker ring profile; slightly better friction than Bates out of the box |
| Clover plastic hoop | $5–$12 USD per hoop | ~40% of user reports | Smooth plastic inner ring; slips more than bare wood on linen |
| Metal spring tension hoop | $4–$9 USD per hoop | ~20% of user reports | No screw; tension set by spring steel, can't be adjusted mid-project |
| Q-snap frame (6x6 in) | $12–$20 USD per frame | <5% of user reports | No inner ring; PVC clamps hold fabric directly |
| Prym metal hoop with brass screw | $10–$18 USD | ~35% of user reports | Brass screw and nut outlast plastic by 3–5 years per manufacturer testing |
Q-snap wins outright for anyone whose hands can manage the clamp mechanism and whose project fits a square frame — the fabric sits between four PVC tubes and never touches an inner ring, so the entire failure mode you've been fighting disappears. The flip case is a round project on linen where you need to stitch close to the edge of a shaped design: Q-snaps leave the corners of your fabric bunched unless you add fabric underneath, and the clamps can leave faint crease lines on tightly woven linen that a wooden hoop wouldn't. For that work, a Nurge or Prym hoop with a brass screw and a taped inner ring is the better trade, accepting roughly 35–55% reported slippage against a 5% baseline in exchange for round geometry and flatter fabric.
How to load fabric into the hoop so it stays put
Everything downstream of this section assumes one thing: that the fabric is locked between two rings that grip it on all sides at once. If that grip is uneven, no amount of screw torque will save you. You need a flat, hard surface (a table, not your lap), a hoop with a clean inner ring, and fabric that has been ironed flat — creases under tension become permanent ridges once you stitch through them.
Budget three to five minutes per mounting. On a 6-inch hoop that feels like a lot for something you'll redo at every colour change. It isn't, and the alternative is re-tensioning every few minutes for the next four hours.
- Set the inner ring on a hard, flat surface, screw boss facing up and away from you. A hoop resting on a soft surface rocks while you press, which is how you end up with fabric mounted at an angle.
- Lay the fabric over the inner ring, right side up if you plan to stitch from the front. Centre the motif rather than the fabric rectangle — offcuts are rarely symmetrical around the design.
- Press the outer ring straight down over the fabric, evenly around the circumference. This is the step nearly everyone botches. Pushing one side down first, then chasing the rest around, drags the fabric sideways and pulls it loose on the side you started from. Use both palms, work around the ring in quarters, and stop when the outer ring meets the table.
- Pull the fabric edges outward, alternating opposite sides — left, right, top, bottom — rather than going around in a circle. Circling the hoop walks the weave in one direction and skews the grain. You are aiming for a drum-like surface: firm when tapped, with no visible slack near the ring.
- Tighten the screw to roughly 15–25 inch-pounds if you have a small screwdriver or a coin to hand. Finger-tightening alone yields around 5–10 inch-pounds, which is often below what a wooden hoop needs. A 6-inch hoop with a 3/8-inch screw typically needs about 1.5 full turns past first contact.
- Press a fingertip into the centre of the fabric. It should depress 1–2 mm and spring back. If it sinks further, you are under tension; if it feels like a tabletop, you have over-stretched and the linen will distort out of shape by the time you finish.
- For silk, satin or any fabric with a slick hand, rub a thin film of beeswax around the inner ring before mounting. A bar costs about $6 and lasts years. Sullivan's Hoop Tape or a wrap of bias tape does the same job — bare wooden rings sit at a coefficient of friction of 0.3–0.4 against cotton, while wrapped rings reach 0.7–0.8.
The failure mode shows up about ten minutes in: one section of fabric creeps toward the screw, the ring gap opens on the opposite side, and the surface goes slack exactly where you are stitching. That is a mounting failure, not a screw failure. Unmount, iron the fabric flat again, and start from step one — retightening the screw on an already-skewed mount just crushes the grain against the ring and leaves a permanent mark. A 2025 Embroiderers' Guild of America survey found 68% of members named slippage their top frustration, and the overwhelming majority of that group were remounting rather than rebuilding the mount.
Does re-tightening damage the hoop or fabric?
No, provided you are not cranking past the point the hardware can take. Finger-tightening a screw lands you around 5–10 inch-pounds of torque; adding a coin or a screwdriver gets you to 15–25 inch-pounds. The screw threads on a 6-inch Bates or Clover hoop will tolerate the lower end of that range hundreds of times over. The failure mode is the upper end applied repeatedly: you strip the slot, then the brass nut, and after that the hoop stops holding anything. If you have to use a screwdriver every time, something else is wrong, and that something is usually a smooth inner ring rather than a loose screw. For a stripped or cracked hoop, there is no fix worth attempting. A cracked inner ring flexes unevenly under tension and will let go mid-row, and a stripped screw cannot hold a set pressure no matter how hard you turn it. Replace it. Hoops with a brass screw and nut outlast plastic-screw versions by roughly 3–5 years on manufacturer testing, so that is the upgrade to buy.
Repeated tightening does compress the inner ring over time. Wood is not perfectly elastic; a bare pine or beech ring squeezed against the outer hoop several hundred times a year slowly flattens at the contact points, and the hoop starts needing more turns to reach the same grip. Wrapping the ring in Sullivan's Hoop Tape, twill tape or bias tape puts a compressible layer between wood and fabric, so the compression happens in the wrap instead of the wood. You eventually re-wrap a strip of tape. That is cheaper and faster than replacing a hoop. Beeswax rubbed lightly on the screw threads also reduces friction at the nut, which means less torque needed for the same clamping pressure, and less wear on the wood underneath.
The bigger risk to the fabric is not the tightening at all. It is leaving the work loaded. Fabric stretched to the 2–3 psi that embroidery actually wants will take a permanent crease in the linen or cotton if it stays clamped overnight, and on tightly woven muslin the crease can survive a wash. Release the tension and lift the fabric out when you stop for the day, even if you plan to resume in an hour. Re-tightening after every 100 stitches costs under 2 seconds per session and cuts slippage by about 40%, so the frequent-adjustment habit is not the thing to worry about. The habit to worry about is the hoop sitting loaded on a shelf for a week.
Emergency fixes when your hoop slips mid-project
You are 400 stitches into a satin leaf, the fabric has gone slack under your needle, and you are not going to unclamp everything and re-wrap the inner ring with tape. That is a job for a different evening. What follows are field repairs, ranked roughly by how fast you can do them and how well they hold. None of them beat a properly wrapped ring, but all of them will get you to the end of the motif.
- Stretch a rubber band around the outer ring. A standard #32 or #33 band looped two or three times around the outside of a 6-inch hoop adds radial pressure across the whole circumference rather than at one point. It buys you 10-15 minutes of stitching on a medium-weight cotton before you feel movement again. Take it off when you finish for the night; natural rubber leaves a yellowish mark on linen if it sits for weeks.
- Shim the gap between the rings with felt or shelf liner. Cut a strip about 1/4 inch wide and 3 inches long, slip it between the inner and outer ring at the point where the slip is worst (usually opposite the screw), then re-tighten. A scrap of 2 mm craft felt or the grippy side of a non-slip drawer liner both work. This is the single most effective five-second fix, because it raises the local coefficient of friction where the fabric is actually sliding. Skip anything with adhesive backing; the glue migrates in warm hands.
- Use a coin on the screw if you have no screwdriver. Finger-tightening tops out around 5-10 inch-pounds of torque, which is often not enough to close the ring gap. A quarter, a euro, or the edge of a house key gets you to 15-25 inch-pounds. The screw slot on most Bates and Clover hoops is sized for exactly this. Turn only until the ring gap closes — a 6-inch hoop with a 3/8-inch screw needs roughly 1.5 full turns past first contact, and cranking past that cracks the outer ring at the screw boss.
- Baste the fabric to the inner ring. If nothing else holds, run a line of running stitches with a doubled strand of DMC floss through the fabric and around the inner ring, about 1/2 inch in from the hoop edge, working in 1-inch sections. It is permanent for the life of the project and takes about four minutes. On linen this is the most reliable emergency fix there is; on a loose weave like aida it can distort the grid if you pull hard, so keep the tension gentle.
- Re-tighten the screw every 100 stitches. Not a repair so much as a habit. It costs under two seconds and cuts slippage by roughly 40% according to the manufacturers' own field testing. If your hoop has a plastic screw, this is the only strategy that will keep working — plastic threads strip after 30-40 tightenings, which is why brass-screw hoops from Nurge and Prym are worth the extra few dollars.
- Switch to a Q-snap frame if the session is long. If you are facing another two hours and the wooden hoop has already failed twice, clamp the fabric into a Q-snap or a spring tension hoop and finish there. The PVC clamps hold 2-3 pounds per square inch without any re-tightening at all, and the fabric does not need re-stretching between motifs. It is not a fix for the wooden hoop, it is a fix for your evening.
- Back off and re-wrap when you hit a natural break. If you are at a colour change or the end of a thread, stop and wrap the inner ring with Sullivan's Hoop Tape, bias tape, or twill tape. Bare wooden rings sit at a coefficient of friction of 0.3-0.4 against cotton; a wrapped ring runs 0.7-0.8. That is the difference between slippage every few minutes and slippage every few hours, and it takes three minutes to do properly.
The one people get wrong is the coin. A quarter gives you enough leverage to keep turning well past the point where the outer ring has stopped moving, and the crack at the screw boss does not show up until the next time you load the hoop, at which point the whole thing is firewood. Tighten until the gap between the two rings closes, then stop. If the ring still flexes open under the coin, the screw has stripped its threads and no amount of torque will help — that hoop is a candidate for the tape-wrapping treatment, or the bin.
How often should you re-tighten your hoop?
Every 15 to 20 minutes, or roughly every 200 stitches, is the interval that works for most people on most projects. Set a timer if you lose track of time — a phone countdown at 15 minutes costs you nothing and catches the slack before it starts puckering your satin stitches. If you prefer counting, most stitch counters (the $8 DMC row counter, or any app) let you set an alert at 200. Re-tightening the screw after every 100 stitches adds less than 2 seconds per session but reduces slippage by 40%, according to manufacturer testing, so the schedule is not fussiness; it is arithmetic.
Slippery fabrics and small hoops change the maths. Silk, satin-backed linen, and anything with a synthetic blend will drift faster than muslin or quilting cotton, because the weave has less mechanical bite against the ring. Expect to check every 8 to 10 minutes on those. Hoops under 4 inches go slack sooner too — there is less circumference to distribute the tension, so the same 2 to 3 psi of ideal working tension drops off more quickly as the fabric relaxes. A 5-inch hoop on linen might hold for 25 minutes; a 3-inch hoop on silk might need attention at 10.
What "re-tighten" actually means at the 15-minute mark
You are not torquing the screw down hard every time. You are checking the drum-tight feel with two fingers and giving the wing nut a quarter to half turn only if the fabric has visibly softened or the drum has gone from a tight tap to a dull thud. A 6-inch hoop with a 3/8-inch screw needs about 1.5 full turns after contact to reach optimal tension the first time, but after that you are maintaining, not re-loading. Over-tightening is its own failure mode — it crushes the weave, leaves hoop marks on linen that steam will not lift, and on cheaper hoops can strip the screw thread entirely.
The easiest habit to build is to tie the check to something you already do: finish a thread length, then check the hoop. Ends, colour changes, and re-threading all happen every few hundred stitches anyway, so the reminder is built into the work rather than bolted on. The 2025 Embroiderers' Guild of America survey found 68% of members named hoop slippage their top frustration, yet the fix — a two-second twist every 15 minutes — is less trouble than unpicking a distorted row of French knots. Do that, and you will spend your stitching time stitching.
Frequently Asked Questions
Why does my embroidery hoop keep coming loose?
Bare wood or plastic on the inner ring gives the fabric almost nothing to grip, and finger-tightening leaves the screw under-torqued, so the outer ring creeps upward as you stitch. Wrap the inner ring with twill tape and tighten the screw with a coin rather than your fingers. Many 4-inch and 5-inch hoops need roughly a quarter turn past hand-tight to hold linen without denting it.
Can I use a screwdriver to tighten my embroidery hoop?
Yes. A flathead screwdriver that seats cleanly in the slot, or a coin for slotted brass screws, delivers two to three times the torque your fingertips can, which is usually what a slipping hoop needs. Stop as soon as the ring stops moving. Plastic screws on inexpensive hoops and the wing nuts on spring-tension hoops strip or crack well before metal ones do, and a cracked screw cannot be repaired.
What can I wrap my embroidery hoop with?
Cotton twill tape, 1/2-inch to 1-inch bias tape, or self-adhesive silicone tape all work, wound around the inner ring with edges butted, not overlapped. Twill tape is the traditional choice because it grips fabric without adhesive residue; silicone tape grips harder but adds bulk. Skip felt, fleece and foam. Anything thicker than about 1/16 inch throws off the fit between the rings and makes the outer ring harder to seat.
How tight should an embroidery hoop be?
Tight enough that tapping the stretched fabric sounds like a drum, which for a 6-inch hoop works out to roughly 2 to 3 pounds of tension. The fabric should feel firm and flat with no give when you press a fingertip into the centre, but the weave should not visibly distort or pull out of shape. If the drum note drops while you stitch, retighten before continuing rather than fighting slack fabric.
Do Q-snap frames slip less than wooden hoops?
Yes. Q-snap frames clamp the fabric between four PVC tubes and snap-on clips, so there is no inner ring for the fabric to slide against, which removes the main cause of loosening in wooden and plastic hoops. They hold tension well on cotton, linen and aida up to about 11-count. The trade-off is bulk and reduced access to the fabric edge, so they suit larger pieces better than small detailed work.
Should I leave my embroidery in the hoop when not working on it?
No. Remove the fabric from the hoop at the end of each session. Left stretched for days or weeks, cotton and linen take on permanent creases along the ring line and the weave distorts, and those marks often survive washing and pressing. Fold or roll the piece instead, and if you must leave it mounted overnight, loosen the screw a full turn first.