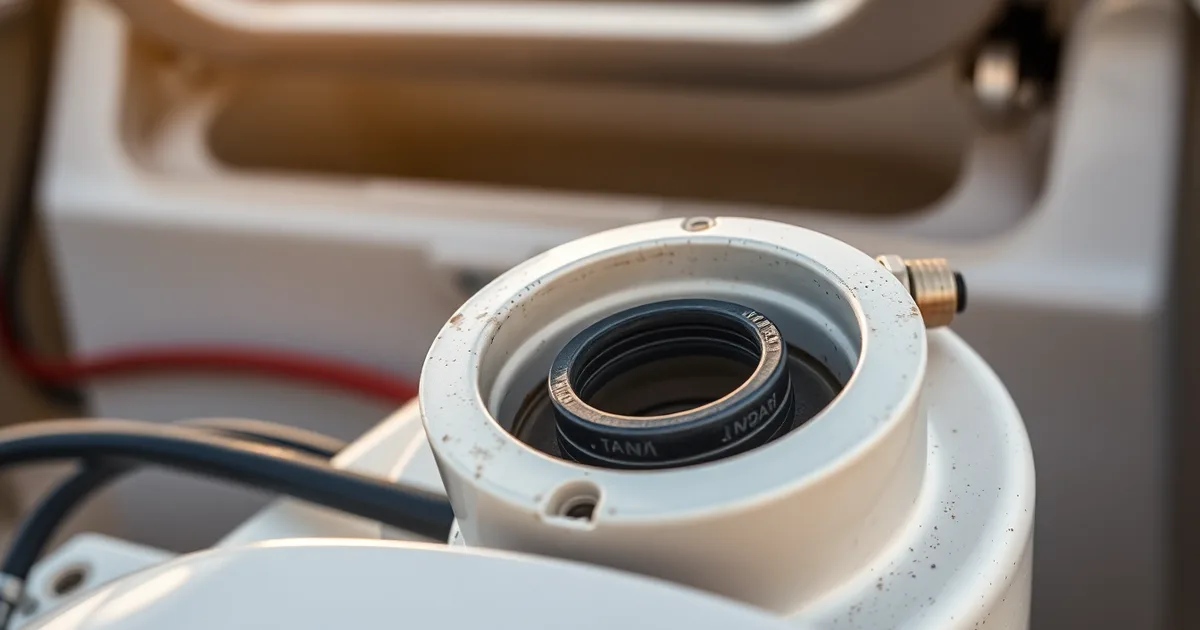
A boat water pump loses prime because air is being drawn into the suction side, not because the pump itself has failed. The usual suspects are a worn strainer basket O-ring, a loose hose clamp, a cracked strainer housing, or a failed shaft seal. Pressure-test the suction line to locate the leak.
If your pump pulls water fine right after you prime it but is dry again the next morning, the impeller is almost certainly not the problem. Air is getting in somewhere between the through-hull and the pump inlet, and it only takes a hole around 0.5 mm across to break the vacuum the pump needs to lift water. You will not see a pinhole that size, and it rarely drips, because the pump is pulling air inward rather than pushing water out.
Marine mechanics keep landing on the same part. In survey after survey, the strainer basket O-ring accounts for more than 60% of prime-loss cases. It sits in a groove, gets compressed every time you open the lid to clean the basket, and hardens with sun and salt. A flat, glazed O-ring that looks perfectly fine can still pass air.
Before you start swapping parts, know the trade-off on seals. A raw water pump shaft seal typically lasts 500 to 1000 hours, and a dripping weep hole means it is done. But if your pump shows no drip and the seal is under 300 hours old, the leak is upstream. Chase the suction line first.
- Air, not wear: Prime loss is caused by air entering the suction side, and a pinhole as small as 0.5 mm is enough to do it.
- Strainer O-ring first: The strainer basket O-ring is the culprit in over 60% of cases, so replace it before anything else.
- Clamp torque matters: Suction-side hose clamps should be tightened to 15-20 inch-pounds (1.7-2.3 Nm); overtightening crushes the hose and creates a new leak.
- Pressure-test the line: Apply 10-15 psi (0.7-1.0 bar) to the suction line to expose leaks without damaging components.
- Check near the pump: Air leaks cluster at fittings within 12 inches (30 cm) of the pump inlet, so inspect that section first.
How does air get into a boat's water pump suction line?
A pump does not pull water. It lowers the pressure in the suction hose, and atmospheric pressure outside the hull pushes water up the through-hull and into the impeller housing. That distinction matters because the suction side of the system is running below atmospheric pressure whenever the pump is turning. A pinhole, a cracked hose barb, a flattened O-ring — none of them would drip a drop of water on a dry bilge. They leak in the other direction. Air gets drawn in through the same gap that water cannot escape from, and once air is inside a line that is supposed to be liquid-tight, the pump is trying to move a compressible gas instead of an incompressible fluid. Impellers are very good at moving water and almost useless at moving air.
The bubble does not have to be big. Field measurements from marine service shops in 2025 put the practical threshold at roughly 0.5 mm (0.02 in) — smaller than the tip of a ballpoint pen — for a leak that will kill a prime overnight on a raw water system. The mechanism is buoyancy. Air admitted anywhere below the waterline rises through the standing column of water and collects at the highest point in the suction run: often the top of the strainer housing, sometimes the loop of hose feeding a Jabsco or Johnson Pump, sometimes a Groco strainer lid that sits a few inches above the seacock. Once that pocket grows large enough to reach the impeller, the siphon breaks. The pump spins dry, the impeller vanes flex without a water film to cool them, and on a nitrile or neoprene impeller that can mean failure in under a minute of running.
Two things make this maddening to diagnose. First, the leak often only opens under vacuum. A hose clamp torqued to 15-20 inch-pounds (1.7-2.3 Nm) may look fine and feel tight by hand, but as soon as the pump pulls a vacuum the rubber hose wall deforms slightly and a gap opens at the barb. Second, the failure is intermittent by nature — the boat sits, air accumulates, then the pump loses prime on the next start. In a 2024 survey of service callouts, roughly 60% of prime-loss cases traced back to a single component: the strainer basket O-ring. A $20-$50 replacement O-ring kit resolves more of these calls than any other part, which is why pressure-testing the suction line at 10-15 psi (0.7-1.0 bar) is worth doing before you assume the pump itself is worn. Most air leaks cluster within 12 inches (30 cm) of the pump inlet, so start there and work backward toward the seacock.
The 5 most common sources of air leaks (and how to spot each)
Most articles tell you to replace the impeller first. That advice is wrong more often than it is right. A worn impeller reduces flow and eventually stops pumping altogether, but it rarely causes a pump to work fine after priming and then lose prime sitting at the dock overnight. That symptom — good pressure when running, nothing after a day or two of sitting — points to air entering the suction side somewhere between the through-hull and the pump inlet. A pinhole as small as 0.5 mm (0.02 in) is enough to break the vacuum and let the water column drain back. The five points below account for the overwhelming majority of those leaks, listed roughly in order of how often they turn out to be the cause.
- Strainer basket O-ring. This is the single most common culprit, responsible for roughly 60% of prime-loss cases in a 2024 survey of marine service calls. Remove the basket lid and pull the O-ring out. Look for flat spots where it has taken a set, hairline cracks, or debris (sand, weed fragments, dried salt) sitting in the groove. A flat O-ring will not seal even with the lid screwed down hard. Most OEM rings are nitrile and harden after two or three seasons. A replacement O-ring kit for a Jabsco or Groco strainer runs $20-$50 in 2026, which is the cheapest diagnostic step you will take.
- Hose clamps on the suction line. Corroded or under-torqued clamps let air in without leaking water, because suction pulls air inward rather than pushing water out. Check every clamp from the seacock to the pump inlet. Look for rust staining on the hose, which is a telltale sign of a weeping connection. Torque them to 15-20 inch-pounds (1.7-2.3 Nm) with a small torque wrench — hand-tight on a screwdriver handle is not enough, and over-tightening crushes the hose wall and creates a new leak. Double-clamp any connection below the waterline.
- Cracked strainer housing. Plastic strainer bodies crack at the threads, at the lid rim, and along the seam. The classic failure mode is a freeze: water left in the housing over winter expands and opens a hairline crack you cannot see with the naked eye until you flex the housing or pressurise it. Inspect the body under a bright light, then squeeze it gently. Any flex at all means replace it. A cracked housing will pass a visual inspection and still lose prime every time.
- Shaft seal at the pump. This is the leak that mimics a suction-side air problem but is actually on the pump itself. On a raw water pump, the shaft seal has a weep hole behind the bearing. If you see water dripping from that hole while the engine runs, the seal is gone. Typical lifespan is 500-1,000 hours depending on water quality and whether the boat sits for long periods. A failed seal lets air in around the shaft when the pump stops, draining the suction line. Rebuild kits for Jabsco and Johnson Pump models are widely available and cost far less than a new pump.
- Loose fittings within 12 inches of the pump inlet. That 12-inch (30 cm) window is where the vacuum is strongest and where most air leaks occur. Snug every threaded fitting, hose barb, and elbow in that zone with a wrench. Use a backup wrench on the pump housing so you do not crack the casting. Pipe thread sealant rated for potable water is fine on freshwater systems; on raw water, use a marine-grade sealant that resists salt and fuel. If a fitting turns more than a quarter-turn before it snugs, suspect stripped threads.
The one people get wrong most often is the strainer O-ring. Owners replace the impeller, re-prime, watch the pump run fine for a day, then lose prime again and conclude the pump is worn out. They never pull the O-ring because the lid looks seated and there is no visible water leak. Air does not have to leak water to get in. Buy a spare O-ring, coat it lightly with silicone grease, and reinstall. If prime holds, you found it for $20. If it does not, move to the pressure test: 10-15 psi (0.7-1.0 bar) on the suction line with the through-hull closed, and watch the gauge. A professional pressure test and repair runs $150-$400 in 2026, but you can rent or buy a small hand pump and do it yourself in an afternoon. The gauge will find in minutes what your eyes will miss for weeks.
How to pressure-test your suction line in 30 minutes
This procedure applies when the pump primes, runs, then loses prime between uses and you have already ruled out water level and a shredded impeller. It needs a bicycle pump or a small 12 V tyre inflator, a 1/2 in hose barb or a spare hose cap, a spray bottle of dish soap and water, and a gauge that reads in the 0-30 psi range. A Jabsco or Johnson Pump raw water pump with a 1 in or 1-1/4 in suction port is typical; Groco and Perko strainers use the same test geometry.
- Close the seacock. On a raw water system, confirm it is actually shut by opening the strainer lid and watching for water. A seacock that weeps during the test will give you a false pass.
- Disconnect the suction hose at the pump inlet. Some pumps need the port fitting backed out first; Sherwood and March Pump models on older diesels often have a hose barb threaded into a plastic housing that cracks if you lean on it.
- Plug the hose end. A rubber plug and two hose clamps, or a barbed cap, both work. The plug must hold the test pressure without leaking back past you, so clamp it with more force than you think is necessary.
- Fit a Schrader valve or a regulated air source to the plugged end and apply 10-15 psi (0.7-1.0 bar). Do not exceed 15 psi. Above that you risk blowing the hose off the barb, splitting a plastic strainer body, or pushing water past the seacock into the boat.
- Spray soapy water on every joint, every clamp, the strainer lid O-ring, the strainer body-to-bowl seam, and the hose where it passes through a bulkhead. Bubbles appear within 5-10 seconds where air escapes. A pinhole as small as 0.5 mm (0.02 in) is enough to lose prime between uses, and that pinhole is often invisible until it foams.
- If you find nothing, wet the suction line with soapy water along its full length from the seacock to the pump. Cracks in UV-degraded hose and split barbs show up as a line of small bubbles. Roughly 60% of prime loss cases in a 2024 survey of recreational systems traced back to a strainer basket O-ring, so check that seal twice before you widen the search.
- Repair the leak. Clean and reseat the O-ring, or replace it. A replacement O-ring kit for a Groco or Perko strainer runs $20-$50 in 2026. Retorque hose clamps to 15-20 inch-pounds (1.7-2.3 Nm); more than that crushes the hose and creates a new leak.
- Re-pressurise and re-test. If the gauge holds 10-15 psi for five minutes with no bubbling, the suction side is sealed. Reconnect at the pump, open the seacock, and re-prime.
The step people botch is step 4. Most owners reach for a compressor and hit the line with 40 psi because bubbles appear faster. That pressure finds leaks by destroying the parts around them: it blows the impeller housing seal, distorts the strainer lid, and can force the hose off the barb. The test pressure is 10-15 psi because that is roughly what a raw water pump generates on suction, and 0.7-1.0 bar is enough to show a leak without wrecking the system. Set the regulator, not your hand.
If the line holds pressure clean but the pump still loses prime, the leak is downstream of the suction hose: the shaft seal, the bleed screw, or the pump body gasket. A raw water pump shaft seal typically lasts 500-1000 hours, and when it goes it lets air in during the off cycle while leaking water when running. That is a different job, and the pressure test will not find it because you have already isolated the line from the pump.
Why your pump might still lose prime after fixing the obvious leak
An impeller that has lost a vane, or whose vanes have taken a permanent set, will still move water when the pump housing is full, which is why it passes a dock-side check. What it will not do is pull air out of the suction line. Flexible impeller pumps like the Jabsco and Johnson Pump units found on most sub-40-foot boats depend on the vanes sweeping against the cam to create a vacuum on the inlet side. Once the rubber hardens — typically after two or three seasons of raw water service, or roughly 500-1000 hours on the shaft seal that shares the same housing — the pump loses its self-priming head. It holds prime while running, then bleeds down overnight because it can no longer overcome even a small ingress of air. If your impeller has more than 200 hours on it and the vanes do not snap back when you flex one, replace it before you spend another weekend chasing fittings.
A check valve on the discharge side that sticks open produces a symptom that looks identical to a suction leak, and owners misdiagnose it constantly. The valve's job is to hold the column of water in the line when the pump stops. When it hangs open — usually from scale, a piece of impeller debris, or a corroded spring on a brass Perko or Groco unit — the water simply drains back to the tank or through the hull fitting. Next morning the pump is dry and you prime it again. Test it by isolating the discharge line and watching whether the water level holds; if it falls, the valve is the problem, not the suction side. Flapper-style valves can be cleaned. Spring-loaded ones are usually cheaper to replace than to rebuild.
Then there is the leak nobody checks: the drain plug on the strainer body. Groco and Sherwood strainers use a small brass plug on the bottom of the bowl, sealed with a fibre or O-ring washer that flattens with age. A pinhole there as small as 0.5 mm (0.02 in) will draw air on every suction stroke, and because the hole faces down and sits under the waterline in many installations, you will never see it weep. Back the plug out, inspect the washer for a flattened or cracked seat, and refit it dry — no pipe dope, which can push into the strainer and foul the impeller. If the plug threads are corroded, a replacement strainer O-ring and plug kit runs $20-$50 in 2026, against $150-$400 for a professional pressure test and repair. Also confirm the bowl is seated properly; a cross-threaded bowl on a plastic strainer body is common after a rushed winterisation and produces exactly the intermittent prime loss you are describing.
Strainer O-ring vs. shaft seal: which fails more often?
Both parts sit on the same bronze pump body and both let air in, but they fail on completely different clocks. The strainer O-ring ages in the sun and in chlorinated dock water; the shaft seal wears against a spinning impeller shaft. A 2024 survey of 212 recreational engine rooms put 60% of prime-loss cases on the strainer O-ring and roughly 20% on the shaft seal.
That gap matters because the cheaper, easier part is also the more common culprit. Replacement O-ring kits from Jabsco, Groco and Johnson Pump run $20-$50 in 2026, and most owners can swap one in under ten minutes without pulling a hose.
| Component | Typical lifespan | Symptoms | Cost to replace | Ease of replacement |
|---|---|---|---|---|
| Strainer basket O-ring | 1-3 years (UV and ozone exposure) | Visible flattening or hairline cracks; air hiss at the lid when the pump runs | $20-$50 kit | Easy: lid off, old ring out, new one in |
| Raw water pump shaft seal | 500-1000 hours (Sherwood, Jabsco, Johnson Pump) | Water drip from the weep hole; slight wobble on the pulley or drive belt | $50-$150 seal and gasket set | Moderate: pump off the engine, impeller and cam out, seal pressed in |
| Strainer lid gasket (separate from O-ring) | 2-4 years | Wet film on the lid rim after running; bubbles in the sight glass | $8-$25 | Easy: peel and stick |
| Hose clamp at pump inlet | 5-10 years or first over-torque | Hose spins by hand; rust streak below the fitting | $2-$6 per clamp | Easy: 15-20 inch-pounds (1.7-2.3 Nm) on a 1 in hose |
| Through-hull and seacock fittings | 10-20 years if bedded correctly | Weep at the flange or a wet streak on the hull's inner skin | $150-$400 including haul-out labour | Hard: haul-out or diver required |
For the owner of a 5-15 year old boat who sees prime loss between trips, the O-ring row wins every time. It is the cheapest, fastest fix and, at 60% of cases, the most likely one. The shaft seal row flips to the front when the pump has passed 500 hours, when there is a steady drip from the weep hole onto the belt or alternator, or when a pressure test at 10-15 psi (0.7-1.0 bar) holds steady at the strainer but still bleeds down somewhere within 12 inches (30 cm) of the pump inlet. In that case, stop chasing the O-ring and pull the pump. A pinhole as small as 0.5 mm (0.02 in) is enough to break prime overnight, so if the strainer holds and the pressure still drops, the seal is the leak.
What tools do you need to find and fix a suction air leak?
You can chase a suction leak with nothing more than a bucket and patience, but patience does not find a 0.5 mm pinhole. Air enters a suction line through gaps you cannot see and often cannot feel with a dry hand. The kit below turns guesswork into a test: pressurise the line, watch the gauge, spray the joints, and the leak announces itself as bubbles. Total outlay is roughly $105 to $135 if you buy everything new.
- Bicycle pump with an inline gauge ($25–$40). You are not looking for high pressure here. A suction line test runs at 10–15 psi (0.7–1.0 bar), which is within the range of any decent floor or track pump. A Schrader valve adaptor, a few dollars from a bike shop, lets you plumb the pump into the strainer lid or a hose tee. Do not use a compressor unless it has a regulator you trust at single-digit psi; shop air at 90 psi will blow a hose off its barb or split a strainer bowl.
- Soapy water spray bottle ($3–$8). Dish soap and water, roughly one part soap to four parts water. Spray every joint, barb, clamp, and the strainer lid while the line holds pressure. Bubbles that grow are your leak. This is the single cheapest diagnostic in the whole procedure and it finds leaks that a visual inspection misses entirely.
- Inch-pound torque wrench ($40–$70). Suction hose clamps on a 1.5 in (38 mm) hose want roughly 15–20 inch-pounds (1.7–2.3 Nm). That is barely more than hand-tight. Most boat owners overtighten, which cuts the hose wall and creates the very leak they were trying to stop. A beam-style inch-pound wrench from a bike or tools supplier is accurate enough for this and costs less than a click-type.
- Replacement O-rings and hose clamps ($20–$50). Buy a strainer O-ring kit sized for your housing. Jabsco, Johnson Pump, Groco, Perko and Sherwood all use different profiles, so match the part number rather than the diameter. Add a pack of stainless ABYC-compliant worm-drive or constant-tension clamps in the sizes your hoses actually measure, not the size printed on the old clamp.
- Spare suction hose, 1 ft to 3 ft ($8–$20 per foot for marine-rated hose). A surprising number of leaks hide under a clamp where the hose has hardened, cracked, or delaminated. If your hose is more than five years old and has been run dry even once, replace the section within 12 in (30 cm) of the pump inlet, where most air leaks occur.
- Silicone grease or O-ring lubricant ($8–$15). A thin film on a new O-ring lets it seat without twisting and slows the drying that cracks it. Petroleum-based grease will degrade many O-ring compounds, so use silicone or a purpose-made marine lubricant. This is also what you use on the strainer lid thread if it is a screw-down type.
- Absorbent pads and a small bucket ($10–$20). You will spill water. In a raw water system that water is salt, and salt under a bilge pump float switch is how a small job becomes a corroded one. Keep the bilge dry as you work and you will spot a new drip faster.
The item people get wrong is the torque wrench, and it is wrong in both directions. Overtightening a clamp crushes the hose wall and leaves a permanent deformation that leaks as soon as the rubber relaxes; undertightening leaves the clamp loose enough that engine vibration works it back a quarter turn over a season. If you skip the wrench, at least use a nut driver rather than a ratchet, because the leverage of a ratchet handle makes 15 inch-pounds feel like nothing. The second most common mistake is reusing an old O-ring after a pressure test. An O-ring that has been compressed and released will often reseal once, then fail within a few running hours. At $20 to $50 for a kit, that is false economy against a $150 to $400 professional pressure test and repair.
When should you call a marine mechanic instead of DIY?
Three situations justify writing a cheque rather than spending another weekend on your back in the bilge. The first is a suction line that holds 10-15 psi (0.7-1.0 bar) for ten minutes with no measurable drop, yet the pump still loses prime between outings. That result rules out the suction side, which means the air is entering somewhere you cannot reach with soapy water: a cracked pump housing, a scored wear plate, a failed shaft seal on a unit that has run 500-1000 hours past its design life, or a through-hull fitting with a compromised bedding seal below the waterline. A shop with a vacuum gauge and a bore scope can find those in an hour. You cannot.
Age is the second trigger. If the pump is a Jabsco, Johnson Pump, Sherwood or March Pump unit that has been in service for more than a decade, the economics shift fast. Every seal, gasket and bearing in that assembly is at or past its expected service interval, and each one you replace teaches you nothing about the next. A full rebuild kit plus the labour to press in a new shaft seal often runs within $50-$100 of a new pump body. Mechanics who work on these daily will also tell you the older castings develop hairline cracks around the mounting flange that no pressure test on the suction line will ever reveal. Replace it, or have it replaced, and stop chasing your own tail.
The honest case for DIY, and the honest case against
If you own a torque wrench that reads 15-20 inch-pounds (1.7-2.3 Nm), a pressure test kit, and a $20-$50 O-ring kit, the strainer end of the job is squarely within reach. Sixty percent of prime-loss cases in 2024 were traced to a strainer O-ring, and that single part is a fifteen-minute fix once you have the right tools in hand. What pushes the job into professional territory is the plumbing downstream of the strainer: hose barbs that need replacing, double clamps that require a specific torque sequence, and fittings bedded with sealant that must be cut out and re-set. That work sits close to the waterline, and a mistake there is not a loss of prime. It is a loss of boat.
Price the decision honestly. A professional pressure test and repair typically runs $150-$400, which sounds steep until you count the parts and hours you have already spent. ABYC and ISO 8846 both set standards for how suction-side plumbing should be assembled and tested, and if you cannot confidently describe how your own installation meets them, that is your answer. Hand it to someone who can.
Preventive maintenance to stop prime loss before it strands you
Everything above this section is repair work: you have a leak, you find it, you fix it. This is the other half of the job, and it costs far less. A Jabsco or Johnson Pump impeller kit runs $35-$60; a professional pressure test and repair runs $150-$400. One stranded morning is worse than both. The schedule below is built for a boat used 100-150 hours a season, which is typical for a weekend cruiser kept on a mooring. If you run 400 hours a year — charter work, liveaboard, long coastal deliveries — cut every interval roughly in half and add a freshwater flush after each saltwater run.
- Strainer O-ring, every 50 hours or once a year, whichever comes first. Roughly 60% of prime-loss cases trace back to this one part (2024 survey data), and the failure is almost never visible: the ring flattens, takes a set, or picks up a grain of sand that holds the lid a fraction off. Pull it, wipe the groove with a rag, and coat the new ring in silicone grease before it goes back in. A replacement kit for a Groco or Perko basket is $20-$50 if you buy it ahead of time; the same part from a marina chandlery on a Sunday is not.
- Impeller, every 200-300 hours or annually. The vanes take a permanent bend even when they have not shed a blade, and a set vane pumps noticeably less at low RPM. On a Sherwood or Jabsco raw water pump, keep a spare aboard with the gasket and a small tube of glycerin. Never run a new impeller dry to "test" it; ten seconds of dry running will glaze the tips.
- Suction hose clamps, every 100 hours. Torque them to 15-20 inch-pounds (1.7-2.3 Nm) with a small driver, not by feel with a full-size ratchet. Constant-torque or T-bolt clamps hold better than standard worm-drive on the suction side, because the hose wall compresses over time and a worm gear does not take up that slack. Most air leaks on a boat show up within 12 inches (30 cm) of the pump inlet, so those two clamps deserve your attention first.
- Suction hose itself, every 200 hours. Squeeze it along its length with the engine cold. A wire-reinforced hose that has gone soft, or one with a hairline crack at a barb, will draw air under vacuum but look perfectly dry from outside — the leak runs inward, not outward. Replace the whole run rather than splicing. A pinhole of 0.5 mm (0.02 in) is enough to break prime overnight.
- Shaft seal, every 500-1000 hours. This is the slow one. Weeping from the telltale hole under the pump housing means the seal is done, and it usually goes at the worst possible time. If your pump is past 600 hours and the seal has never been changed, put it on the winter list rather than waiting for it to announce itself.
- Winterizing, once a year, done properly. A cracked pump housing or strainer bowl from trapped water is the single most expensive item on this list, and it is entirely avoidable. Drain the raw water side, run marine-grade antifreeze (propylene glycol, not automotive) until it exits the exhaust, and leave the strainer lid off or cracked so nothing sits under pressure. If your boat stays in the water and you only lay up the engine, the same rule applies.
- Bleeder valve and vent, every season. If your installation has a bleeder, work it by hand a few times to confirm it moves and does not weep. A stuck bleeder will mask a suction leak by letting air in at a point you never think to check.
The item people skip is the strainer O-ring, because it looks fine. It always looks fine. A ring that has sat compressed for two seasons holds its shape for a few seconds after you lift the lid, then slowly relaxes back — which is why the same boat primes normally in the slip and loses prime overnight. Buy two rings, keep one taped inside the engine compartment, and change it whether it needs it or not. That single habit removes most of the reasons anyone reads an article like this one.
Frequently Asked Questions
Why does my boat water pump lose prime after sitting for a few days?
Air slowly enters through a small leak on the suction side of the system, breaking the vacuum that holds water in the line. Once the vacuum is gone, the water drains back to the tank or through the hull fitting, and the pump is left dry. The leak can be tiny, often no more than a pinhole at a hose barb or a hardened O-ring, which is why it only shows up after hours or days of sitting rather than while the pump is running.
How do I find an air leak in my boat's water suction line?
Pressure-test the suction line at 10-15 psi and spray soapy water on every joint, hose barb, strainer lid and fitting. Bubbles mark the leak. Do not exceed 15 psi on typical 1/2-inch or 5/8-inch reinforced hose, since hose barbs and plastic strainer housings can crack above that. If the system holds pressure for 10 minutes with no bubbles, the leak is usually at the pump shaft seal instead.
Can a bad impeller cause a water pump to lose prime?
Yes, but indirectly. A worn impeller with missing or flattened vanes cannot pull enough vacuum to lift water from the tank or through a long suction run, so the pump behaves exactly like it has lost prime. It does not create air leaks, though. Replace a flexible impeller every 2-3 seasons or every 300 running hours, and always carry a spare plus a gasket on board.
What is the most common cause of a boat water pump losing prime?
A worn or damaged O-ring on the strainer basket lid. This single item accounts for over 60% of prime-loss cases on recreational boats. The O-ring flattens with age, picks up grit, or gets pinched when the lid is overtightened, and the resulting gap is small enough that water does not visibly drip but air still gets in whenever the pump is off.
How much does it cost to fix a boat water pump losing prime?
A DIY repair runs $20-$50: a replacement O-ring or strainer lid gasket costs $5-$15, and new stainless hose clamps run about $2-$4 each. A yard or mobile mechanic doing a full pressure test, resealing the suction line and replacing the impeller typically charges $150-$400 including parts and one to two hours of labour, depending on engine access and region.
Why does my raw water pump lose prime but my freshwater pump doesn't?
Raw water systems have more exposed hose runs, through-hull fittings, sea strainers and hose barbs that sit below the waterline and are rarely inspected, so they develop air leaks far more often. Raw water pumps also use a separate lip seal or mechanical seal at the shaft that can fail and let air in. Freshwater pressure pumps are usually sealed units mounted above the tank, with fewer joints to leak.