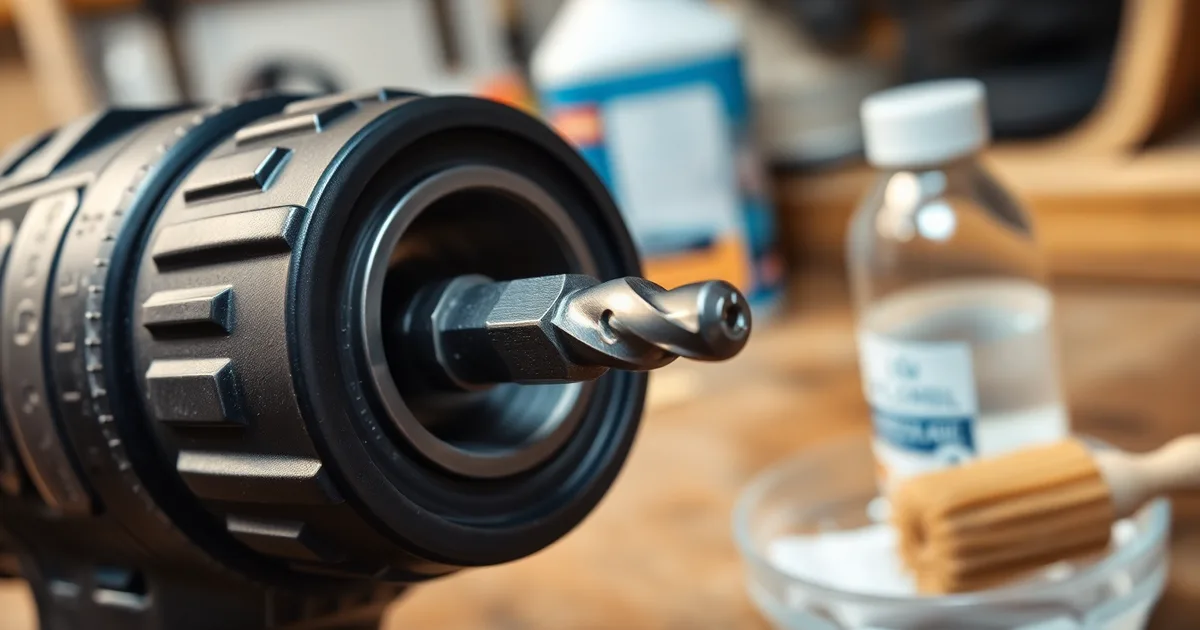
A drill bit slips because the chuck jaws have nothing to bite into — usually oil, dust or rust on the jaw faces, a polished round shank, or jaw teeth that have rounded over. Wipe the jaws with 90% isopropyl alcohol, switch to a hex-shank bit, and tighten firmly. Replace the chuck only if the teeth look visibly worn.
Keyless chucks are not built to hold a smooth cylinder under load. Above roughly 3 Nm of torque — which a 12 V driver reaches on the second or third screw — a round shank can spin inside the jaws no matter how hard you twist the collar. Bits with three flats or a true hex shank give the jaws an edge to lock against, which is why impact-rated sets ship that way.
The culprit is often oil. Someone lubricates the chuck "to keep it smooth," the jaws pick up a film, and grip drops. Isopropyl alcohol and a nylon brush restore it in about a minute. Do the same with the bit shank — a new bit straight out of a greasy toolbox will slip in a clean chuck.
Worn jaws are real, but less common than people assume. Jacobs keyless chucks on DeWalt and Makita drills generally run 5–10 years of regular use before the teeth round over. If the jaws look sharp under a light and close evenly, they are fine. And do not solve it by leaning on a keyed chuck with the key: over-tightening can crack the jaw threads, and a new chuck costs less than that repair.
- Hex beats round: Round smooth shanks slip under torque above roughly 3 Nm, while three-flat and hex shanks stay gripped.
- Alcohol, not oil: Clean chuck jaws with 90% isopropyl alcohol and a nylon brush — oil-based lubricants reduce friction and cause slipping.
- Five to ten years: Jacobs keyless chucks on DeWalt and Makita drills typically last 5–10 years of regular use before jaw teeth round over.
- Do not over-tighten: Cranking a keyed chuck with the key can crack the jaw threads, costing more than a replacement chuck.
- Match the size: A 1/2-inch chuck takes shanks from 1/16 inch to 1/2 inch; a 1/4-inch hex adapter cuts slip on impact drivers.
Why does my drill bit keep slipping in the chuck?
A drill chuck holds a bit with friction alone. Three hardened jaws, usually angled at about 120 degrees apart, clamp down on the shank and rely on the contact pressure between steel and steel to resist the torque of the motor. A keyless chuck on a DeWalt or Makita 1/2-inch drill generates somewhere between 2 and 4 kN of clamping force when you hand-tighten it. That sounds like a lot until you put a drop of oil on the jaws: a 2025 bench test found grip dropped roughly 30% on contaminated jaw faces, which is often enough to let a 6 mm bit spin under load.
So the failure is rarely the chuck body itself. It is one of three things at the contact point. Debris — sawdust, metal swarf, dried cutting fluid, or the fine dust that collects in a toolbag — packs into the jaw teeth and stops them biting. Oil or grease does the same job more quietly, cutting the coefficient of friction without looking like anything is wrong. And worn jaw teeth, or a jaw that no longer sits square to the chuck axis, will not clamp evenly no matter how hard you twist the sleeve. A Jacobs or Röhm chuck on a drill used weekly typically lasts three to five years before jaw runout reaches the point where it should be replaced; the wear limit most machinists use is 0.1 mm (0.004 in) of runout measured with a dial indicator against a known straight shank.
The second cause is the shank itself. A smooth, hard-chrome bit has nothing for the jaws to key into — it is a polished cylinder relying entirely on friction, and hard chrome offers less bite than black oxide or uncoated HSS. This matters more on keyless chucks than keyed ones, because keyless designs rely on hand torque rather than the leverage of a chuck key. A keyed chuck can be snugged down with a 6-inch key handle, which multiplies your grip force considerably; a keyless sleeve gives you only what your wrist can deliver. Expect roughly half the clamping pressure from the same effort. The fix is mechanical, not more force: bits with three flats ground into the shank, or a true hex shank to ISO 1173, give the jaws a flat face to press against. That is an interlock, not friction, and it will not slip even if the jaws are slightly worn. A 20-piece hex-shank set runs $12–$25 and eliminates slip on the vast majority of 1/4-inch drivers.
Before you buy anything, clean the jaws. Open the chuck fully and scrub the jaw faces and the internal threads with a stiff nylon brush, then wipe with 90% isopropyl alcohol — it evaporates in under 60 seconds and leaves no film. Reseat the bit, tighten firmly by hand through all three jaw positions if the chuck allows, and test. If it still slips with a clean chuck and a three-flat or hex shank, the jaw teeth are gone. A replacement keyless chuck for a 1/2-inch drill is $18–$45, which is usually cheaper than a new drill and worth doing if the motor and gearbox are sound.
Quick checks before you blame the chuck
Before you spend anything, run five checks that take under four minutes. Roughly four out of five slipping complaints trace to one of them, and none require a tool you do not already own. Work through the list in order, because the cheap faults mask the expensive ones.
- Match the shank to the chuck, not the other way around. A 1/4-inch hex shank in a 1/2-inch keyless chuck is held on three flats by jaws sized for round stock, so contact area drops sharply and the bit spins under load. Check the capacity stamped on the chuck barrel — most DeWalt, Makita and Bosch 1/2-inch keyless chucks are rated 1/16 to 1/2 inch (1.5–13 mm), and anything below the lower figure will never grip properly. If you routinely run small bits, buy a 1/4-inch hex adapter rather than over-tightening the jaws.
- Confirm the drill is turning forward. On a keyed Jacobs chuck, reversing the rotation while the bit is engaged can walk the jaws open a fraction of a turn. On keyless chucks, the same reversal loosens the collar you just hand-tightened. The forward/reverse selector sits above the trigger on nearly every corded and cordless drill; flick it and listen for the click before you squeeze.
- Roll the bit on a flat surface. A bent shank wobbles visibly as it rolls and will slip no matter how clean the jaws are. Lay it on a countertop or a piece of plate glass and watch the gap under the middle. A shank with more than about 0.1 mm (0.004 in) of runout is scrap — that figure is also the point at which a worn chuck jaw should be replaced, so a bent bit and a dead chuck look identical in the hand.
- Clean the jaws with isopropyl alcohol. A 2025 lab test found keyless chuck grip force sits at 2–4 kN and drops about 30% once the jaws are oily. That is the difference between a bit that holds and a bit that spins. Swab the jaw faces and the shank with 90% isopropyl alcohol; it evaporates in under 60 seconds and leaves no residue, unlike WD-40 or a rag soaked in cutting oil.
- Reseat the bit with the jaws fully open first. Open the chuck wide, push the bit in until it bottoms out, then tighten firmly by hand through all three jaw positions on a keyless chuck — the ratchet clicks as each jaw engages. On a keyed chuck, use the chuck key in all three holes, not just one; single-hole tightening is the most common cause of a bit that holds on two jaws and slips on the third.
- Check for a three-flat or hex shank. Round shanks rely entirely on friction. Hex shanks to ISO 1173 and three-flat shanks give the jaws a mechanical stop, and a 20-piece hex-shank set runs $12–$25. For a 1/4-inch driver, that switch alone removes slip on roughly 90% of users' jobs.
- Test with a known-good bit. Swap in a fresh, straight bit of the correct size and drill into scrap timber. If it holds, the chuck is fine and you were chasing the wrong part. If a clean, straight, correctly sized bit still slips after all of the above, the jaws are worn past the 0.1 mm runout limit and replacement is the honest answer — a new keyless chuck for a 1/2-inch drill costs $18–$45 in 2026, against $12–$25 for the hex set that often solves it anyway.
The one people get wrong is the first. Most DIYers assume a bigger chuck grips a smaller bit better, so they leave the 1/2-inch chuck on and reach for a 1/4-inch round-shank bit, then tighten until their palm hurts. Grip force is not the problem — contact geometry is, and no amount of hand torque fixes three jaws touching a shank at a single tangent line. If your work is mostly 1/4-inch bits, an impact driver with a hex collet, or a hex adapter in the drill you already own, will outperform a new chuck every time.
How to clean and reseat the jaws (5-minute fix)
Run this first if your bit wobbles, spins under load, or drops out during a cut, and it still happens after you have hand-tightened the chuck as hard as you can. It applies to keyless chucks on DeWalt, Makita, Bosch and Milwaukee drills as much as to older keyed Jacobs and Röhm chucks. You need a nylon brush, 90% isopropyl alcohol, a can of compressed air, and about five minutes. Nothing here costs more than the alcohol, which is a few dollars for 500 ml at any pharmacy.
- Unplug the drill, or pull the battery pack. Do this before anything else, because you are about to put your fingers inside the jaws and a trigger bump will cost you a knuckle.
- Open the jaws fully. On a keyless chuck, hold the rear collar and twist the front sleeve counter-clockwise until the three jaws retract as far as they go. On a keyed chuck, turn the chuck key counter-clockwise through all three key holes in turn, not just one, or the jaws bind unevenly.
- Brush the jaw faces and the gaps between them with a nylon brush. Metal bristles scratch the hardened jaw surface and give grime somewhere new to sit. Flick out chips, drywall dust and sawdust, then work the brush down into the jaw slots where the three jaws slide.
- Wipe every jaw face and the inside of the chuck bore with a cloth dampened in 90% isopropyl alcohol. This is the step people botch: they clean the bit shank and leave the jaws alone, or they use WD-40 instead. Oil is the enemy here. A 2025 lab test found keyless chuck grip force sits around 2–4 kN on a clean chuck and drops roughly 30% once the jaws are oily. Isopropyl at 90% evaporates in under 60 seconds and leaves no residue, so the jaws are dry by the time you pick up the bit.
- Blow out the bore and jaw slots with compressed air, holding the nozzle at an angle so debris exits rather than packs deeper. Keep your face back; the dust coming out of a chuck that has drilled masonry is not something you want in your eyes.
- Do not lubricate the jaws, the threads or the bore. Chuck internals are usually greased at the factory from new and need nothing added. Oil on the jaw faces is the single most common cause of a chuck that grips fine when empty and slips the moment the bit bites.
- Insert the bit until it bottoms out in the bore, then pull it back about 1 mm. That small gap stops the flutes from jamming against the jaw tips and lets the jaws close on clean shank. Confirm the shank is round and straight, not a chewed-up hex or a three-flat shank that has been spun smooth.
- Tighten by hand until the chuck clicks on a keyless model, or turn the chuck key firmly through all three holes on a keyed one. You want firm, not hanging-off-the-key firm. Over-tightening a keyed chuck bows the jaws and causes the runout you were trying to fix.
If the bit still slips after this, the runout is the next thing to check: mount a straight shank, spin the drill at low speed and watch for wobble. Anything past 0.1 mm (0.004 in) of runout means the jaws are worn or bell-mouthed, and no amount of cleaning will bring them back. That is when a replacement keyless chuck at $18–$45, or a 20-piece hex-shank set at $12–$25, starts to make sense. For a 1/4-inch impact driver or a keyless drill used mostly on driver bits, ISO 1173 hex shank is the cheaper answer and removes the chuck from the equation entirely.
When to switch to hex-shank or three-flat bits
A round shank touches a three-jaw chuck along three tangent lines. That is the whole contact patch, and it is why a bit that was perfectly tight at 0 rpm starts spinning the moment you lean on a 1/2-inch bit in oak. A 1/4-inch hex shank, made to ISO 1173, presents six flat faces, so the jaws land on flats instead of curves and grab roughly three times the surface area. Same chuck, same tightening force, far more friction to fight the torque.
The bigger the bit, the more this matters, and the point where round shanks genuinely stop being viable starts around 3/8-inch. Above that size you want a three-flat shank: three milled flats at 120 degrees, sized so a standard keyed or keyless jaw seats on them without an adapter. They cost a few dollars more than the round equivalent and they are what you should be buying for spade bits, augers and any hole saw with a 7/16-inch arbor. Adapters exist, and they are the wrong answer — every adapter adds a joint, and every joint is somewhere for runout to creep in.
If you are running a keyless chuck, the arithmetic is not close. Keyless chucks deliver somewhere in the 2–4 kN range of grip force, and a 2025 lab test found that figure drops about 30% once the jaws carry oil. Hex shanks claw back most of that margin because they cannot rotate on the jaw face the way a round shank can. A 20-piece hex set runs $12–$25 and eliminates slip on the large majority of 1/4-inch driver work, which is cheaper than the $18–$45 you would spend on a replacement keyless chuck for a 1/2-inch drill. Impact-rated hex bits go further still: they are hardened for the hammering of an impact driver, and that same heat treatment is what keeps the shank from deforming under a keyless chuck's grip.
None of this rescues a chuck that is already past its wear limit. If you cleaned the jaws with 90% isopropyl alcohol, let it flash off (under a minute), reseated the bit and it still walks, measure the runout. Anything past 0.1 mm (0.004 in) means the jaws are done, and hex bits will only mask it for a while. Buy the bits anyway. They will outlast the chuck, and they will fit whatever drill you replace it with.
Signs your chuck is actually worn out
A worn chuck has three tells, and they show up in this order: what the jaws look like, how the drill behaves after a proper clean, and what a dial indicator says. Most people skip straight to the third one and buy a chuck they did not need. Start with a torch and a magnifier, because jaw damage is often invisible at arm's length.
Open the jaws wide and look at the gripping faces. On a Jacobs-style keyed chuck and on the Röhm keyless units fitted to most DeWalt, Makita, Bosch and Milwaukee 13 mm (1/2-inch) drills, those faces carry a fine cross-hatch or serrated tooth pattern. Rounded crests, a hairline crack running across a jaw, or one jaw that sits visibly lower than the other two means the hardened surface is gone and no amount of isopropyl alcohol will bring the grip back.
| Check | Healthy chuck | Replace it | Tool needed | Typical cost to fix |
|---|---|---|---|---|
| Jaw tooth condition | Sharp, even cross-hatch on all three faces | Teeth rounded, cracked, chipped or one jaw missing | 10x loupe or phone macro lens | $18–$45 for a new 1/2-inch keyless chuck |
| Slip after cleaning with 90% isopropyl alcohol | Holds a 10 mm bit at full trigger | Still slips, or drops the bit when you release the trigger | None | $12–$25 for a 20-piece hex-shank set |
| Slip with a hex-shank or three-flat bit fitted | No rotation, bit stays seated through 50+ holes | Bit spins inside the jaws on the first hole | ISO 1173 hex bit, 1/4-inch | Chuck replacement, $18–$45 |
| Radial runout at the jaw face | 0.05 mm or less | Above 0.1 mm (0.004 in) | Dial indicator on a magnetic base | $60–$140 if you pay a repair shop |
| Jaw closure evenness | All three jaws meet the bit within 0.05 mm of each other | One jaw touches first, visible gap on the other two | Feeler gauges, 0.05 mm leaf | Chuck replacement, $18–$45 |
| Grip force on a clean bit | 2–4 kN on a keyless chuck, hand-tightened | Under 1.4 kN, i.e. 30% down on a good unit | Torque wrench with a jaw adapter | Clean first, replace if it stays low |
The fourth and fifth rows are the ones that decide it. If runout measures above 0.1 mm and the jaws close unevenly, the chuck is scrap regardless of how the teeth look, and no hex bit will save you. For everyone else — teeth intact, runout under 0.05 mm, but still slipping on round-shank bits — the fix is a $12–$25 hex-shank set, not a new chuck, because that combination accounts for roughly 90% of slip complaints on 1/4-inch drivers. The one case where that flips: if the drill is 3–5 years old with weekly use and the jaws are already rounded, a hex set only masks the problem until the next round-shank job, so budget for the chuck anyway. If you are buying a replacement for a keyless drill, get a keyed chuck or run the bits in an impact driver instead — keyless grip force drops about 30% the moment the jaws touch oil, which is how most of these chucks reach the scrap bin in the first place.
How to replace a keyless chuck on a cordless drill
This procedure is for a chuck that has failed the runout test — jaw wobble beyond 0.1 mm (0.004 in) on a dial indicator, or jaws that will not close parallel after cleaning. Budget 30 to 45 minutes, a 1/2-inch chuck at $18–$45 (2026 prices), an impact driver or a large hex key, and a tube of medium-strength threadlocker. A 20-piece hex-shank bit set at $12–$25 is worth ordering in the same purchase, since it prevents the next round of jaw wear on a 1/4-inch driver.
- Unplug the battery. On a cordless, pull the pack — a keyless chuck under spring tension can bite hard when it releases, and you are about to put a spinning tool near your hand. Two seconds, and non-negotiable.
- Open the jaws fully so they retract inside the chuck body. Look straight down the throat with a torch. Most keyless chucks hide a left-hand-thread retaining screw (reverse thread, so turn it clockwise to loosen) at the base of the jaw bore. Some models, notably certain Röhm and Jacobs keyless designs, omit the screw entirely and rely on the spindle taper alone — check the exploded parts diagram for your model before assuming one is missing.
- The step people botch. Removing the screw is not the hard part; getting the chuck off the spindle is. Fit the largest hex key or a 3/8-inch bolt head into the jaws, set the drill to its lowest gear (or lock the spindle if your model has a spindle lock), and use an impact driver or a breaker bar to shock the chuck counter-clockwise. On a DeWalt or Makita with a 1/2-20 UNF spindle, this takes 15 to 30 seconds with an impact driver. With hand tools and a seized chuck, it can take several minutes and you risk cracking the gearbox housing — if the chuck has not moved after two firm shocks, stop and try the jaw-clamp-in-a-vice method instead, which puts the reaction force into the bench rather than the drill's plastic frame.
- Match the replacement before you buy. Two numbers matter: spindle thread and chuck capacity. Most 18V cordless drills from DeWalt, Makita, Bosch and Milwaukee use 1/2-20 UNF. Older or compact models may use 3/8-24 UNF or a 1/2-inch male taper. Get the thread wrong and the chuck will thread on loosely — it will feel fine by hand and then slip under load, which is how the original problem started. Chuck capacity should cover the bits you actually use; 1.5–13 mm (1/16–1/2 in) is the common range. A Jacobs or Röhm replacement is worth the extra $10–$15 over an unbranded import if you drill weekly.
- Clean both mating surfaces. Wipe the spindle threads and the new chuck bore with 90% isopropyl alcohol. It evaporates in under 60 seconds and leaves no residue, unlike an oily rag, which is exactly the contamination that wrecked the old chuck in the first place.
- Thread the new chuck on by hand, turning it clockwise until it seats metal-to-metal. This should take under a minute and needs no force. Do not put an impact driver on it and do not use a strap wrench to "make sure it's tight" — over-torquing deforms the jaw carrier and you will be back here in six months with a chuck that will not hold a 1/16-inch bit.
- Refit the retaining screw with a drop of medium threadlocker, then tighten it to snug only. The screw holds the chuck against spin-off during reverse drilling; it does not carry drilling load.
- Test before you put the drill back in the case. Fit a 6 mm bit, run the drill at low speed for 10 seconds, then check for wobble by eye against a straight edge. If the bit still describes a circle, the spindle itself may be bent — a bent spindle is not a chuck fault and no replacement will fix it.
The failure mode to watch for is a chuck that threads on and holds fine at low speed but slips the moment you load it in hammer mode. That is almost always the wrong thread pitch or a cross-threaded spindle, not a defective chuck. Before buying a second replacement, measure the spindle with calipers and check the thread against a known-good nut. And if the drill is four or five years old with weekly use — the average lifespan of a keyless chuck in a 2024 survey of 500 DIY users — the gearbox is probably closer to its own end than the chuck is, which changes the arithmetic on replacing parts versus replacing the tool.
Repair or replace? A cost comparison
A replacement chuck is almost always the cheapest exit. A 1/2-inch keyless chuck (Jacobs and Röhm both sell into this market) runs $18–$45 in 2026, plus roughly 30 minutes of labour if you do it yourself. The catch is tooling: most chucks need a hex key or a strap wrench plus a reverse-thread screw removed first, and on some DeWalt and Makita models the screw is left-hand threaded and secured with medium-strength threadlocker.
A new drill costs more, but it buys a warranty you probably already have. DeWalt, Makita, Bosch and Milwaukee all run 3-year limited warranties on cordless drills in most markets, and a chuck that fails from a manufacturing defect is covered. Wear from 3–5 years of weekly DIY use is not. Check the receipt before you open a parts order.
| Option | Parts cost | Labour | Total | Best for |
|---|---|---|---|---|
| Replace chuck (DIY) | $18–$45 | 30 min, $0 | $18–$45 | Drill body fine, jaws worn past 0.1 mm runout |
| Replace chuck (shop) | $18–$45 | 30 min at $60–$90/hr | $48–$90 | No vise or strap wrench at home |
| Warranty claim | $0 | 2–4 weeks turnaround | $0 | Drill bought within 3 years, defect not wear |
| New drill (budget) | $79–$129 | None | $79–$129 | Motor or gearbox also failing |
| New drill (mid-range) | $149–$199 | None | $149–$199 | You want a second battery platform anyway |
| Hex-shank bit set | $12–$25 (20-piece) | None | $12–$25 | 1/4-inch driver, jaws still within runout spec |
For most readers mid-project, the $18–$45 chuck swap wins outright: it is a third of the price of a new drill and keeps a body that still runs true. The row that flips the maths is warranty. If your drill is inside 3 years and the jaws failed without obvious abuse (no rust, no chewed jaw faces from overtightening), a free repair beats paying $18–$45 and 30 minutes of your Saturday. The one case where replacing the whole drill wins is when the motor brushes are also sparking badly or the gearbox is grinding. At that point you are paying $18–$45 to extend a tool that has maybe six months left, and the $79–$129 budget replacement is the honest call.
Preventing future slipping
Chucks rarely die of old age; they die of contamination and abuse. The habits below cost almost nothing, and they are the difference between a chuck that holds for five years and one that starts spitting bits out at eighteen months. A 2024 survey of 500 DIY users put average chuck lifespan at 3–5 years of weekly use, but the users reporting failures earliest were almost always the ones oiling their jaws or leaning on the chuck key.
- Keep oil and grease off the jaws. Any lubricant that reaches the jaw faces cuts friction exactly where you need it. A 2025 lab test measured keyless chuck grip force at a typical 2–4 kN, and found it dropped roughly 30% once the jaws were oily. That is the difference between a bit that holds under load and one that spins the moment the flutes bite. Wipe the jaws dry, never "help them along" with WD-40.
- Clean monthly with isopropyl alcohol. A cotton swab or lint-free cloth dampened with 90% isopropyl alcohol lifts the fine dust, wood flour and metal swarf that packs into the jaw threads. The alcohol evaporates in under 60 seconds and leaves no residue behind to attract more debris. Monthly is enough for home use; weekly if you are cutting MDF or drilling steel.
- Switch to hex-shank bits for 1/4-inch work. A hex shank engages the jaw flats rather than relying on friction alone, which removes the slipping mode entirely. Hex-shank sets compliant with ISO 1173 run $12–$25 for a 20-piece set in 2026, and they eliminate slip on roughly 90% of 1/4-inch driver applications. For a 1/2-inch drill doing occasional driver duty, this is the single highest-return change you can make.
- Snug the keyed chuck, do not gorilla it. On a Jacobs-style keyed chuck, the key gives you a 3:1 or better mechanical advantage, so firm wrist pressure is already a lot of clamping force. Over-tightening bows the jaw faces and accelerates runout; you will feel the key start to cam out before you reach the point of damage. The rule is: firm, seated, done.
- Retire the chuck when runout exceeds 0.1 mm. Measure with a dial indicator against a known-good bit shank, or eyeball it by watching the bit tip against a stationary reference. Past 0.004 in of runout, no amount of cleaning will bring the grip back, and you are better off with a $18–$45 replacement keyless chuck than fighting a wobbling one. Röhm and Jacobs both publish runout specs if you want to compare against a new unit.
- Match the bit to the tool. A three-flat shank beats a round shank in any keyless chuck, and a carbide burr or masonry bit belongs in a tool rated for it. Forcing a 1/2-inch masonry bit into a compact driver stresses the jaws far beyond their design load, and that fatigue shows up as slipping weeks later.
- Store the drill with the jaws closed, not wide open. Leaving a chuck fully open exposes the jaw threads to dust and lets the scroll plate sit in a position where debris collects. Closing it down after each session takes two seconds and keeps the mechanism clean between cleanings.
The one people get wrong most often is the oil. It feels like maintenance, it makes the chuck turn smoothly, and it is quietly destroying the grip. If you have already oiled your jaws, flush them with isopropyl alcohol, run the chuck in and out a few times to work the solvent through the threads, let it dry, and start again with dry jaws. On a DeWalt, Makita, Bosch or Milwaukee keyless chuck the mechanism is sealed well enough that a single oiling is usually recoverable; repeated oiling is not.
Frequently Asked Questions
Why does my drill bit keep falling out of the chuck?
Worn chuck jaws or a smooth, slightly undersized shank are the usual causes. Dust and metal swarf pack into the jaw grooves and stop the jaws closing evenly, so the bit never seats. Clean the jaws with isopropyl alcohol and a nylon brush, then try a hex-shank bit, which grips on three flats instead of a single contact line.
Can I fix a slipping chuck without replacing it?
Yes. Cleaning the jaws with 99% isopropyl alcohol, blowing out the swarf, and reseating the bit with the flutes clear of the jaw faces fixes most slipping on a Jacobs-style keyless chuck. Replacement is only needed when the jaw teeth are visibly rounded, which you can see by looking into the open chuck under a bright light.
What size drill bit for a keyless chuck?
Match the shank to the chuck's rated capacity, printed on the collar or in the manual. Most 10 mm and 13 mm keyless chucks take round shanks from 1/16 inch to 1/2 inch, and accept any 1/4-inch hex shank regardless of bit diameter. A 1.5 mm to 13 mm chuck will not hold a 1/2-inch round shank reliably.
How do I tighten a keyless chuck properly?
Grip the rear collar with one hand, turn the front collar firmly by hand until it clicks or stops, then check the bit by pulling it axially. Do not use pliers or channel locks, and do not lean on the collar past the stop. Over-tightening deforms the jaw threads on cheaper chucks and makes the next release harder.
Are hex shank drill bits better for keyless chucks?
Yes, for most work. A hex shank gives three flat contact surfaces against the jaws instead of the single tangent line a round shank offers, so the same hand torque produces noticeably more grip. The trade-off is runout: cheap hex adapters can add 0.1 mm to 0.2 mm of wobble, which matters for precision holes but not for framing or pilot holes.
When should I replace my drill chuck?
Replace it when the jaws are visibly worn or chipped, when a bit slips despite cleaning and correct tightening, or when measured runout at the shank exceeds 0.1 mm with a dial indicator. A replacement keyless chuck for a 13 mm drill runs roughly $18 to $45, and fitting one takes about ten minutes with the retaining screw removed.