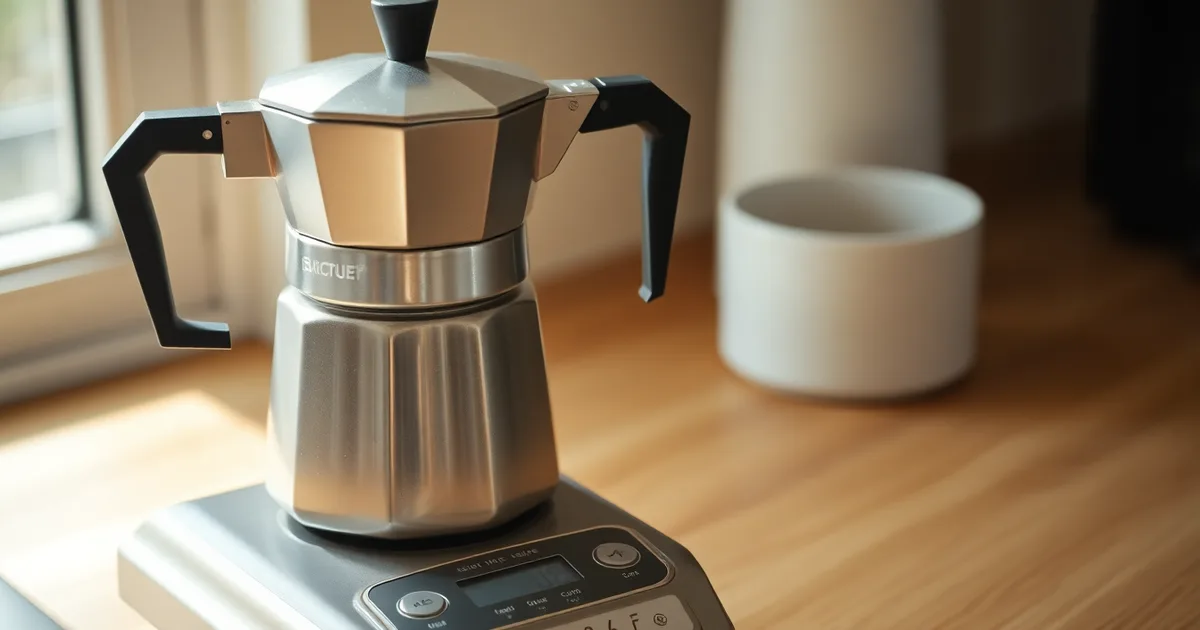
For a classic 3-cup moka pot, aim for a 1:10 to 1:12 coffee-to-water ratio by weight, roughly 15–18 g of medium-fine coffee to 150–180 g of water. Fill the basket level without tamping, keep water below the safety valve, and brew on medium-low heat.
Most moka pot complaints trace back to a single mismatch. A 3-cup Bialetti-style pot holds about 150–180 g of water, but its basket comfortably holds 20–22 g of coffee if you pile it in and press it down. That lands you somewhere near 1:7, and the result is a brew that tastes both harsh and thin, because the water never gets through the puck evenly. People blame the pot, buy a different one, and repeat the mistake.
The grind matters as much as the ratio. Target 400–600 microns: finer than drip, coarser than espresso. Too fine and you get the sputtering, spitting finish that most people describe as a "blown" moka pot; too coarse and the water races through in seconds and leaves you with something closer to weak drip coffee.
One caveat worth stating plainly: if you are brewing a dark, oily roast, push toward 1:12 rather than 1:10, since those beans extract fast and go bitter at higher doses. Medium roasts generally sit comfortably at 1:10 or 1:11, and light roasts often need the stronger end of the range to avoid tasting flat.
- 3-cup ratio: 15–18 g of coffee to 150–180 g of water, which is a 1:10 to 1:12 ratio by weight.
- Grind target: 400–600 microns, finer than drip but coarser than espresso.
- Never tamp: fill the basket level and leave it loose; tamping raises pressure and causes channeling.
- Water level: keep it just below the safety valve, or steam replaces water and scalds the grounds.
- Stop signal: pull the pot off the heat when the flow turns pale yellow and starts to sputter.
What is the best coffee to water ratio for a moka pot?
By weight, aim for 1:10 to 1:12 coffee to water. That is a much tighter, denser brew than a drip machine (typically 1:15 to 1:17) because a moka pot pushes water through the puck at only 1–2 bar instead of the 9 bar of an espresso machine. Less pressure means less water forced through each gram of coffee, so you need more coffee to extract properly. A standard 3-cup Moka Express holds roughly 150–180 g of water, which puts the dose at 15–18 g of ground coffee. Scale it up for a 6-cup pot: 30–36 g of coffee against 300–360 g of water.
The ratio is set by two things you control directly. First, the coffee dose: fill the basket level to the rim, then level it off with a flat edge — do not tamp it, and do not mound it into a dome. Second, the water amount: fill the base chamber to just below the safety valve, never covering it. The basket itself is not the measuring device people assume it is; fill it level every time and let the water line in the base do the rest. A 3-cup basket packed level with a medium-fine grind lands in that 15–18 g window almost by design.
Why tablespoons will not get you there
A level tablespoon of coffee holds somewhere between 5 g and 9 g depending on grind and roast. Finer grounds pack tighter and weigh more per spoon; a dark, oily Lavazza roast settles differently from a light, dense single origin. Across a 3-cup dose that is a swing of 10 g or more — enough to jump you from a balanced 1:11 to a thin, over-extracted 1:16 without changing a single other variable. A scale that reads to 0.1 g removes the guesswork entirely and costs less than a bag of beans. Weigh the water too, or at minimum weigh the dose and trust the chamber's fill line.
Get the ratio wrong on the low-coffee side and you get sour, weak, gushing coffee — the water races through with nothing to resist it. Too much coffee and the puck chokes, pressure spikes, and the brew spurts and stalls before it finishes. Start at 1:11, keep the grind at roughly 400–600 microns on a burr grinder like a Baratza Encore, and adjust in 1 g steps from there.
How does moka pot size change the coffee and water amounts?
The number stamped on a moka pot is a lie told in espresso cups. A "3-cup" Bialetti Moka Express does not make three mugs of coffee; it makes about 90–100 g of brewed coffee, which is three 30 ml espresso-style servings or one generous mug. That mismatch is why so many people underdose their pot and then wonder why the result tastes like hot brown water.
Weigh both sides. Water goes into the boiler, coffee goes into the basket, and the ratio between them should land between 1:10 and 1:12. The table below uses 1:11 as the working midpoint, which suits most medium roasts and most palates. Yields assume you stop the brew when the stream turns pale yellow, which typically costs you 10–15 g of water left behind in the boiler.
| Moka pot size | Water capacity (g) | Coffee dose (g) | Typical yield (g) |
|---|---|---|---|
| 2-cup | 100–120 g | 9–11 g | 70–85 g |
| 3-cup | 150–180 g | 15–18 g | 110–130 g |
| 4-cup | 200–220 g | 18–22 g | 150–170 g |
| 6-cup | 300–330 g | 30–36 g | 230–260 g |
| 9-cup | 440–480 g | 44–52 g | 340–380 g |
The 3-cup row is the sweet spot for a single drinker: 15–18 g of coffee is one heaped tablespoon-and-a-half, cheap enough that a $14 bag of Lavazza Crema e Aroma lasts about ten brews, and small enough that a Baratza Encore set to 12–14 grinds the whole dose in under eight seconds. The 6-cup wins for two people or for anyone who wants leftovers for a cold coffee the next morning, because running a 3-cup pot twice costs you double the heating time (4–6 minutes each) and double the gasket wear. The flip case is a 9-cup pot bought for a single person. Forty-four grams per brew is roughly $1.60 of coffee at specialty prices, and unless you drink 340 g of coffee in one sitting, you are pouring most of it down the sink.
Volume-based scoops and the "just fill the basket" instruction circulating on most Bialetti packaging are the reason ratios swing so wildly in practice. A level basket of coarse grounds can weigh 10 g while the same basket packed with a fine grind hits 20 g, which against 160 g of water is a ratio anywhere from 1:8 to 1:18. Buy a $20 kitchen scale that reads to 0.1 g and use it on both the water and the coffee. That single change does more for consistency than any grinder upgrade under $200.
What grind size stops a moka pot from being bitter or weak?
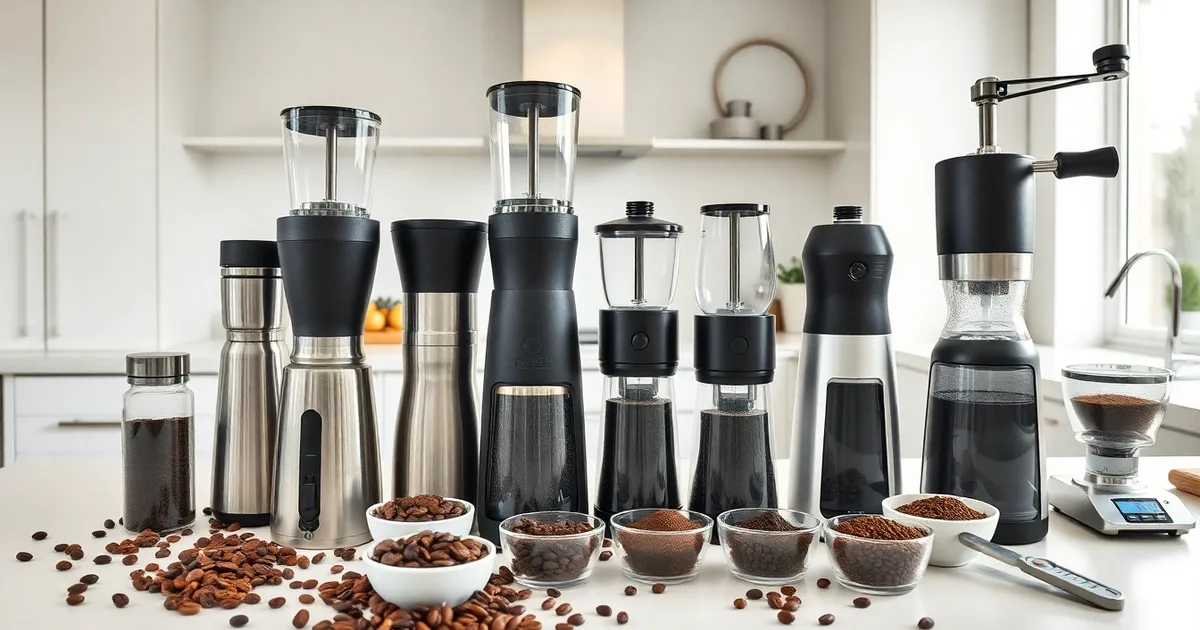
Target 400–600 microns. That band sits between drip and espresso: finer than the 600–900 microns you would use in a batch brewer, coarser than the 200–300 microns a real espresso machine wants. If you have a burr grinder with numbered settings, it is usually two to four clicks coarser than your espresso setting — on a Baratza Encore, start around 8–10 and adjust from there. A moka pot runs at just 1–2 bar, while espresso pushes 9 bar, so the puck does not need the same resistance to build pressure. Grinding that fine to compensate for the pot's lower pressure is the single most common cause of a bitter, sputtering brew.
What goes wrong at the extremes is not subtle. Too fine, and the coffee bed packs tight enough that water finds the path of least resistance, perforating the puck in a few channels; those channels over-extract while the rest of the bed barely gets wet, and you get bitterness and sourness in the same cup, plus steam forcing its way through and making the pot spit. Too coarse, and water runs through in under four minutes with almost no resistance, leaving you with a thin, sour, under-extracted cup that tastes weak no matter how much coffee you loaded. Both failures feel like the pot's fault. Neither is.
If you are buying pre-ground, this problem is already solved for you. Lavazza's Qualità Rossa and illy's Moka ground coffee sit inside that 400–600 micron window, because their grinders are calibrated for stovetop brewers rather than espresso machines. Bags labelled "moka pot" or "percolator" grind are the safe default; bags labelled "espresso grind" are not, even though every Moka Express is sold as a "stovetop espresso maker." Skip the blade grinder if you have one — it produces a mix of dust and boulders, and the dust fraction alone will channel on you regardless of your average setting.
How to brew moka pot coffee without sputtering
This applies to any classic stovetop moka pot: a 3-cup Moka Express, a 6-cup, or one of the stainless versions that have mostly replaced aluminium since Bialetti started selling them in 2026. You need a burr grinder, a scale reading to 1 g, and a kettle or a way to heat water separately from the pot. Gas and electric coil both work; induction does not, unless the pot is marked for it.
Sputtering is a plumbing problem, not a coffee problem. Steam finds a path past the gasket or through a channel in the puck and blows the remaining water up the funnel in bursts. Everything below exists to keep the bed intact and the pressure under roughly 1–2 bar.
- Weigh the water first. A standard 3-cup pot takes 150–180 g; a 6-cup takes roughly double. Weigh it rather than filling to the valve, because "just under the valve" varies by 20 g between pots and that variance is enough to change the brew.
- Heat that water separately to 80–90°C (176–194°F). A kettle with a temperature hold is easiest. If you have no thermometer, boil and let it sit 90 seconds. Cold water in the base is what scorches grounds: the metal gets hot long before the water does, and the coffee sitting in a hot empty basket loses its aromatics before extraction even starts.
- Grind 15–18 g for a 3-cup, 30–36 g for a 6-cup, at medium-fine. Target 400–600 microns, which on a Baratza Encore sits around setting 8–10. It should feel like fine sand, clump slightly when pinched, and hold a fingerprint. Finer than that and the pot stalls or chokes; coarser and water rips through in under two minutes.
- Fill the basket level and do not tamp. Distribute with a shake or a needle, then level the surface with a flat finger. Tamping compacts the puck, raises the pressure needed to push water through, and is the single most common cause of a stalled brew that then erupts. Wipe the rim and the threads with a fingertip so no grounds sit in the seal.
- Screw the top on firmly, holding the base with a cloth. It needs to be snug, not gorilla-tight. A worn gasket is the other leak path; they cost a few dollars and last roughly a year of daily use, less if you habitually overtighten.
- Set the pot on medium-low heat, not high. On a domestic gas hob that is a flame that just reaches the base edge. High heat does not speed up a good brew, it only raises the temperature of the metal and pushes the pressure up.
- Leave the lid open for the first brew on a new pot so you can watch the flow. Coffee should appear after 4–6 minutes and run as a thin, dark, honey-like stream that fills the upper chamber in 30–45 seconds.
- Pull it off the heat the moment the stream turns pale yellow-blonde and starts to spit. That is the end of the useful extraction. Everything after it is water and bitterness.
The failure mode here is the second half of step 8: people leave the pot on because the coffee looks thin, the flow accelerates, and by the time they lift it the upper chamber is full of pale, sputtering liquid at 100°C that has been dragged through spent grounds for a full minute. The brew tastes simultaneously bitter and weak, which is exactly the combination that sends people out to buy an AeroPress. Stir the pot once before pouring, since the first liquid out is stronger than the last, and rinse the gasket under the tap while the metal is still warm.
Why does my moka pot sputter and spurt?
Sputtering is not a quirk of the pot. It is the sound of steam escaping through the coffee bed instead of water, which means the last third of your brew is being pushed through by vapour at 100°C-plus rather than liquid water at 1–2 bar. Steam extracts differently: it scorches, it channels, and it leaves you with a cup that tastes both burnt and thin at the same time. Five things cause it, and four of them are yours to control.
- Water filled above the safety valve. On a standard 3-cup Moka Express the boiler holds 150–180 g of water and the valve sits a few millimetres below the rim. Fill past it and there is nowhere for the air trapped above the waterline to go except up through the coffee, which it does at pressure. Fill to just under the valve, every time, and weigh it once so you know what "just under" looks like.
- A grind too fine for the basket. Medium-fine for moka sits around 400–600 microns, coarser than espresso and finer than AeroPress. Go finer, into the 200–300 micron espresso range, and the bed becomes a plug: pressure builds behind it until it finds a crack, and the brew surges. If your Baratza Encore is set at 8 for espresso, moka wants roughly 12–14.
- Tamping. The moka pot basket is not a portafilter. Tamping compresses the puck and closes the gaps the water needs to move through evenly. Level the dose with your finger or a light shake, leave it loose, and let the geometry of the basket do the work. A 15–18 g dose in a 3-cup basket should look full but feel soft.
- Heat set too high. Blasting a moka pot on a gas ring at maximum gets you a sputter in about 90 seconds. The target is 4–6 minutes on medium-low, with the flame or ring smaller than the base of the pot so the sides do not overheat. If you hear a fast, angry hiss rather than a slow gurgle, the heat is the problem, not the coffee.
- An old or hardened gasket. The silicone or rubber ring inside the top chamber is a wear part. After 12–18 months of daily use it goes brittle, stops sealing against the filter plate, and water bypasses the basket entirely, running down the outside of the pot or jetting out the spout. Replacements cost a few euros or dollars and take two minutes to fit.
- Starting with cold water on high heat. Cold water means more time on the burner, which means more heat soaked into the metal and a runaway brew once it finally gets going. Preheating to 80–90°C (176–194°F) in a kettle shortens the window considerably and gives you far more control over when the flow starts.
- A pot screwed together too loosely. Not a sputter cause on its own, but a loose top chamber leaks pressure at the threads and lowers the effective brewing pressure below the 1–2 bar the design needs. Hand-tight is enough. Do not use a cloth and torque it down.
The mistake people make most often is treating the sputter as the signal that the brew is finished. It is the signal that it went wrong about 90 seconds ago. By the time you hear that rush, steam is already in the bed and the damage is done for this cup. The fix is upstream: coarser grind, no tamp, water just below the valve, and a burner low enough that you can hold your hand near the pot without pulling away. James Hoffmann has demonstrated the preheated-water version of this repeatedly, and the result is a slower, quieter, sweeter brew with a visible stream rather than a spray. If your pot still sputters after all four adjustments, the gasket is the last suspect, and it is the cheapest one to rule out.
Should you use preheated water in a moka pot?
Start with water at 80–90°C (176–194°F). Fill the base to just under the safety valve, screw the top on with a cloth or towel, and put the pot on medium-low heat. The reason is simple arithmetic: a moka pot at 1–2 bar is not extracting under pressure the way an espresso machine does, so most of what you taste is the result of how long the grounds sit in contact with hot water. Cold water means the grounds spend the first two or three minutes of a 4–6 minute brew being warmed by steam rather than extracted evenly. That extra time pulls out the harsh, woody compounds that read as bitterness.
The counterargument, and it is a real one among Italian households and the r/coffee crowd, is that cold water gives a slower, gentler ramp that produces a rounder cup. Bialetti's own instructions on the Moka Express have said cold water for decades. James Hoffmann tested this on camera and came down on the side of preheating, and the mechanism supports him: the difference is not a matter of taste preference but of how much time the coffee spends above roughly 90°C before the brew finishes. Cold water shortens the window in which the puck is at a stable temperature, which is why cold-start brews often taste simultaneously sour and scorched.
The failure mode nobody warns you about
Scorching is the reason cold-start brews go wrong so often. With cold water the pot has to sit on the burner long enough to heat 150–180 g of water in a 3-cup model, and if the flame is high because you are impatient, the aluminium base gets well past boiling while the grounds are still dry. That is where the burnt rubber taste comes from, and it is not a defect in the pot. Preheated water cuts the on-stove time to somewhere near the 4–6 minute target on medium-low heat, so the base never has a reason to run hot. If you are using a 6-cup pot with 30–36 g of coffee, preheating matters more, not less, because the larger thermal mass takes longer to come up to temperature.
One practical caveat: do not use boiling water. At 100°C the water flashes to steam as soon as it hits the funnel, and you get exactly the sputtering, uneven extraction that this whole exercise is meant to avoid. Let the kettle sit for 30–60 seconds after it switches off, or use a thermometer. And if you are weighing your dose, do it before the water goes in, because the funnel gets hot fast and a hot funnel changes how the grounds settle.
What coffee-to-water ratio do baristas use for moka pot?
In specialty cafés that pull moka pots for tasting flights, the working number is 1:10 by weight. That means 15 g of coffee to 150 g of water in a standard 3-cup Moka Express, which sits just inside the 150–180 g the upper chamber holds. Push the dose to 18 g and the same pot lands nearer 1:8, which most baristas consider overextracted and muddy rather than strong. For a 6-cup pot, scale the same logic: 30–36 g of coffee against roughly 300 g of water.
James Hoffmann's published method settles on 1:10 as well, with two conditions attached. The grind has to sit in the medium-fine band, roughly 400–600 microns, and the water goes in hot — 80–90°C (176–194°F) — so the pot spends its 4–6 minutes on the stove extracting rather than heating cold water. Skip the preheat and you lose control of the back half of the brew, which is where most bitterness and sputtering originate. A Baratza Encore at setting 8–10 lands in the right particle range for most beans.
When to move to 1:12
Dark roasts are the main case for backing off. Beans from Lavazza or illy that are roasted well into second crack give up their solubles faster, and at 1:10 the cup turns ashy. Go to 1:12 and coarsen the grind by two or three clicks on the same grinder; you get a cup closer to filter strength but without the hollow finish that comes from simply adding water after brewing. Medium and light roasts, especially single-origin lots roasted for filter, usually taste flat at 1:12 — the moka pot's 1–2 bar of pressure is doing less work than an espresso machine's 9 bar, and dilution costs you the body that justifies using the pot at all.
How to measure coffee for a moka pot without a scale
A scale removes every guess from moka brewing, but plenty of kitchens do not have one yet, and you should not skip coffee because of it. Volume dosing works well enough to get you into the 1:10–1:12 range if you know what each scoop actually weighs. The numbers below assume a standard 3-cup Bialetti Moka Express with a 150–180 g water capacity, and medium-fine coffee ground to roughly 400–600 microns.
- Start with the tablespoon. One level tablespoon of medium-fine coffee weighs about 5–7 g, depending on roast level and how densely the grounds settle. Darker, oilier beans from brands like Lavazza pack heavier than a light-roast single origin, so treat 6 g as your working average.
- Scale the count to the pot. A 3-cup pot needs roughly 15–18 g of coffee, which lands at 2.5–3 level tablespoons. A 6-cup pot needs 30–36 g, or about 5–6 level tablespoons. Write the number on a sticky note and keep it on the shelf.
- Fill the basket, then level it. Spoon grounds in until the basket is heaped, then sweep a finger across the rim to knock off the excess. The basket should be full and flat, not domed.
- Never tamp. A moka pot runs at 1–2 bar, not the 9 bar of an espresso machine, so a compressed puck just chokes the flow and drives brew time past the 4–6 minute window. Pressing with a tamper is the single fastest way to make a Moka Express sputter and stall.
- Match the water line, not the scoop count. Fill the base to just below the safety valve every time, then adjust coffee to that water volume. If you change water amount, your tablespoon count has to move with it or the ratio drifts.
- Weigh the water once if you can. Even a cheap kitchen scale lets you confirm your base holds 160 g, which turns the tablespoon method from a guess into a calculation. After that, you only need the scale for coffee.
- Expect drift between bags. A scoop of coarsely ground coffee weighs less than the same scoop ground fine, and humidity changes volume by a gram or two. If a new bag tastes thin, add half a tablespoon before you blame the pot.
The mistake almost everyone makes is the flat scoop. A tablespoon dragged through a full bag compacts the grounds and can carry 9 or 10 g instead of 6, which puts a 3-cup pot at a 1:7 ratio and produces the harsh, bitter cup people blame on the moka pot itself. Scoop loose, level with a finger, and if the result tastes muddy rather than bright, that is your signal to buy a $15 scale and stop counting spoons.
When should you stop the brew on a moka pot?
Watch the stream coming out of the chimney, not the clock. For the first 30-45 seconds of flow you get a thick, dark brown rope of coffee, and that is the part you want. The moment it lightens to pale yellow-tan and the stream starts to break up, hissing and spitting instead of pouring, extraction is over. Every second past that point pulls bitter, woody compounds out of the puck and into your cup. If you have ever wondered why the last 20 ml of a moka brew tastes like burnt rubber, that is the answer.
Kill the heat the instant that pale colour appears. Lift the pot off the burner and, if you are on gas or induction, run the bottom chamber under cool tap water for 10-15 seconds. The metal is thin and holds a lot of thermal energy, so the brew keeps going on residual heat long after the flame is gone. Cooling the base drops the pressure inside and stops the flow immediately. This is the single step most people skip, and it is why two pots brewed from the same beans and the same ratio can taste completely different.
The whole thing should take 4-6 minutes from the moment you set the pot down. Start with 150-180 g of water at 80-90°C in a standard 3-cup Moka Express, add 15-18 g of medium-fine coffee, and use medium-low heat. Under four minutes means the water is being pushed through too fast, which usually comes from too high a flame, water that was already boiling when it hit the basket, or a grind that is coarser than the 400-600 micron range you want. Over six minutes and you are cooking the grounds rather than brewing them. A 6-cup pot with 30-36 g of coffee will run longer, closer to 7-8 minutes, because there is more mass to heat and more water to push through; that is normal, not a fault.
One caveat worth naming: at 1-2 bar the moka pot simply cannot generate the pressure an espresso machine uses, so "stovetop espresso" is marketing language rather than a description. You are brewing a strong, slightly cloudy concentrate, and treating it like a 9-bar shot leads people to chase flow rates that the geometry will never deliver. If your pot sputters violently within 90 seconds and the coffee tastes thin, the problem is heat and grind, not the pot itself; back the flame down and tighten the grind one notch on the burr grinder before you change anything else. Check the gasket and safety valve if the hissing starts immediately, since a hardened gasket from 12-18 months of use lets steam bypass the puck and mimics a heat problem. Replace it, run the brew again, and judge from there.
Frequently Asked Questions
What is the best coffee to water ratio for a 3-cup moka pot?
Use 15–18 g of coffee to 150–180 g of water. That is a 1:10 to 1:12 ratio, noticeably stronger than the 1:15 to 1:17 you would use for drip. A Bialetti 3-cup Moka Express holds about 150 ml of water below the valve, so start with 16 g of coffee and 170 g of water, then adjust by taste.
Weighing beats scooping here. A level 1-tablespoon scoop of medium-fine grounds lands anywhere between 5 g and 8 g depending on roast darkness and how settled the coffee is, which is a swing of 30% or more across three scoops.
How fine should coffee be ground for a moka pot?
Medium-fine, roughly 400–600 microns. That sits between drip (600–900 microns) and espresso (200–350 microns) on the standard grind scale most burr grinders publish. On a Baratza Encore the sweet spot is usually 8–12 clicks from the finest setting; on a Comandante C40, around 18–22 clicks.
You can also judge it by hand. The grounds should clump slightly when pinched, like fine wet sand, but not hold a compressed shape the way espresso does.
Why is my moka pot coffee bitter?
Bitterness in a moka pot almost always traces to too fine a grind, too high a flame, or both. Espresso-fine grounds restrict flow, so the water sits in contact with the coffee past the point where pleasant compounds have already been extracted. Drop the grind one step coarser and lower the heat so the stream emerges in a slow, dark honey-coloured trickle rather than a jet.
Brew time is the second lever. On a gas hob, total time from flame-on to the first sputter should land around 4–6 minutes. If you are finishing under 3 minutes, the heat is too aggressive.
Can I use espresso grind in a moka pot?
No. Espresso grind is too fine for the moka pot's filter plate, typically 200–350 microns against the roughly 500-micron holes. The bed clogs, pressure builds in the lower chamber, and the brew either stalls entirely or sputters out in bursts that scald the coffee. Bitterness and a metallic edge follow.
If espresso is all you have, run it through a coarser setting on the same grinder. Pre-ground espresso from a supermarket will give you a thin, harsh cup no matter what you do.
How much coffee for a 6-cup moka pot?
Use 30–36 g of coffee and 300–360 g of water. Same 1:10 to 1:12 ratio as the smaller pots, just scaled. A 6-cup Bialetti takes about 300 ml of water, so 32 g of coffee and 330 g of water is a reliable starting point. The basket should be full and level before you close it, not heaped.
Should I tamp coffee in a moka pot?
Never tamp. Fill the basket level, wipe the rim clean with your finger or a cloth, and close the pot. Tamping raises the pressure the lower chamber needs to push water through, which causes channeling, uneven extraction and, in the worst case, a seal failure that sprays hot coffee from the joint between the two halves.
The moka pot generates its own pressure, roughly 1–2 bar, well below the 9 bar of an espresso machine. The basket is a delivery vessel, not a puck.