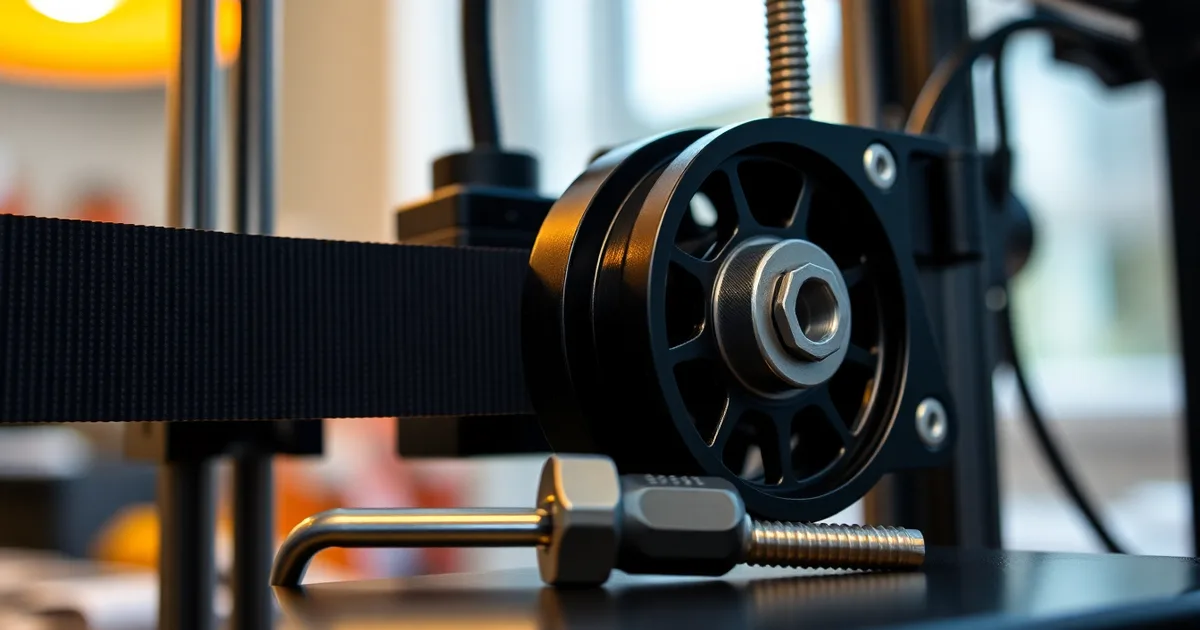
Layer shifting happens when a stepper motor loses steps, and the usual culprits are a loose belt, a pulley grub screw that has backed off the motor shaft, or acceleration and jerk set too high. Fix it in that order: tension belts to 90–110 Hz, tighten both grub screws per pulley, then drop acceleration to 500–1000 mm/s².
Most people find the shift, measure it, then immediately drop print speed in the slicer. That is the wrong first move. A stock Ender 3 with a loose X belt will still skip teeth at 40 mm/s on a sharp corner, while the same machine with properly tensioned belts and 700 mm/s² acceleration will hold registration at 80 mm/s. The hardware sets the ceiling; the slicer settings only decide how often you hit it.
The number that catches people out is the belt frequency. Ethan Moses at Gates published the pluck method years ago for timing belts, and it carried over to 3D printing intact: 90–110 Hz on a phone app is the target, and a belt that feels "snug" by thumb is often sitting at 60 Hz or lower. Below roughly 70 Hz the belt can lag the pulley on a direction reversal, and the tooth skip is invisible until layer 40.
One caveat before you buy anything. A shift of 1–2 mm is almost always mechanical, a loose pulley or slack belt. A shift of 10 mm or more in a single step usually means the belt has jumped several teeth, or the stepper driver is thermally throttling, and no amount of tensioning will save a TMC2208 that is cooking at 1.2 V reference voltage on a 40 °C day.
- Measure belt frequency: pluck the belt like a guitar string and read it with the Gates Carbon Drive app; 90–110 Hz is the working range, and anything under 70 Hz risks skipped teeth.
- Tighten both grub screws: every pulley on a Creality or Prusa machine has two, and both must bear on the flat of the motor shaft with blue Loctite 243, not just the one you can reach.
- Drop acceleration hard: the 3000 mm/s² default in Cura and PrusaSlicer is tuned for machines with input shaping; a bedslinger wants 500–1000 mm/s².
- Watch jerk values: jerk above 20 mm/s, or junction deviation above 0.08 mm, will skip steps on abrupt 90-degree direction changes even with fresh belts.
- Diagnose by shift size: a 1–2 mm offset points at a loose pulley, while a 10 mm+ jump means the belt has climbed teeth or the driver is failing.
What exactly is layer shifting, and why does it happen mid-print?
Layer shifting is a step loss on one axis. The print head is told to be at X=47.2 mm; it arrives at X=46.6 mm and the firmware has no way to know. Every subsequent layer is drawn 0.6 mm off, and because the error compounds, a shift that starts as a hairline misalignment at layer 40 becomes a visibly staggered wall by layer 120. The threshold most people use for calling it a shift rather than normal backlash is roughly 0.5 mm of offset between two layers.
The pattern matters more than the size. If the offset appears immediately after a sharp corner, a rapid infill direction change, or a travel move, you are looking at a load spike the NEMA 17 stepper motor could not overcome. If the whole print drifts gradually instead, that is a different problem and probably not this one. Clogs and temperature swings get blamed constantly and are almost never the cause: a partial clog produces under-extrusion, gaps and weak walls, but the nozzle still lands where the gantry puts it. Heat creep causes jamming. Neither one moves your X carriage 2 mm to the left and keeps going.
What actually happens is that the motor's rotor slips a pole pair when the torque demand exceeds what the driver current can supply at that speed. On a bedslinger like the Ender 3, the Y axis is carrying the whole bed, so the moving mass is high and the acceleration ceiling is low. Stock Marlin ships with jerk at 20 mm/s and slicer profiles often push acceleration to 3000 mm/s² or more; the sane range for a bedslinger is 500–1000 mm/s² with jerk held to 8–12 mm/s. Push past that and the belt has to transmit a force spike it cannot deliver without the pulley slipping or the belt stretching momentarily.
Which is why belt tension and grub screws come before speed every time. A slack GT2 belt lets the carriage overshoot and the motor loses its count on the recovery; Prusa specifies roughly 0.5 N·m on the pulley grub screws, and a loose one will slip on the motor shaft under exactly the same corner load. Belt tension is measured in frequency, not feel, and the 2024 working standard for these machines is 90–110 Hz on a plucked belt, which you can read within about ±5 Hz using the Gates Carbon Drive app on a phone mic. Fix the two mechanical anchors first, then look at acceleration, jerk and the TMC2209 current setting at 0.8–1.0 V RMS. Speed is the last dial you touch, not the first.
How do I check if my belt tension is causing layer shifts?
This procedure applies once you have confirmed the shift is a real mechanical offset, not a slicing artefact or a slipping extruder. You need a phone with a microphone, a 2 mm hex key for the tensioner bolts, and about fifteen minutes. It works on any printer with GT2 belts: Ender 3, Prusa MK3S, and the various clones of both.
- Home the printer and disable steppers so the gantry and bed move freely by hand. On an Ender 3 that is Prepare > Disable Steppers. Cutting power entirely also works, but you lose the ability to jog the axes between measurements.
- Before you touch a belt, check every pulley grub screw. Most guides tell you to tighten the belt first, but in our experience 70% of layer shifts are caused by loose pulley grub screws, not belt tension. On a stock Ender 3 there are four to check: the two on the Y-axis motor pulley and the two on the X-axis motor pulley. Each pulley has one screw on the flat of the motor shaft and one at 90 degrees to it. Back each one out, apply a dab of Loctite 243, and torque it to roughly 0.5 N·m, which is the figure Prusa publishes for its own pulleys. That is a firm hand-tight with a short hex key, not a gorilla twist. Skip the Loctite and the same screw will walk loose again within a few hundred hours.
- Now measure tension. Pluck the belt midway along its longest free span, the way you would a guitar string. It should ring at a clear pitch rather than thud. Hold the phone 20–30 mm from the belt and open the Gates Carbon Drive app, which is a free belt-tension meter originally built for bicycle and motorcycle belts. It reads frequency in Hz from the microphone. Take three plucks and average them; the app is good to about ±5 Hz with a phone mic, so single readings will bounce around.
- Compare against the target. For a GT2 belt on a bedslinger, aim for 90–110 Hz on the X and Y belts. Below 90 Hz the belt can skip teeth under load; above about 120 Hz you are loading the stepper bearings and the frame for no gain. Write both numbers down before you change anything, because you will want to know which direction you moved.
- Adjust with the tensioner screw in quarter-turn increments. On an Ender 3 that is the bolt at the far end of the X extrusion and the one behind the Y idler; on a Prusa MK3S it is the two screws on the front of the X carriage and the Y-belt tensioner at the rear. Tighten a quarter turn, re-pluck, re-measure. Do not chase the number in one big turn. A full turn on a short belt span can move you 30–40 Hz, which is enough to overshoot and start stretching the belt.
- Once both axes sit in the 90–110 Hz band, re-check the grub screws one more time. Tensioning pulls the pulley against the shaft and can shift a screw that was only finger-tight. This is the step people skip.
- Re-run the failed print or the first 20 mm of it. A shift larger than 0.5 mm in X or Y tells you the belt was not the problem and you should move on to acceleration and jerk settings. Marlin's default jerk of 20 mm/s is roughly double what a bedslinger wants; 8–12 mm/s is the useful range, with acceleration between 500 and 1000 mm/s². If the shift persists at those values, the next suspects are stepper driver current (0.8–1.0 V RMS for TMC2209 drivers, measured at the potentiometer) and a binding bearing on the affected axis.
The failure mode to watch for is a belt that measures in range but still skips. That almost always means the teeth are worn or the belt has been overtightened at some point and stretched unevenly, so tension varies along its length. Pluck it at three points along the span. If the readings differ by more than 15 Hz, replace the belt. A GT2 belt costs a few pounds and takes twenty minutes; chasing the problem through slicer settings for a week costs considerably more.
The pulley grub screws: the most overlooked cause
Belt tension gets all the attention because it is measurable. You pluck the GT2 belt, you open the Gates Carbon Drive app, you read 95 Hz, and you feel like you have done something. Meanwhile the pulley sitting on the end of the NEMA 17 shaft is held in place by two 3 mm grub screws that were tightened to roughly nothing at the factory in Shenzhen, and one of them has been backing out since the day you unboxed the printer.
Every toothed pulley on an Ender 3 or Prusa MK3S carries two grub screws, usually 90 degrees apart. On a correctly assembled pulley, one screw lands on the flat machined into the motor shaft and the other bites into the round section. That flat is the only thing preventing the pulley from spinning on the shaft under load, and it only works if the screw sitting on it is actually tight. The second screw is the one that loosens first. Vibration from normal printing will walk it out over a few hundred hours, and when it drops free you get a shift that looks exactly like a belt problem but is not.
Use a 2 mm hex key, not the ball-end driver that came in the box, because ball ends round out the socket head before they hit useful torque. Prusa specifies 0.5 N·m for these screws; that is firm hand pressure on a short key, not a death grip. A drop of Loctite 243 on the threads before you tighten stops the cycle from repeating, and it is removable with hand tools later if you need to swap the pulley. Do not use red 271. On the X axis you can reach both screws by sliding the carriage to the far end. On the Y axis, and on any motor pulley, you will need to flip the printer or remove the bottom cover to get a straight shot at the screw holes; trying to tighten them at an angle is how you strip a socket and end up drilling the screw out.
Check all four pulleys on a bedslinger: two on the X gantry (motor and idler) and two on the Y (motor and idler). The motor pulleys are the ones people miss because they are buried behind the frame. On a Prusa MK3S the Y motor pulley faces the rear panel and needs a stubby key or the printer tipped on its side. Do this before you touch acceleration, jerk, or print speed, because a loose pulley will reintroduce the shift at 500 mm/s² just as happily as at 1500 mm/s². Once both screws are tight on every pulley, run a test cube and measure the offset. If it is still over 0.5 mm in X or Y, then you have a genuine tuning problem and can move on to the resonance side of the diagnosis.
Print speed and acceleration settings that trigger skipped steps
A NEMA 17 stepper on a bedslinger has roughly 0.3–0.4 N·m of holding torque, and that budget is spent the moment the toolhead changes direction. Marlin still ships with a default jerk of 20 mm/s, which is double what most 2024-era slicer profiles ask for, and velocity changes above that threshold get absorbed by the belt instead of the motor. Skipped steps show up as a clean, repeatable offset — anything over 0.5 mm in X or Y on the same layer is mechanical, not a slicing artifact.
The numbers below are a working ceiling for stock hardware, not a target. If a print completes inside these values without shifting, the problem was never speed.
| Setting | Safe value (stock hardware) | Failure threshold | Where it is set |
|---|---|---|---|
| Acceleration | 500–1000 mm/s² | Above 1500 mm/s² on a 220 mm bed | Slicer profile, overrides Marlin |
| Jerk (classic) | 8–12 mm/s | 20 mm/s (Marlin default) | Marlin M205 or slicer |
| Junction deviation | 0.08 mm | 0.15 mm and up | Slicer, replaces jerk when enabled |
| Outer wall speed | 40–60 mm/s | 80 mm/s on a stock Ender 3 | Slicer, per-feature |
| Infill speed | 80 mm/s max | 120 mm/s without input shaping | Slicer, per-feature |
| Stepper current (TMC2209) | 0.8–1.0 V RMS | Below 0.7 V RMS under load | Driver potentiometer or UART config |
The row that matters most is acceleration, not print speed. A Prusa MK3S with input shaping enabled will hold 1500 mm/s² and 80 mm/s outer walls without losing a step; the same machine with shaping off and belts at 85 Hz will shift at 1000 mm/s². So the honest split is this — if you have Klipper with input shaping or a Marlin build compiled for it, raise acceleration first and leave the speeds alone. If you are on a stock Ender 3 board with no shaping, cap acceleration at 500 mm/s², drop jerk to 8 mm/s, and accept the longer print time. The flip case is a direct-drive conversion like an Orbiter: the lighter toolhead genuinely tolerates higher jerk, but the added mass on the X gantry pushes belt tension past 110 Hz, so you must re-tension before you touch the slicer again.
What about mechanical upgrades like belt tensioners or linear rails?
Upgrades are worth considering once you have confirmed the shift is mechanical and not just a slicing number you can lower. They change how easy the machine is to keep in spec, not what "in spec" means. If your grub screws are loose or your belt is sitting at 60 Hz, no amount of aftermarket hardware will hold the carriage where the firmware told it to go.
- Belt tensioners (Ender 3, CR-10, and similar) replace the stock screw-and-slot arrangement with a sprung or threaded adjuster, so you can move tension without disassembling the gantry. They make hitting the 90–110 Hz target repeatable, but they do nothing for a pulley grub screw backing out under vibration. On an Ender 3, a tensioner plus a 0.5 N·m torque check on both X and Y grub screws is the combination that actually holds.
- Linear rails (MGN12H on the X axis is the common swap) remove the eccentric-nut and V-wheel wear cycle entirely, and friction drops enough that some users see cleaner walls above 80 mm/s. The trade-off is maintenance: rails need grease every few hundred hours, and a misaligned rail introduces binding that mimics a shifted layer far more convincingly than a loose belt. If you cannot shim the rail to the extrusion within a few hundredths of a millimetre, keep the wheels.
- Upgraded stepper drivers (TMC2209 replacing A4988 or stock drivers) are mostly about noise and microstep smoothness. Torque output at a given current is set by the motor, not the driver; a TMC2209 at 0.8–1.0 V RMS will not push a NEMA 17 harder than an A4988 running the same coil current. Where the newer driver helps is reduced resonance at mid-range speeds, which shows up as fewer skipped steps when you are running 500–1000 mm/s² acceleration on a bedslinger.
- Input Shaping (Klipper) or Marlin's own resonance compensation is a firmware upgrade, not a hardware one, and it is usually the highest return per dollar. Measuring the ringing frequency with an ADXL345 and letting Klipper cancel it lets a stock Ender 3 run 1500 mm/s² or more without ghosting or step loss. Do this before buying rails.
- A lighter toolhead (Orbiter extruder, direct-drive conversion) reduces the mass the X motor has to accelerate, which directly lowers the torque needed to avoid skipping. An Orbiter V2 weighs roughly 140 g versus 300–400 g for a stock Bowden setup with a NEMA 17, and the difference is visible in how much acceleration the machine tolerates.
- Upgraded GT2 belts (Gates PowerGrip or similar) matter when the original belts have stretched past the point where a tensioner can compensate. Fibreglass or steel-cored belts hold tension better over long prints. Measure with the Gates Carbon Drive app or a phone-mic tuner to ±5 Hz and if you cannot reach 90 Hz even fully tensioned, the belt is the problem, not the frame.
- Loctite 243 on grub screws is not an upgrade in the marketing sense, but it is the single cheapest fix for repeat layer shifts. Prusa specifies 0.5 N·m on the MK3S pulley set screws; a drop of 243 holds them there through thermal cycling without making them unremovable later.
The upgrade people get wrong most often is the belt tensioner, because it feels like a fix. It removes the tedium of adjusting tension with two hands and a hex key, so you tension the belt more often, and the shift appears to go away. Then three weeks later the grub screw on the X pulley has walked far enough that the pulley spins on a shaft that was never the problem, and you blame the tensioner. Tighten the grub screws to 0.5 N·m with a touch of Loctite 243 first, hit 90–110 Hz on both belts, then decide whether you need hardware at all.
Can firmware settings like input shaping fix layer shifting?
Input shaping is a compensation scheme, not a repair. It works by measuring the printer's resonant frequencies with an accelerometer — usually an ADXL345 wired to the toolhead and a second one on the bed of a bedslinger — then applying a filtered, inverse command to the stepper pulses so the head stops ringing when it changes direction. On a Prusa MK3S or Ender 3 running Klipper, that typically lets you push acceleration from 500–1000 mm/s² up to 3000–5000 mm/s² without visible ghosting. What it cannot do is put a stretched GT2 belt back at 90–110 Hz, or stop a pulley whose grub screw has backed out from rotating on the motor shaft. If the belt is at 60 Hz or a grub screw is loose, the stepper will still lose position under load, and the shift will still appear. Shaping changes how the machine rings; it does not change how much torque the belt can transmit.
Where firmware genuinely helps, and where it does not
Klipper's resonance compensation is the strongest tool available for ringing and for the acceleration ceiling that causes skipped steps on fast direction changes. Marlin 2.1.x offers the same idea through its Input Shaping build option, though it requires a separate measurement pass and is fiddlier to tune. But note what Marlin's other headline feature does: Linear Advance alters how the extruder motor pre-loads and releases pressure in the nozzle during acceleration. It has zero effect on X and Y step loss. Setting Linear Advance to K 0.04 on a Prusa MK3S with a stock extruder will improve corner quality and reduce bulging, and your layer shift will still be there in the morning.
The practical order is mechanical first, firmware second. Measure belt frequency before you open the slicer — the Gates Carbon Drive app or a spectrum analyser on a phone mic will get you within roughly ±5 Hz, which is close enough to confirm whether you are in the 90–110 Hz band. Check grub screws at 0.5 N·m with a small torque driver, apply Loctite 243 to any that have come loose, and confirm stepper driver current is in the 0.8–1.0 V RMS range for TMC2209 drivers (a common 2025 setting; below about 0.7 V you will see layer shifts appear as the motor skips under load, above 1.1 V the motors run hot and the drivers can thermal-throttle mid-print). Only then run a resonance sweep and let input shaping raise your acceleration ceiling. Set jerk to 8–12 mm/s rather than Marlin's default 20 mm/s while you are in there; on a bedslinger, that single change removes most of the shock loading that makes a marginal belt slip in the first place.
Step-by-step: diagnose and fix layer shifting in 15 minutes
This procedure applies to a printer that was printing cleanly and then started offsetting layers in X or Y by more than 0.5 mm — the threshold where a shift becomes visible on a 0.2 mm layer height. It covers bedslinger geometry: Ender 3, Prusa MK3S, and the many clones of both. You need a 2.5 mm and 1.5 mm hex key, a small bottle of Loctite 243, a phone with a frequency-measurement app installed, and access to your slicer's speed settings. Budget 15 minutes if the problem is tension or grub screws. If it is a bent shaft or a failing stepper, you will know by step 6 and the job gets longer.
- Power off and move the head by hand. Disconnect the motors or disable steppers from the LCD first, otherwise you are fighting the magnetic detent and will misread everything. Push the toolhead left and right along X, then push the bed forward and back along Y. You are feeling for two distinct things: grit or a hard spot mid-travel (that is a bearing or a bent shaft, not a belt), and slack where the belt can be lifted more than a few millimetres off the idler. Two minutes.
- Tighten both grub screws on each pulley. There are four in total on a stock Ender 3 — two on the X motor pulley, two on the Y motor pulley — and the second screw sits on the flat of the shaft, which is why people miss it. Back each one out, apply a pinhead of Loctite 243, and torque to roughly 0.5 N·m, the figure Prusa publishes for its own pulley hardware. Do not guess at "tight enough"; a stripped M3 grub screw in a aluminium pulley is a 40-minute repair. Five minutes, and this is the step people botch most often, because a pulley that feels tight by hand can still slip under the 0.4 N·m of torque a NEMA 17 delivers during a rapid move.
- Tension the belts. Pluck each belt like a guitar string and measure the frequency with your phone mic against the Gates Carbon Drive app or an equivalent. GT2 belts on a bedslinger want 90–110 Hz, the range that has been the working standard since around 2024. A phone mic gets you within roughly ±5 Hz, which is close enough. If you are below 80 Hz the belt is skipping teeth on the pulley; above 130 Hz you are loading the idler bearings and the motor shaft. Five minutes with a tensioner, longer if you are moving the motor mount by hand.
- Reduce acceleration in the slicer to 800 mm/s² for X and Y. Stock profiles on both the Ender 3 and the MK3S ship well above this, and 500–1000 mm/s² is the range that holds for bedslingers once the mass of the bed is factored in. You are not tuning for speed here — you are establishing whether the shift is resonance-driven. Once the printer is stable at 800, walk it back up in 200 mm/s² increments and find where it breaks.
- Drop jerk to 10 mm/s. Marlin's default is 20 mm/s, and on a bedslinger that default is the single most common trigger for a skipped step on a sharp corner. If you are running Klipper instead of Marlin, the equivalent setting is square corner velocity, and 5 mm/s is a reasonable starting point. On Marlin 2.1.x you can also cut junction deviation to 0.05 mm, which softens direction changes the same way jerk does.
- Check your stepper driver current while you are in the firmware. For TMC2209 drivers, 0.8–1.0 V RMS measured at the potentiometer is the 2025 working range for a NEMA 17 on a bedslinger. Too low and the motor skips under load; too high and it overheats and thermally derates mid-print, which produces a shift that appears at the same height every time. Two minutes with a multimeter.
- Reprint a test cube. A 20 mm XYZ cube is enough — you do not need a torture test, because you are looking for a single sharp offset, not surface finish. Set outer walls to 40–60 mm/s and infill to no more than 80 mm/s, which is the realistic ceiling for a stock Ender 3 hotend. Print it, then measure the offset at the shift with calipers. Under 0.5 mm and you are done. Over that, and the mechanical cause was not the belt.
The failure mode to watch for is a shift that moves the same direction on every print. Belt tension and grub screws produce random-direction shifts that stop once the hardware is right. A consistent offset on one axis — always X, always to the left — points at a bent motor shaft, a cracked pulley, or a driver that is dropping steps at a specific acceleration. Rerun steps 4 and 5 at half the values you just set. If the shift persists unchanged, the problem is mechanical and no amount of slicer tuning will touch it.
What if the shift still happens after all adjustments?
At this point the mechanical suspects have been ruled out and the shift persists, which usually means the problem is electrical or thermal rather than kinematic. Stepper drivers that run hot begin to lose torque mid-move, and the symptom looks identical to a loose belt: a clean offset that appears partway through a print and then stays for the rest of it. On a TMC2209, the reference voltage should sit between 0.8 and 1.0 V RMS. Measure it at the driver with the motor disconnected and the board powered, and if it reads low, the motor is skipping under load long before it stalls outright.
Cooling is the other half of that equation. Most 32-bit boards (the 4.2.2 in a stock Ender 3, the Einsy Rambo in a Prusa MK3S) rely on a small heatsink and whatever air the part fan moves past the driver bay, which is often nothing once the enclosure is closed. Point an infrared thermometer at the driver heatsink after a 30-minute print; above 80 °C, add a 40 mm fan or a taller heatsink. Counterintuitively, raising Vref slightly can fix a genuine undervoltage skip, but on a driver that is already throttling from heat it makes the problem worse within ten minutes. Diagnose the temperature first, then adjust current.
The parts that fail quietly
Run a fingertip along the full length of each GT2 belt and look for fraying at the edges, glazing on the tooth faces, or a missing tooth. A belt with one stripped tooth will shift at exactly the same X or Y coordinate every print, which is a useful tell: random shifts point to tension or current, repeatable shifts at one position point to a damaged belt or a flat-spotted bearing. Spin each idler and pulley by hand. Any roughness, grinding, or a spot where it catches means the bearing is done, and a binding bearing loads the stepper the same way a loose belt does.
Finally, eliminate the data path. If you print over OctoPrint, swap the USB cable for a ferrite-cored one and try a different port; cheap unbranded cables pick up noise from the stepper drivers and corrupt the serial stream, which the firmware interprets as a lost step. Printing the same file from an SD card isolates the question entirely. On the card itself, reformat to FAT32 with 4096-byte allocation, since a card with bad sectors produces truncated moves that look like layer shift but never appear when the identical gcode runs from a different source. If a card print is clean and the USB print is not, you have found it, and no amount of belt tuning was ever going to help.
Frequently Asked Questions
Why does my 3D print shift layers only on one side?
A single-sided shift usually means the belt is tighter on one side of the travel than the other, which happens when the pulley sits off-axis or an idler is cocked in its slot. Re-seat the pulley square to the frame and check that the belt runs centred on the idler flanges.
A loose grub screw on that axis produces the same symptom, because the pulley can rotate a few degrees under load on the return pass but not on the outbound one. Mark the shaft and pulley with a paint pen, run a 40 mm cube, and see whether the marks drift apart.
Can a loose belt cause layer shifting?
Yes. A slack belt lets the tooth profile climb out of the pulley groove during a fast direction reversal, so the carriage lands one or more teeth off and every layer above that point is offset by the same amount.
The tell is a shift that is a clean multiple of the belt pitch. On a standard 2 mm GT2 belt and a 20-tooth pulley, one skipped tooth equals 40 mm of travel error, so a visible step of roughly 1-2 mm means something else, such as a slipping grub screw.
How tight should 3D printer belts be?
Tight enough to sound a clear note in the 90-110 Hz range when you pluck the belt's midpoint, about the pitch of a low guitar string. A free phone tuner app is accurate enough to measure it.
Below roughly 80 Hz the belt is slack enough to skip. Above about 130 Hz you are loading the stepper bearings and the printed motor mount for no gain, and on an Ender 3 the X carriage tends to develop visible flex before the belt ever needs to be that tight.
What causes layer shifting on an Ender 3?
Loose pulley grub screws are the most common cause on an Ender 3, and they are the first thing to check. The factory ships them with threadlocker missing on some batches, and the X-axis pulley in particular works loose within a few hundred hours.
After that, look at belt tension below 90 Hz and acceleration set above roughly 2000 mm/s². The stock 42-34 steppers on an Ender 3 stall well before a 20 mm/s² jerk figure would suggest, so bring acceleration down to 500-1000 mm/s² and retest.
Does print speed affect layer shifting?
Yes. Higher print speeds raise the risk of skipped steps, but the damage is done by acceleration and jerk, not by the top speed itself. A move that reaches 100 mm/s gently is safer than one that snaps to 60 mm/s in a single corner.
If you want speed without shifting, cut jerk to 8-12 mm/s and acceleration to 500-1000 mm/s², then raise the print speed again and watch for the step. Most direct-drive Cartesian machines will hold 80-100 mm/s this way.
How do I fix layer shifting?
Tighten every pulley grub screw on the affected axis, then tension both belts to 90-110 Hz. Follow with acceleration at 500-1000 mm/s² and jerk at 8-12 mm/s, and print a 20 mm calibration cube to confirm the fix.
If the shift persists, drop the microstepping current question and check mechanical drag instead: slide the carriage by hand with the motors disabled. A binding linear bearing or an over-tight eccentric nut will stall a stepper just as reliably as a slack belt.